- News
- Reviews
- Bikes
- Accessories
- Accessories - misc
- Computer mounts
- Bags
- Bar ends
- Bike bags & cases
- Bottle cages
- Bottles
- Cameras
- Car racks
- Child seats
- Computers
- Glasses
- GPS units
- Helmets
- Lights - front
- Lights - rear
- Lights - sets
- Locks
- Mirrors
- Mudguards
- Racks
- Pumps & CO2 inflators
- Puncture kits
- Reflectives
- Smart watches
- Stands and racks
- Trailers
- Clothing
- Components
- Bar tape & grips
- Bottom brackets
- Brake & gear cables
- Brake & STI levers
- Brake pads & spares
- Brakes
- Cassettes & freewheels
- Chains
- Chainsets & chainrings
- Derailleurs - front
- Derailleurs - rear
- Forks
- Gear levers & shifters
- Groupsets
- Handlebars & extensions
- Headsets
- Hubs
- Inner tubes
- Pedals
- Quick releases & skewers
- Saddles
- Seatposts
- Stems
- Wheels
- Tyres
- Health, fitness and nutrition
- Tools and workshop
- Miscellaneous
- Buyers Guides
- Features
- Forum
- Recommends
- Podcast
feature
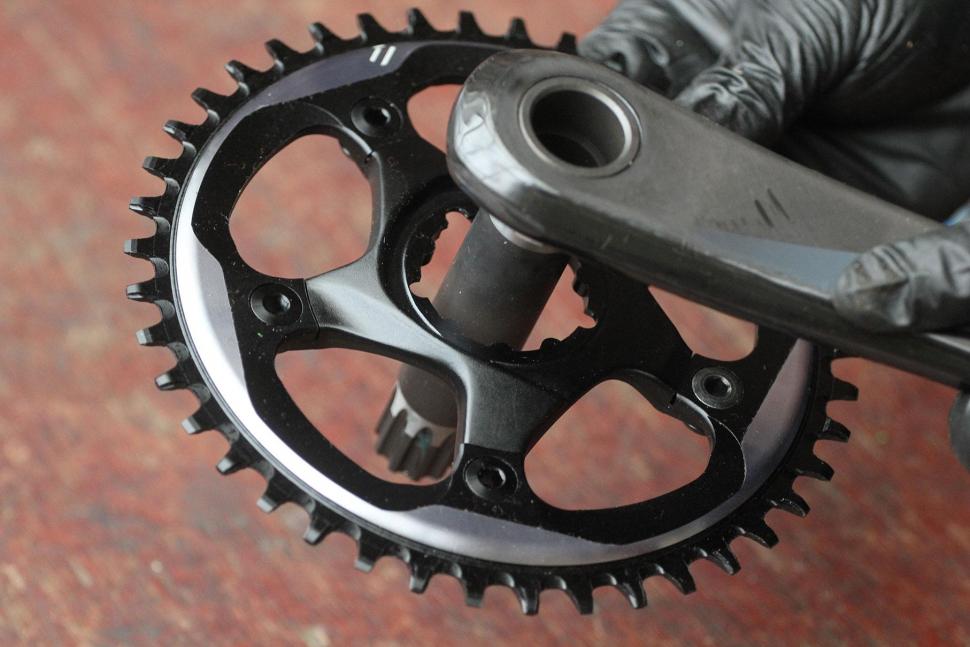 Slide spider onto crank.jpg
How to fit a SRAM CX1 chain ring
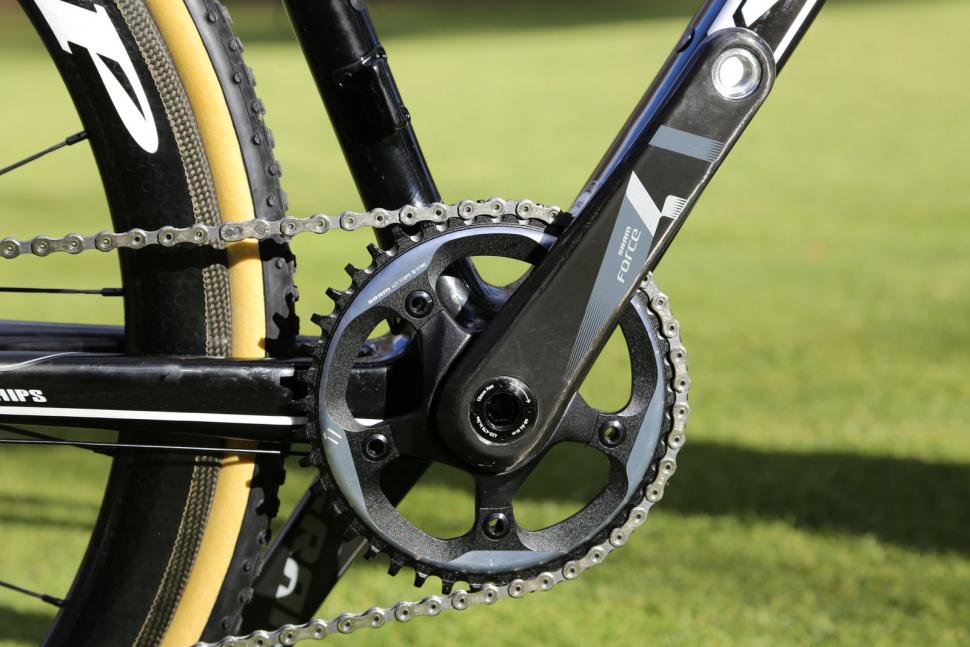
Single chainrings, combined with wide-ratio sprocket cassettes, are gaining popularity for their simplicity. The easiest way to get the system is to buy a SRAM CX1 crankset and install that on you bike, sans front derailleur and cables. However, SRAM Rival, Force and Red series cranksets use the same dimensions and fittings as the single ring CX1 model, so if you have one of those cranks you only need the appropriate ring from SRAM (or other manufacturers such as Absolute Black or Praxis Cycles). Fitting one to the other is easy; here's how.
Our guide below shows you what we believe is the best method to fit a SRAM CX1 single chain ring. We've included a list of the tools and materials that you will need to complete the job and in some cases where you can buy them. If there are others that you prefer then feel free to let everybody know in the comments.
Tools & Materials
Why use one ring? In a word, simplicity. Losing the front derailleur simplifies the job you do on the bike to pedalling, braking and rear shifting. Front shifts have always been breakers of rhythm, so single-ring users have ditched it in favour of a more fluid pedalling style, with smaller less intrusive rear shifts to ease you up the hills. The bike's tidier too, with no front mech or front mech cable.
The development that's made it possible to use a single ring without the chain falling off is the 'narrow/wide' chain ring tooth profile. Alternating teeth on theses rings are wider than normal, filling the spaces in the chain links. That creates a close fit which effectively grips the chain, stopping it from lifting off the ring in bumpy conditions.
What size ring to choose?
There are a couple of other things to consider when going solo with chain rings. SRAM recommend their clutch-equipped rear derailleur. The clutch stops the swinging arm of the derailleur from bouncing forward and creating a loop of slack chain on the lower run between the bottom of the ring and the rear derailleur. That said, we've successfully used a non-clutch rear derailleur with no dropped chains.
If you're going for a wider ratio cassette as well, then between a 46 and 50t ring is going to be about right. If you're going to retain your standard issue 12-27 or similar, then we'd go smaller. SRAM make their CX1 rings incrementally down to a 38t in two-tooth jumps, ideal for hilly locations, off-road adventures and cyclocross.
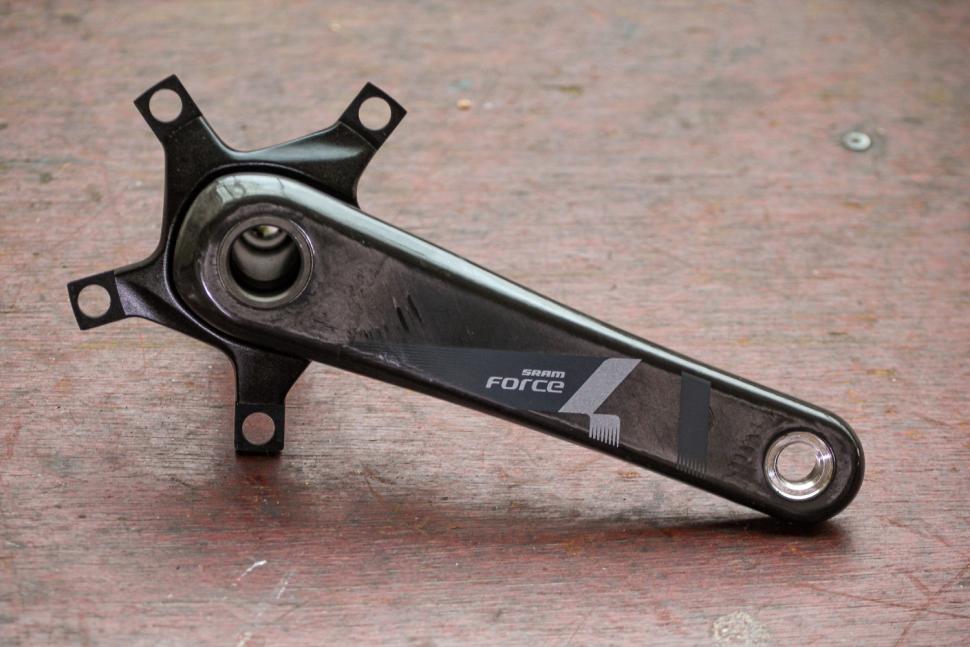
Working on the premise that you're currently riding a bike with double ring SRAM Rival, Force or Red cranks and would like to start using a single ring for your riding, this is the way forward. You could just buy a SRAM Force CX1 crankset with the rings, spider and arms, or you could just buy the appropriate sized narrow wide ring and retro fit it to your existing crank, as CX1 rings are compatible with the standard 110mm BCD, five arm multi ring SRAM spider.
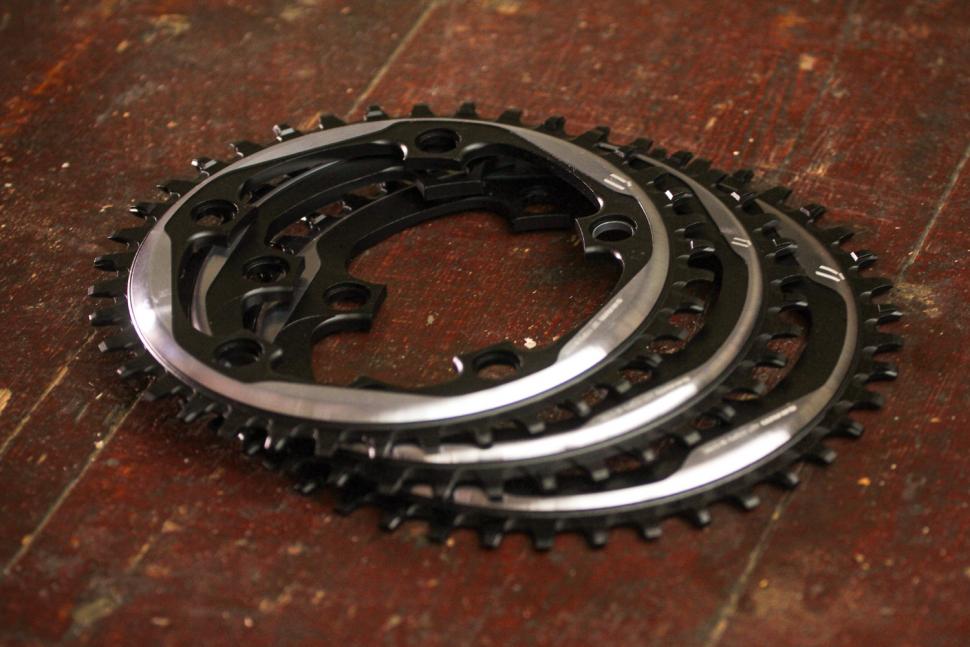
1 Choose your weapon. Whatever ring you choose for your day to day riding it is likely that you might need a spare if you decide on lower gears for a week in the mountains, or taller gears for a TT. With only five bolts to fiddle with (three if you fit the spare ring to its own SRAM spider), it's actually less hassle to 'tune' the front ratios than you might think.
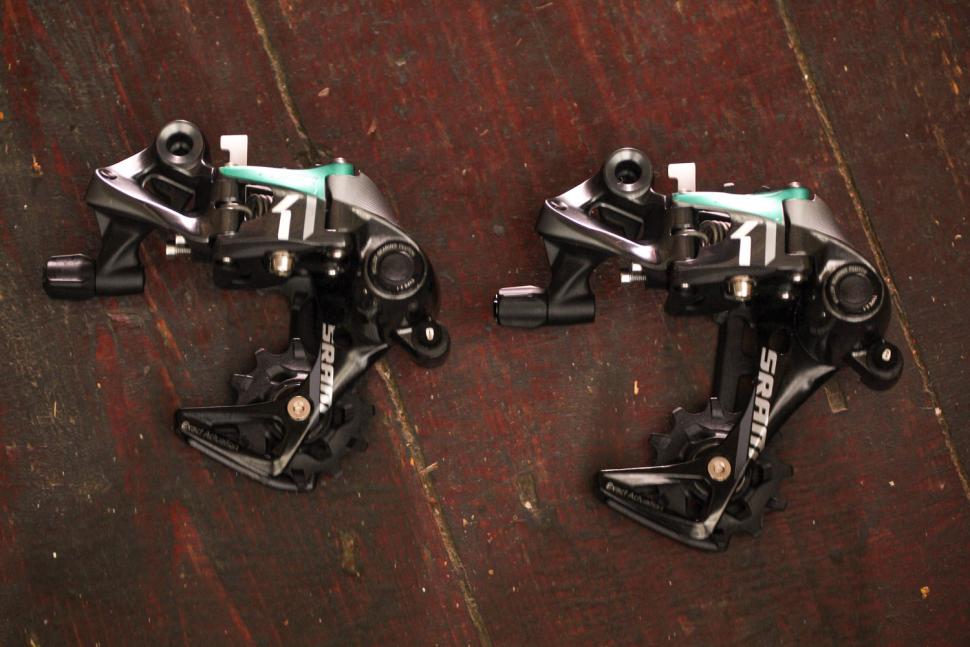
2 Medium and long cages. SRAM makes clutch derailleurs in medium (left) and long (right) length cages. This is to enable the rear derailleur to take up the difference in chain length between the largest and smallest rear sprockets. For cassettes with largest sprockets up to 36 teeth the medium will be fine. For the super wide ratio 11-42 cassette you'd need the long arm model.
3 Remove the crank from the bike and the chainrings from the crank. You'll need to start with a bare SRAM crank and spider, be it Rival, Force, Red or CX1. The whole process is much easier if the crank is removed from the bike before you begin.
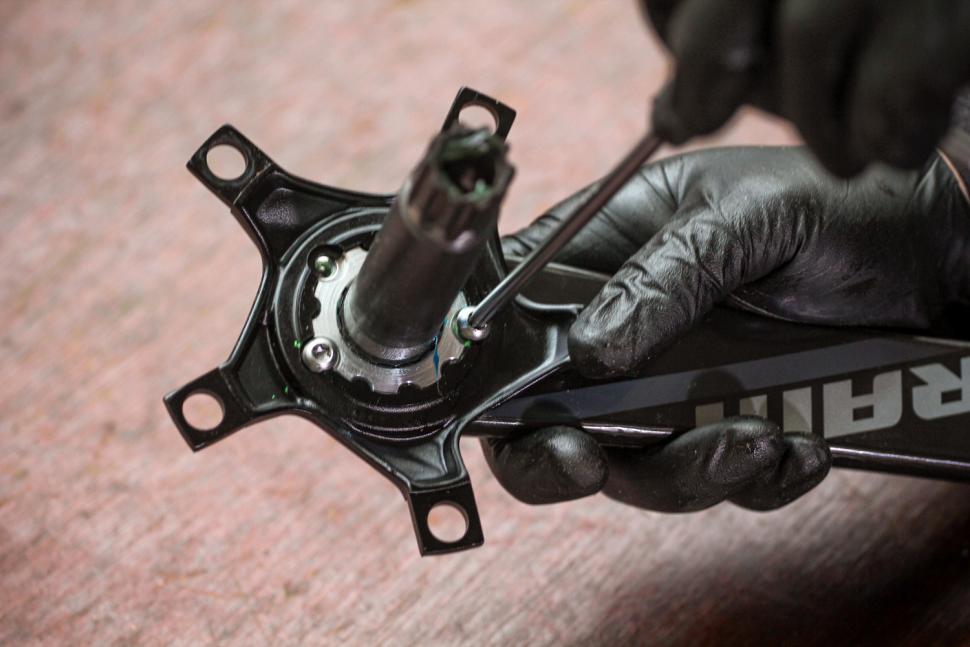
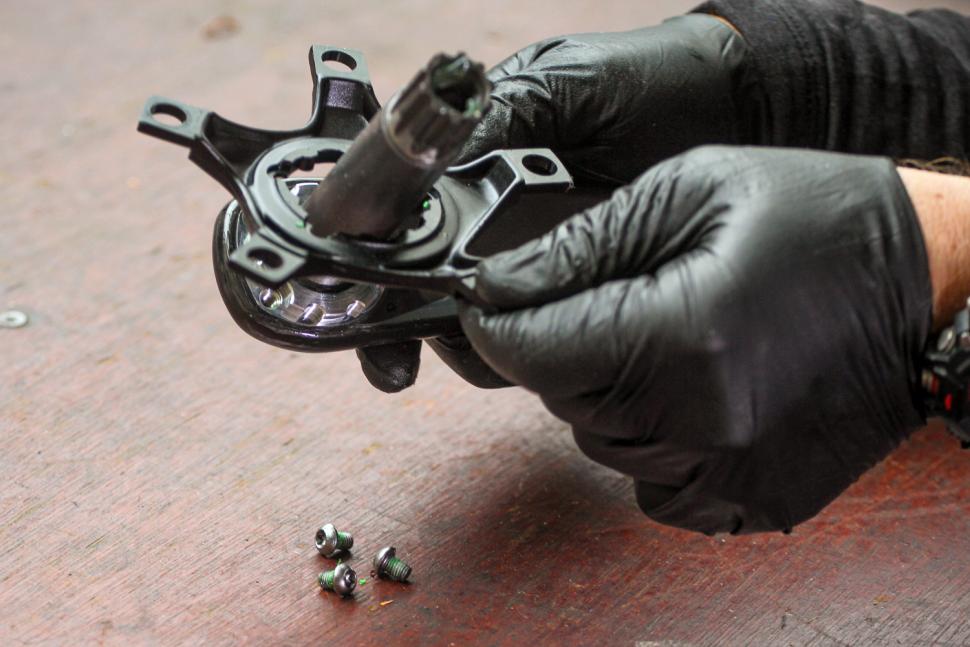
4 Loosen the spider. Use a Torx T25 driver to remove the three dome-head Torx screws from the rear of the spider. Put them somewhere safe.
5 Remove the spider With the three Torx screws removed you can separate the crank arm from the spider. This will either be effortless or it'll feel like its stuck, especially if your cranks have been ridden for a while without having previously had the rings removed. If your spider feels stuck you should be able to wiggle the arms of the spider to break the friction fit.
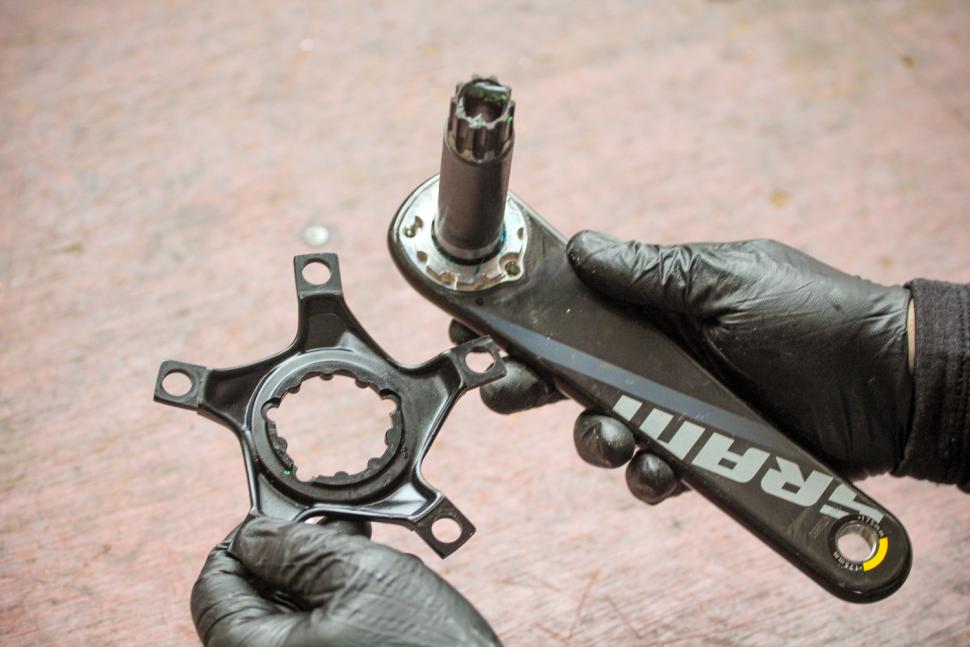
6 The spider and the right hand crank arm apart. You can see the three bolt holes in each piece. These only line up one way, so you won't be able to get the refit wrong.
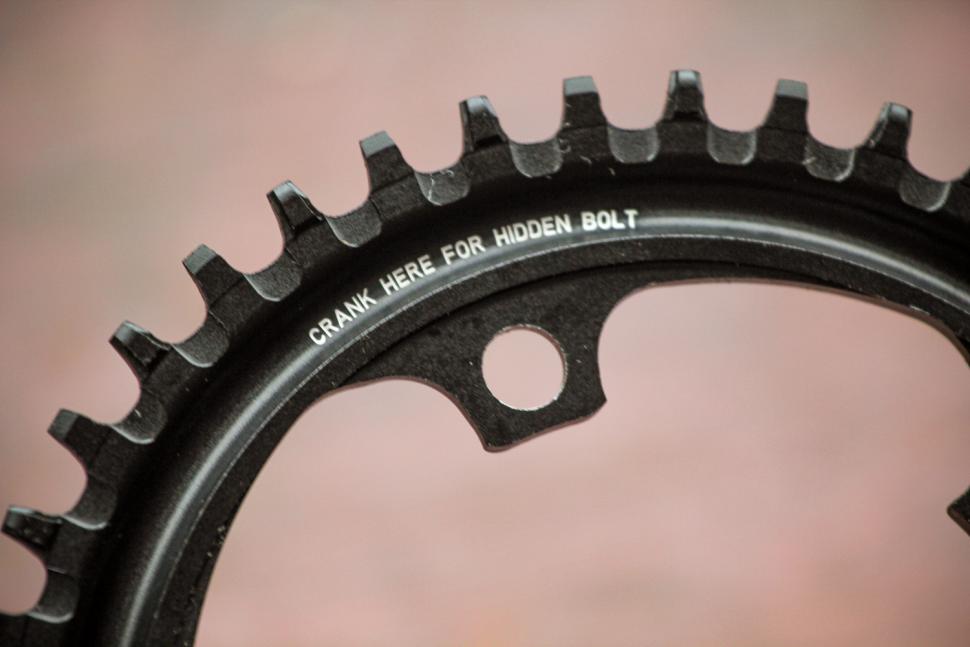
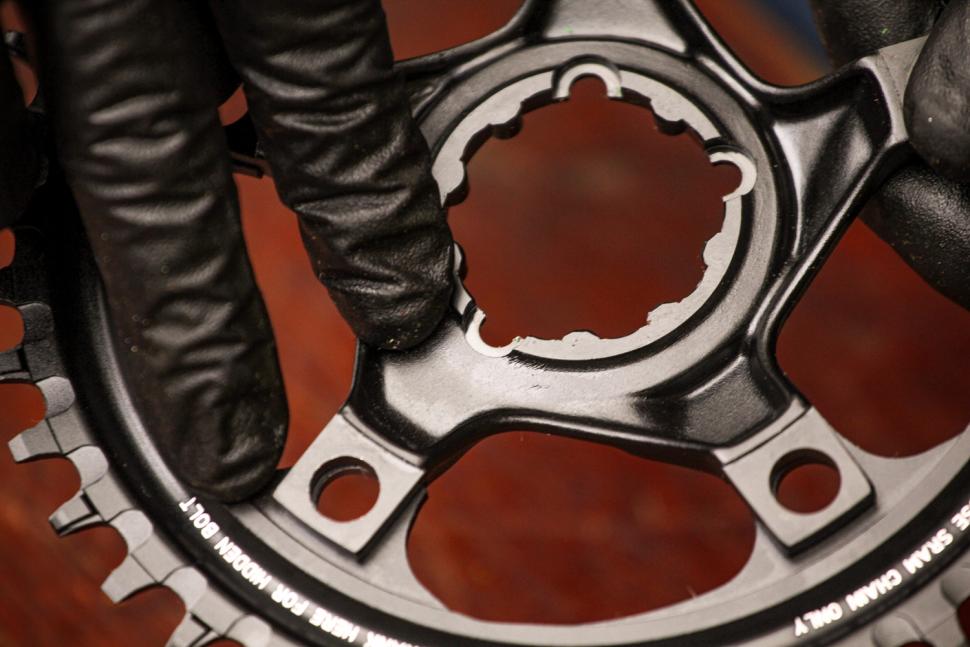
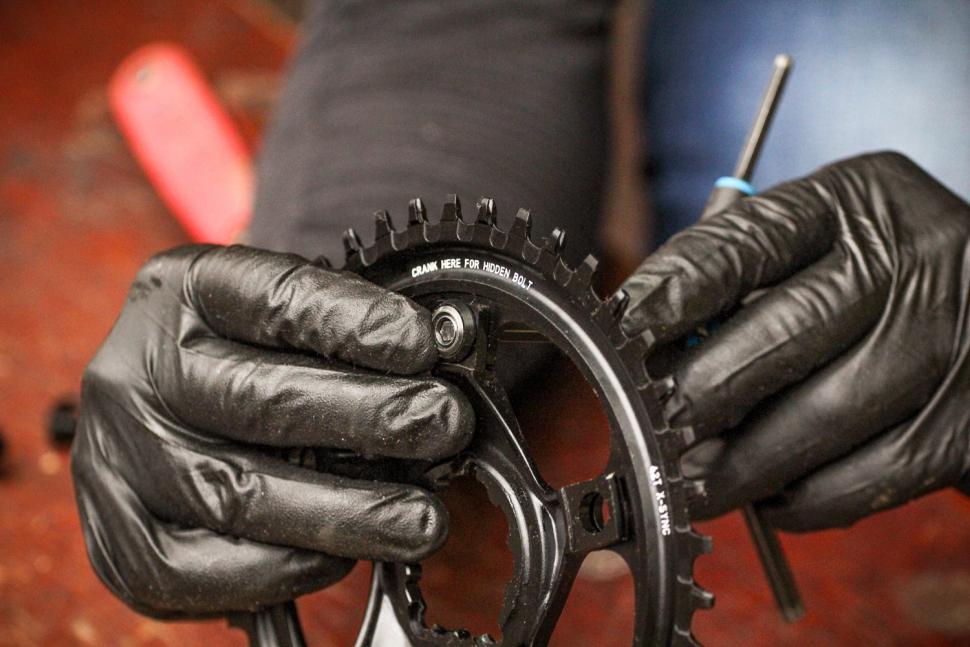
7 The chainring. One arm of the spider fits directly behind the crank. SRAM let you know which one of the chain ring holes must be lined up with that with some neat laser etched lettering.
8 Align the ring Line up the chainring hole that is directly adjacent to the 'hidden bolt' text with the arm of the spider that is directly in line with the single crank arm fixing bolt hole (next to my index finger).
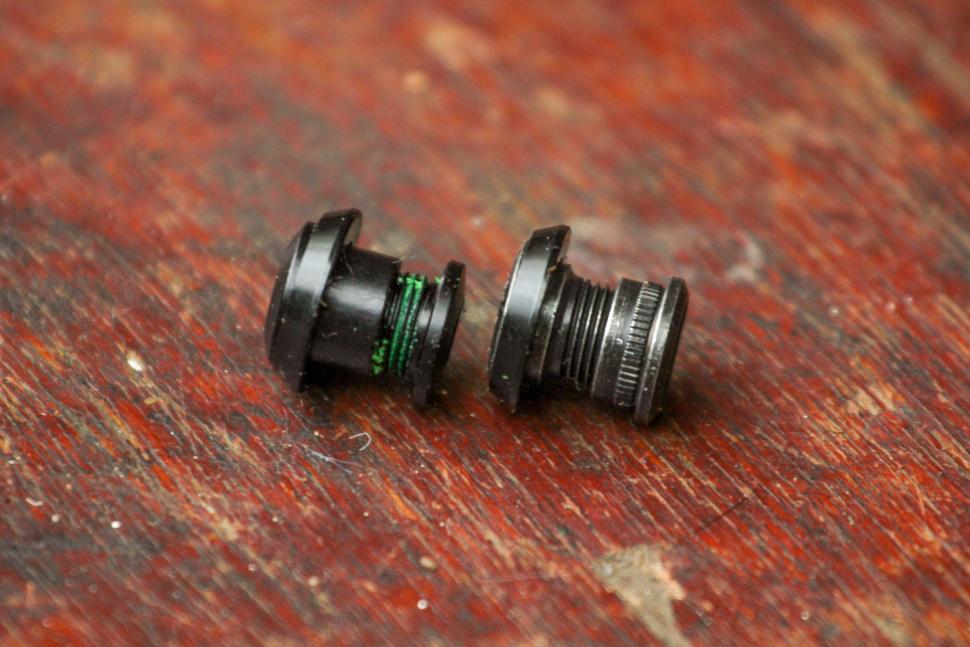
9 The bolt for the arm behind the cranks is different. You'll have to have your eyes peeled to spot the difference between the four all alloy chain ring bolts (left) and the steel one which is for the hidden bolt behind the crank arm. It's got a shallower depth nut with self gripping serrations around its circumference. This is because there isn't room to access the blind (crank facing) side of the bolt when tightening, or making periodic checks.
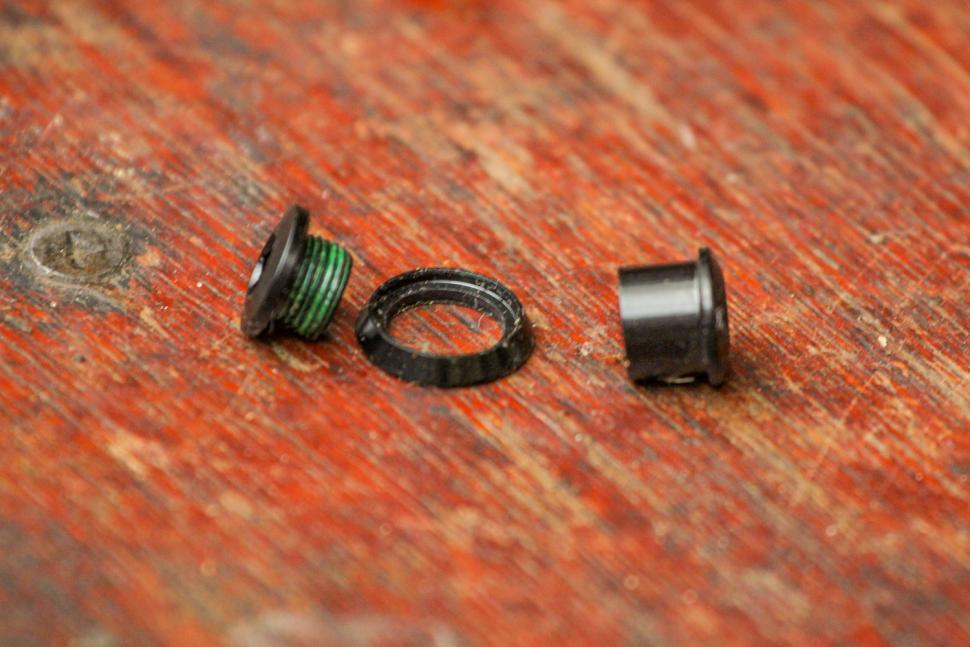
10 The aluminium bolts The other four bolts are all the same and are in three parts, the screw and its recessed, slope-sided washer and the rear nut. The screws sit in the recesses machined into the bolt holes on the outside face of the chainring. The nut sits in the washer on the rear side of the spider.
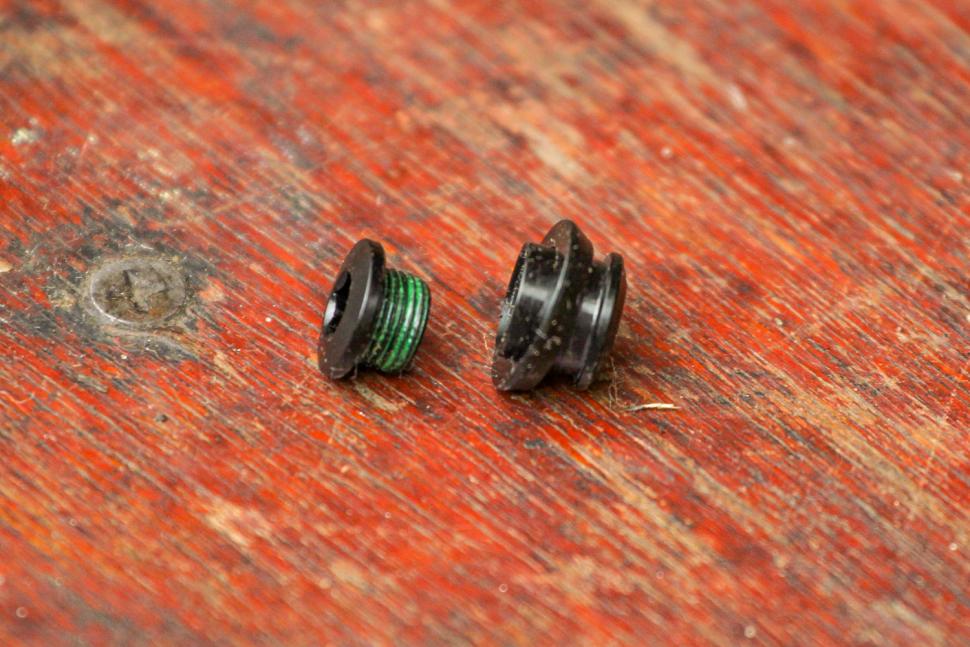
11 The aluminium bolts ready for use The two parts will look like this before fitting with the spider and ring.
12 Position the ring. The ring fits on the outer edge of the spider. The tabs on the ends of the arms should sit inboard.
13 Fit the bolt that goes behind crank. Start with the steel chainring bolt. You'll need a 5mm Allen key to fit it. The rear nut will grip tightly as you turn the key. You'll feel the serrations do their thing.
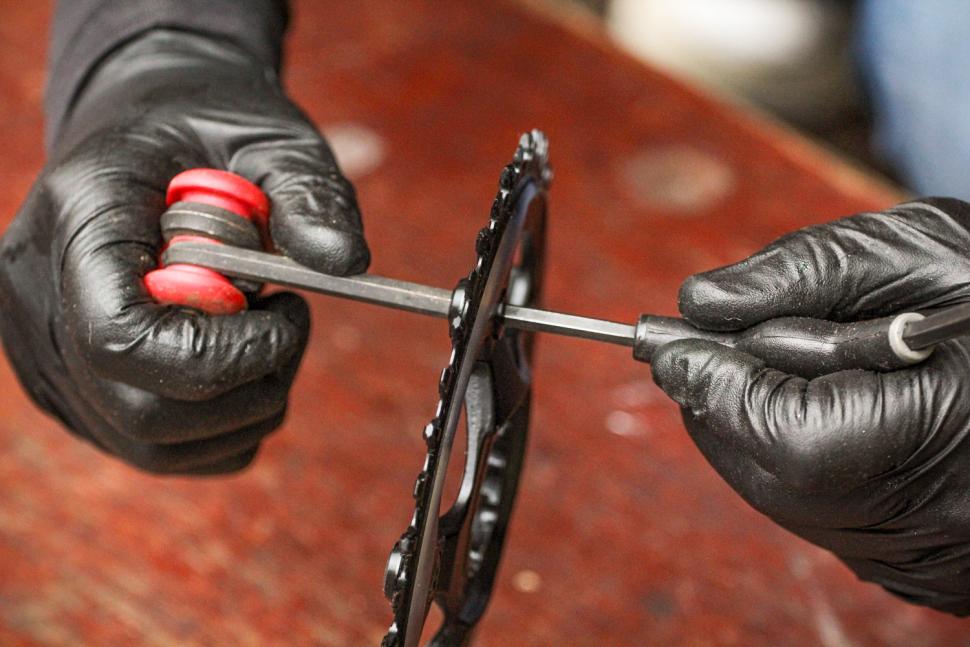
14 Fit the four alloy bolts. The rest of the chainring bolts fit in the normal way. The outer bolt head uses a 5mm Allen key (on the right as you look at it here), and the inner nut (with the red handled multi-tool, on the left), uses a 6mm Allen key.
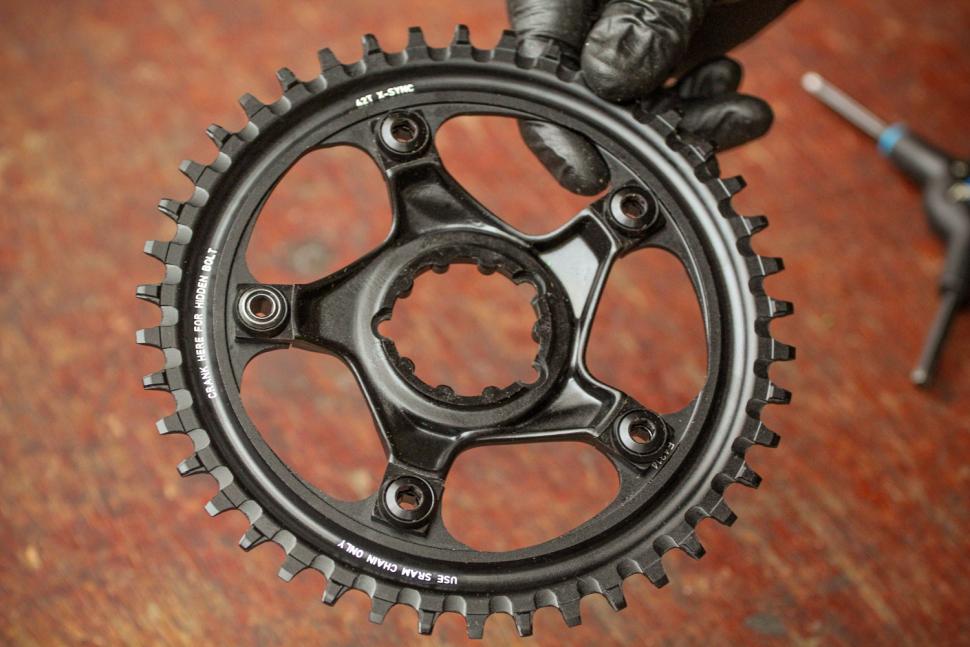
15 The spider and ring bolted together. You can just make out the greeny-brown of the steel bolt in the arm pointing at the nine o'clock position.
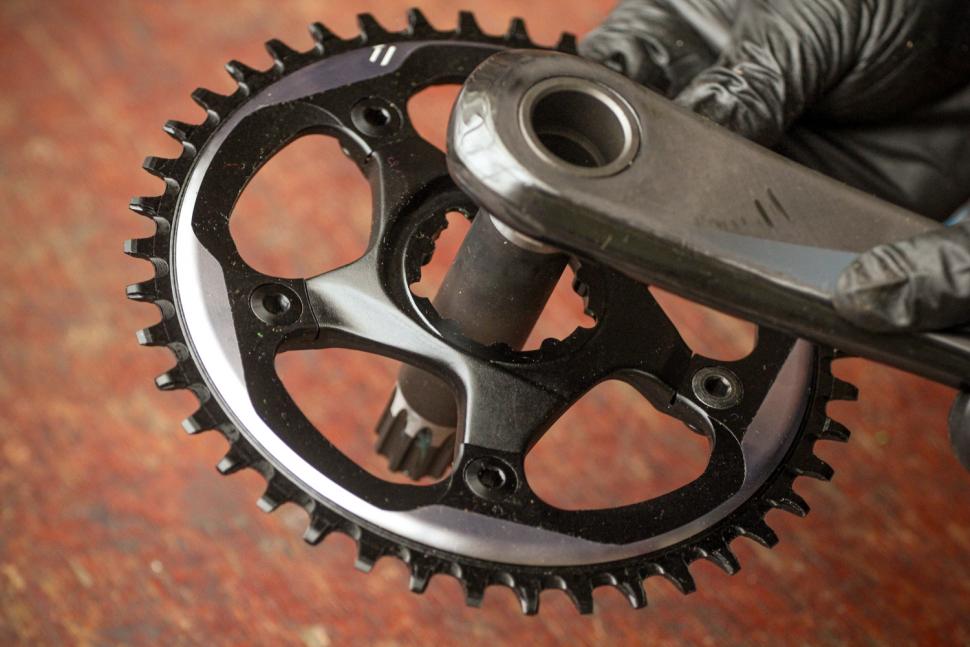
16 Slide the spider on to the crank. Turn the ring over so the outer face of the spider is facing you and reintroduce the axle that is attached to the right hand crank arm through the mounting hole in the spider. Remember to position the steel bolt in line with the crank arm.
17 Tighten the spider screws You can see the steel bolt lined up behind the crank arm. The spider will only fit this way. With the spider seated in the splines that connect the two parts, the three Torx bolts can go back in. These should have threadlock on their threads. If they don't, or if it's worn off, then put some more on there. If these come loose the cranks can develop a creak under power.
18 Refit the crank. Slide the crank arm back into the frame and tighten the bolt that holds the left hand crank until you feel it bottom out.
>> Read more: The full archive of road.cc maintenance features
Latest Comments
- Legin 44 min 59 sec ago
The tory party will oppose anything that might restrict their tanks rolling at the next election.
- EraserBike 50 min 38 sec ago
I'm sure this (and other 3D printed models) are made where labour costs are cheap also. Nobody is making these in Europe. There's only so much ...
- quiff 55 min ago
I did start asking myself why there is a legal limit for a class A drug, until I read this bit: "In the UK, cocaine is classified as an illegal...
- chrisonabike 1 hour 1 min ago
Don't forget the trains when you get there also...
- mdavidford 1 hour 15 min ago
Especially since the similarly priced Tickr X did have that functionality.
- anke2 1 hour 55 min ago
CX is brutal in terms of forces acting on the chain. A single, technical kick at 40 RPM by Iserbyt with a small chainwheel might put more load on...
- chrisonabike 2 hours 20 min ago
Perhaps some of the difficulty here is in the language - what we're comparing with what?...
- Andrewbanshee 2 hours 33 min ago
I experience this quite often when out running. I follow the guidelines, running towards traffic and keep hard right. I am very visible too but...
- mctrials23 2 hours 47 min ago
Not enough to warrant having the role exist at all would be my guess.


Add new comment
3 comments
Hi there,
I know this article is over 2 years old but are you able to resurrect your knowledge on this by telling me if I require a 1x specific chainring bolt set?
Thanks,
Good God mun! Remove 5 hex bolts, slide off old rings, slide on new one, do up hex holts. 10 minute job assuming you've got the right length bolts. No need to remove the chainset other than the fact that removing SRAM chainsets is a piece of cake.
The only issues you might come across doing it "in situ" are those pesky slotted rear bolts.
I guess that's why the crankset was removed. I searched YouTube for a video showing how to safely swap the chainring without removing the crank and didn't find one. The risk appears to be that if you're unlucky the hidden bolt just turns inside the chainring hole and refuses to tighten (if you are only able to use one key as opposed to 2 on it). Did you by any chance try doing it the risky way. Perhaps there's a trick to it (maybe wedging something between crank arm and hidden bold head) - but I don't see how that could stop it spinning if it decides to.
Sorry to resurect an old post