- News
- Reviews
- Bikes
- Components
- Bar tape & grips
- Bottom brackets
- Brake & gear cables
- Brake & STI levers
- Brake pads & spares
- Brakes
- Cassettes & freewheels
- Chains
- Chainsets & chainrings
- Derailleurs - front
- Derailleurs - rear
- Forks
- Gear levers & shifters
- Groupsets
- Handlebars & extensions
- Headsets
- Hubs
- Inner tubes
- Pedals
- Quick releases & skewers
- Saddles
- Seatposts
- Stems
- Wheels
- Tyres
- Tubeless valves
- Accessories
- Accessories - misc
- Computer mounts
- Bags
- Bar ends
- Bike bags & cases
- Bottle cages
- Bottles
- Cameras
- Car racks
- Child seats
- Computers
- Glasses
- GPS units
- Helmets
- Lights - front
- Lights - rear
- Lights - sets
- Locks
- Mirrors
- Mudguards
- Racks
- Pumps & CO2 inflators
- Puncture kits
- Reflectives
- Smart watches
- Stands and racks
- Trailers
- Clothing
- Health, fitness and nutrition
- Tools and workshop
- Miscellaneous
- Buyers Guides
- Features
- Forum
- Recommends
- Podcast
feature
6 bicycle brake safety checks - stop faster with better braking
Your brakes are a pretty crucial part of your bicycle. They are the only thing that will slow you down when you start moving and so making sure that they’re working is a rather good idea.
There are also performance aspects to these checks. Good brakes allow you to slow later into a corner and if your brakes are dragging then that will really slow you down. Here are six checks to make for rim and disc systems.
Calliper alignment - rim and disc
Calliper alignment is imperative to the correct functioning of both rim brake and disc brakes. If the callipers are off then the brake could rub, making riding very hard work or you’ll just get one side of the brake contacting the rim or rotor first which is where imbalance braking starts.
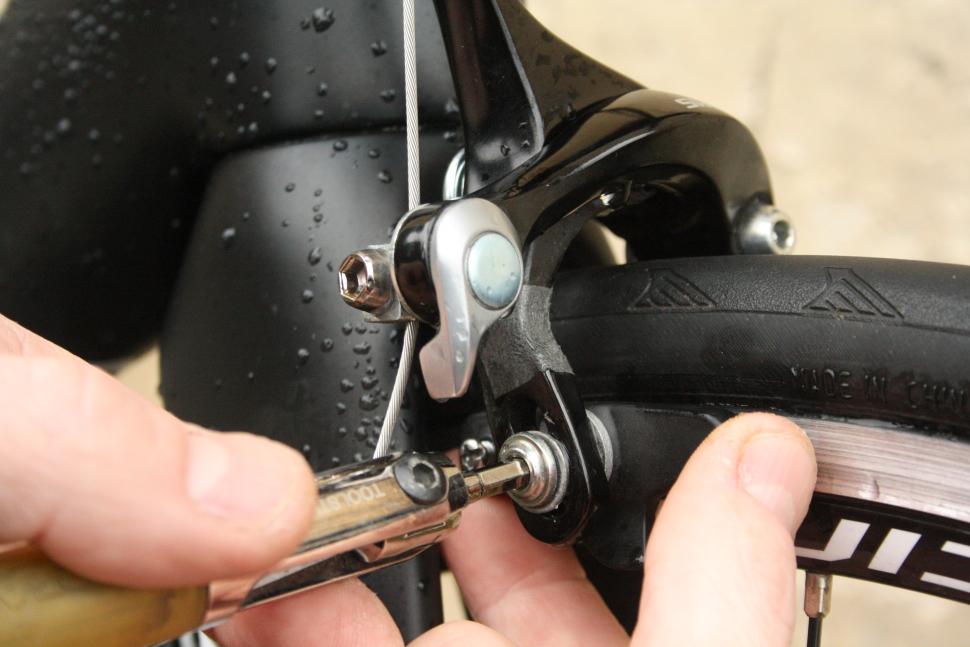
Starting with rim brakes, this one is a simple fix. You’re going to need an Allen key, most of the time it'll be a 5mm. We pop it into the back side of the brake where the fastening nut is, loosen it off until the brake can move freely and then pull the brake on. This centres it and, keeping hold of the brake lever as firmly as possible, you can retighten the nut.
> 12 essential braking tips — get better control on hills & when stopping
For disc brakes, the procedure is very similar. A quick switch to a 4mm Allen key for our Shimano brakes and we're also going to go for a ball end as the access down here is a little tight. Loosen the calliper bolts so that the calliper can move. Then give the wheel a spin and jam the brake on, holding it. This again should set the calliper correctly. Holding the brake on, tighten the bolt closest to the hose first and once it is firmly tightened, test the alignment by spinning the wheel. Blissful silence is what you're looking for here. If you have it, then tighten the other bolt down and give things one final spin to check that you're still getting silence.
That’s it for calliper alignment. All other things being well, you should have perfect brakes.
Pad wear - rim and disc
Both rim and disc brakes do wear down over time and checking for excessive wear will prolong the life of your kit, ensure that your brakes work quietly and, crucially, effectively.
Again we’ll start with rim brakes. Here, you need to check that the pads have life left in them first but also that they’re free from debris and not glazed over.
The wear on the pad can be seen via a wear indication line. You might have to clean the pad to view this line because brake dust gets everywhere, but you’re definitely going to be working on a perfectly clean bike? If not, a wet wipe or wet rag should do the trick.
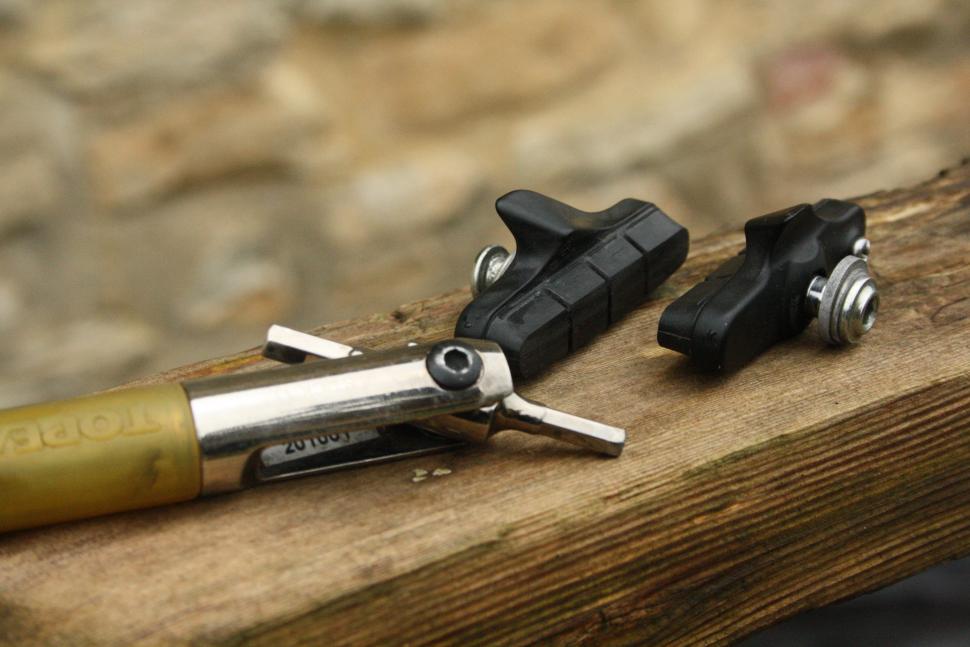
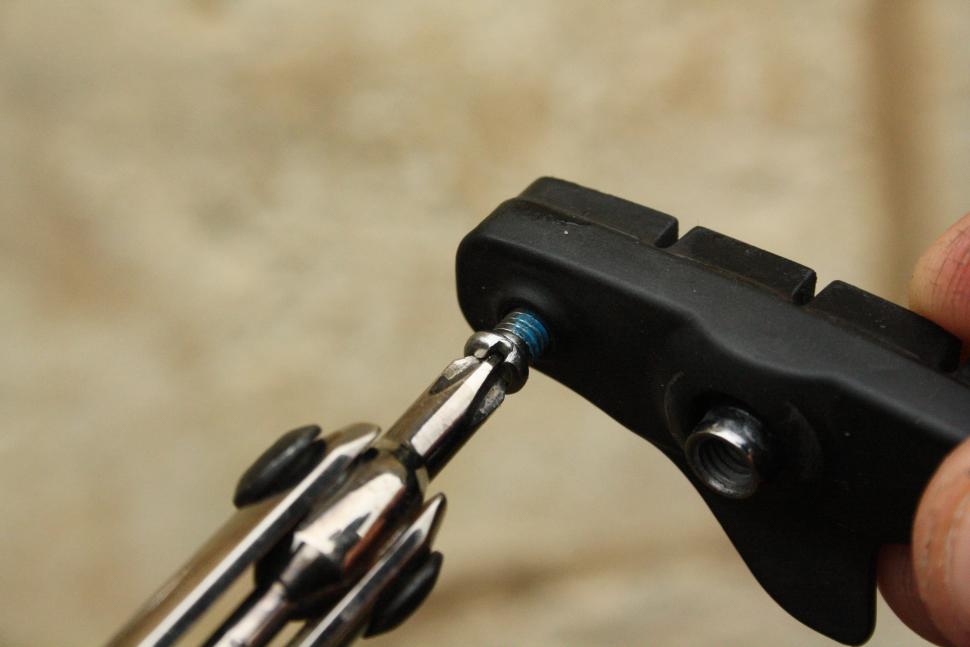
Once you’ve located the line, ensure that there is plenty of pad left. If you’re getting close, down to about 2mm left before the wear mark, it’s time to buy new pads ready to replace them. If the line is gone already or your pads are down to near the brake shoe, you need to replace them urgently. It’s a simple case of undoing the small bolt, sliding out the old pad and sliding the new one back in. The new pads will have left and right printed on them along with a directional arrow, just follow the direction of the wheel.
If your pads have plenty of life left, check them for bits of debris that may have become lodged in the compound. If you’ve got alloy rims then this is a common occurrence. Just flick anything you find out with a pick or a knife. You don’t want it in there because it will eat into the braking surface on your rims.
> 11 tips for better cornering — get round bends faster
And finally, check for glazing. It is caused by constant heat cycles which can’t be avoided, so it’s completely normal. Take a file or some sandpaper and take the glazed layer off.
For disc pads, you’re really just looking to see that there is enough pad left. You really don’t want to get down to bare metal. That will sound horrendous and be very dangerous. The rough rule is any pad under 1mm thick needs to be replaced. Digital verniers or a simple tape measure will do the job.
You can take any glazing off the pad, again using sandpaper or a file, just be careful to keep the pad surface flat.
Pad toe in for rim brakes
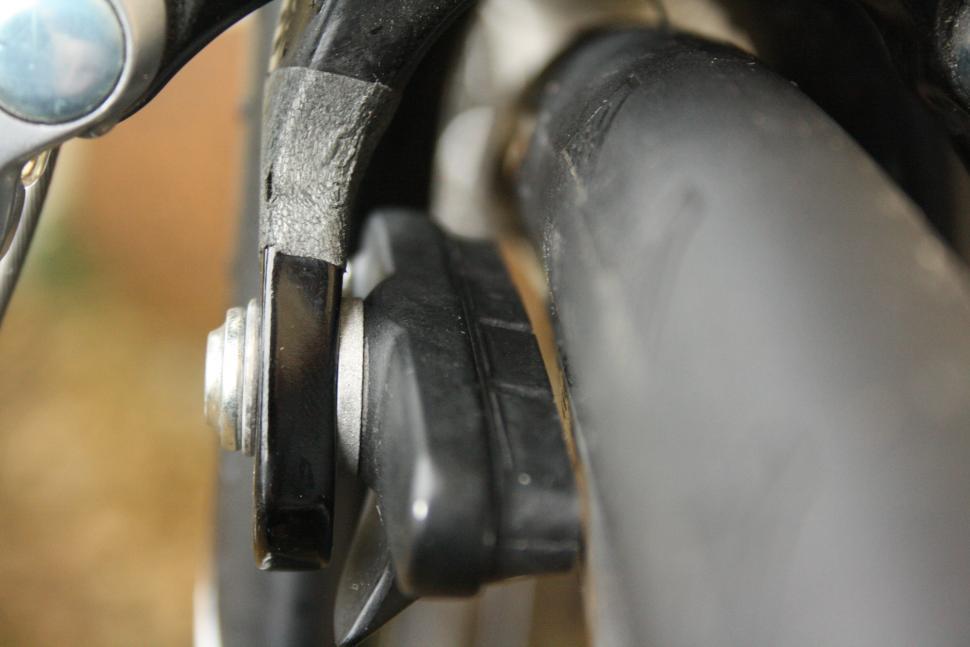
If your rim brakes are making a bit of noise, or you feel like you’re not getting the most power from them, toeing the pad in can really help. This makes the front of the pad hit the braking surface first but we need to kick the rear of the pad out by about 1mm.
It’s a simple case of folding a bus ticket or business card, sliding it in behind the back edge of the brake pad and then pulling the brake on to hold everything in place.
You need to undo the brake shoe bolt and then nip it back up. That should angle the pad inwards just enough. Don’t forget to do the other side too!
Cable run optimisation
For rim brakes, this has always been one of the most important factors when setting up brakes and anyone who has used cantilever brakes on a cyclocross bike will know that they really needed perfect length cables to create as little resistance as possible.
What you need to do is to give enough cable housing to allow the handlebars to turn freely while also creating the smoothest line possible from the hood to the brake. You need to avoid really tight bends and also make sure that the ends of the housing are free from obstructions.
> Stop your bike brakes squeaking and squealing - try these simple tips
Simply go along the length of each brake’s housing and check for tight bends and kinks. If you have any, and your brakes are heavy at the lever, consider replacing the housing and inner. In an ideal world, you want the brake lever to feel nice and light.
Brake lever position
Being able to access your brake levers from both the hoods and the drops is really important for safety, so one thing to check is your brake lever position.
At the lever, depending on which levers you have, there should be a reach adjustment screw which you access by rolling the hood back. Set the levers so that you can wrap the end of your finger over the lever when in the drops. You might want to test this with the bike on the ground as the angle of your wrist and hand will change.
If you do wind your levers in, you’ll need to check that the lever doesn’t now contact the handlebar when you start braking. If it does, the brake won’t generate all of its potential power, so we need to remove some of the lever movement that happens before the pads contact the rim. First off, what you do depends on the shifters that you’re working on. With the Ultegra R8750 Di2 Disc shifters we have in the video, there’s a little screw under the hood. Turning it clockwise will increase the free stroke and counterclockwise will decrease it.
For rim brakes, you can set the pads closer to the rim by either unwinding the barrel adjuster or resetting the anchor bolt with the pads closer to the rim.
Rotor truing and wear
Disc brake rotors can warp through excessive heat and they will eventually wear out too, so checking your rotors from time to time is very sensible.
If the rotor is warped, you’ll see it when you spin the wheel and look down through the brake calliper. That movement could also be causing the rotor to rub against the pads which you’ll hear and that’s just plain annoying.
A rotor truing tool can be used to straighten a bent rotor. You need to find where the rotor is out of line and then - there’s no pretty way to do this - bend it back into shape.
> 8 reasons not to get disc brakes — find out the hassles before you switch
If you find that you are constantly warping rotors then changing to a larger size is a great idea. Don’t worry about weight, the difference is minimal.
Rotors, like brake pads, also need changing when they get too thin. Most rotors have their minimum thickness printed on the side so just as with the disc brake pads, reach for the digital verniers or a tape measure to check the thickness of your rotors. If they get below the minimum thickness, it is absolutely time to replace them with a new set.
Well, there are our six checks to make on your brakes. If you’ve got a check that you make then pop it in the comments below as it might help someone else.
Latest Comments
- bobbinogs 3 sec ago
Yepp, fantastic coverage. It seems strange that WBD have forced me to spend less and get better coverage! Thing is, I would have been happy with a...
- David9694 47 min 40 sec ago
+1 on saddle height and also check your lateral alignment - everything should be straight and aligned. My bike fit years ago moved my feet to the...
- froze 51 min 52 sec ago
Everything Lezyne sells are really good, especially their pumps, and the Torque Drive. ...
- wtjs 1 hour 35 min ago
It's not only the UK which suffers from vile louts-VdP is a great athlete who deserves respect!
- Hirsute 2 hours 11 min ago
https://www.youtube.com/watch?v=wOzP87HVCWw
- Rendel Harris 3 hours 37 min ago
Apart from the fact that you're completely wrong - Decathlon is a French company and has 1045 stores in Europe compared to 50 in the UK - whilst...
- hawkinspeter 5 hours 43 min ago
Finally tried out the Smart Lever that I did get for Xmas as I had a suspicious looking bubble/bump on my rear GoodYear tyre (don't think I'll buy...
- chrisonabike 8 hours 46 min ago
Further motoring exemptions have been highlighted by a certain celebrity lawyer: needing the loo, being a well-known footballer...
Add new comment
5 comments
Missing tips:
1) The most basic for cable brakes: adjusting for pad wear - which also deals with minor caliper alignment issues for cable disc brakes.
2) Centering a dual pivot rim brake.
These seem more likely pre-ride checks than cable length or lever reach adjustment.
I have only just started with disc brakes. Can you just swap a larger rotor in? Sounds too simple - there must be more to it than that and there must be a maximum size too surely ?
I think 140/160 should be physically swappable, because the calipers mounts seem to accommodate the required change in position of the caliper. But I understand that the strength of the wheel is also a factor to consider, bigger discs impose greater forces.
Thanks also just read "You must check your fork manufacturer for the maximum size of rotor the fork can be safely operated with."
I'd assume the fork manufacturer would have asked themselves the question before they positioned the caliper mounting points? Is it possible to mount the calipers beyond the fixing positions on the forks?