- News
- Reviews
- Bikes
- Components
- Bar tape & grips
- Bottom brackets
- Brake & gear cables
- Brake & STI levers
- Brake pads & spares
- Brakes
- Cassettes & freewheels
- Chains
- Chainsets & chainrings
- Derailleurs - front
- Derailleurs - rear
- Forks
- Gear levers & shifters
- Groupsets
- Handlebars & extensions
- Headsets
- Hubs
- Inner tubes
- Pedals
- Quick releases & skewers
- Saddles
- Seatposts
- Stems
- Wheels
- Tyres
- Tubeless valves
- Accessories
- Accessories - misc
- Computer mounts
- Bags
- Bar ends
- Bike bags & cases
- Bottle cages
- Bottles
- Cameras
- Car racks
- Child seats
- Computers
- Glasses
- GPS units
- Helmets
- Lights - front
- Lights - rear
- Lights - sets
- Locks
- Mirrors
- Mudguards
- Racks
- Pumps & CO2 inflators
- Puncture kits
- Reflectives
- Smart watches
- Stands and racks
- Trailers
- Clothing
- Health, fitness and nutrition
- Tools and workshop
- Miscellaneous
- Buyers Guides
- Features
- Forum
- Recommends
- Podcast
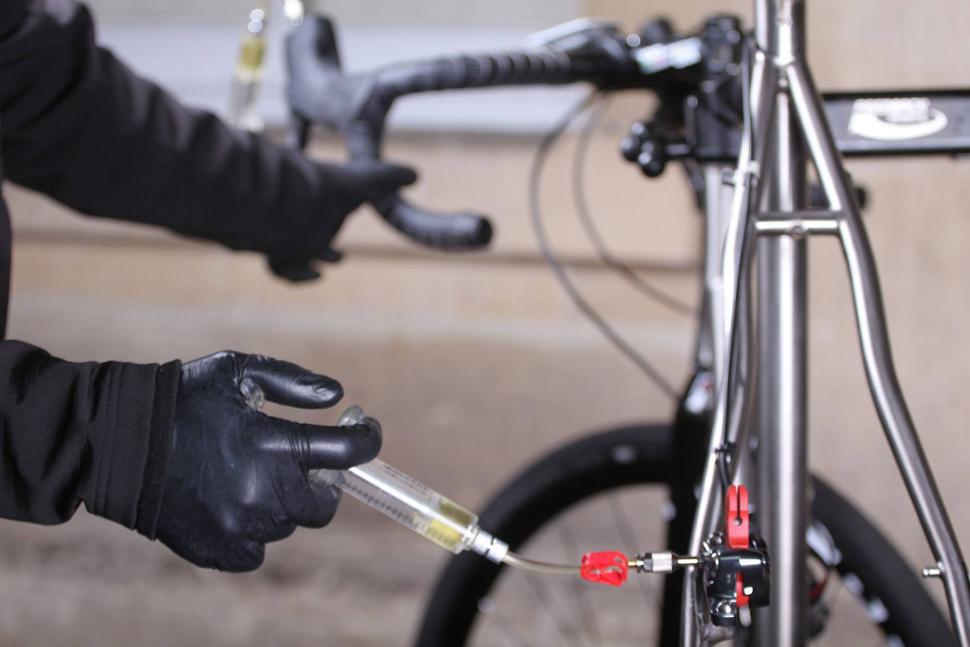 pressure calliper and slowly release lever.jpg
How to bleed SRAM hydraulic road disc brakes — find out how to fix spongy brakes
Hydraulic disc brakes offer improved braking performance with greater consistency than traditional calliper rim brakes. They're a little more involved to set up and service than cable brakes, but once you know what you're doing it's really very straightforward. As with any hydraulic system, air is the enemy causing inconsistent performance. Removing it, or 'bleeding' it out of the system is vital. Here's how to do it on a SRAM hydraulic road disc brake.
Tools and Materials
Rag
Hydraulic brakes work on the basis that brake fluid is not compressible. Squeeze the brake lever and the displaced fluid is forced through the hose, into the calliper, forcing the pistons (and brake pads) towards each other and applying pressure to the disc rotor. Unlike fluid, air is a gas and therefore is compressible. If air is in the system it can cause the brake to have a mushy feel at the lever as the air compresses instead of directly transferring the braking pressure.
Air in brake hoses can also cause issues with inconsistent system pressure when hot. Under hard braking an air bubble can expand and cause the lever to pump out. Neither are helpful to effective braking. Both are fixed by 'bleeding' air from the system and replacing the trapped air bubbles with brake fluid.
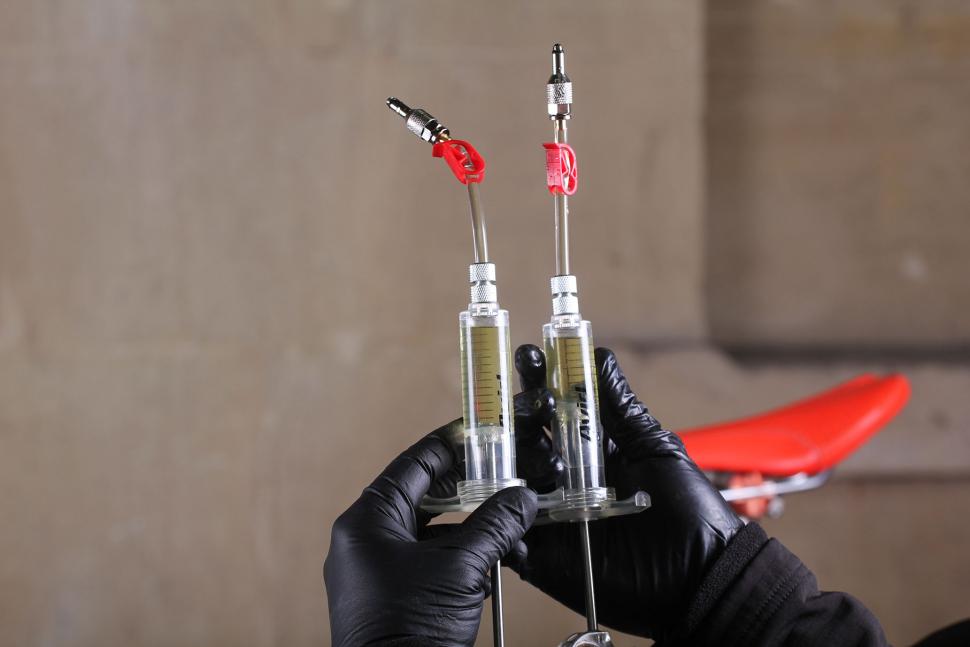
1 Put a pair of protective gloves on. DOT brake fluid is nasty stuff and contact with skin is best avoided. Fill the two syringes with fresh DOT5 brake fluid. Fill one half full, the other a quarter full. When filling the syringes try not to make any bubbles in the fluid bottle. The fewer you have in the syringe, the fewer you'll have to remove in the next step...
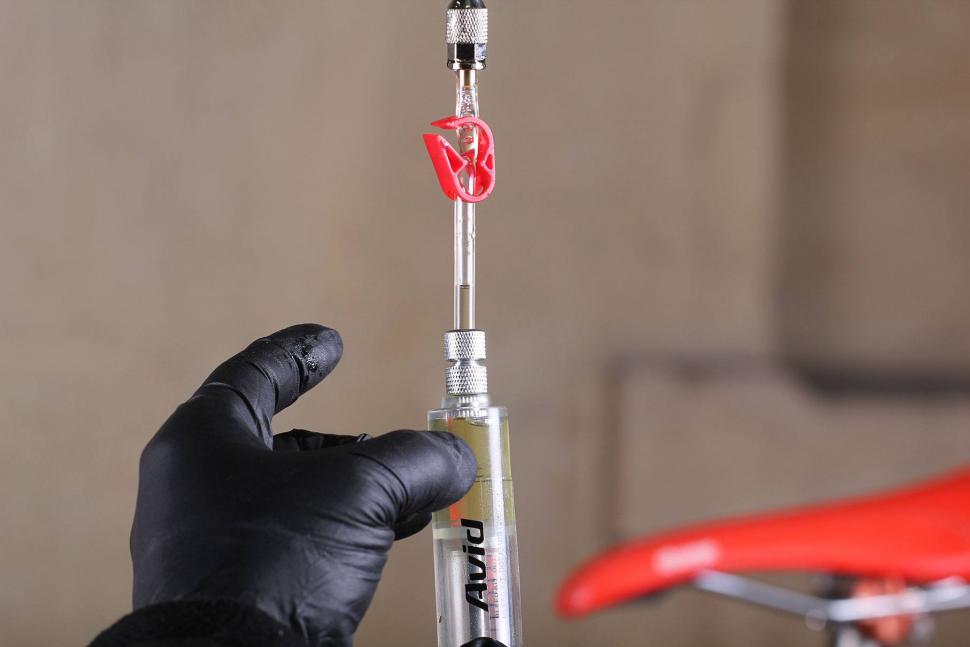
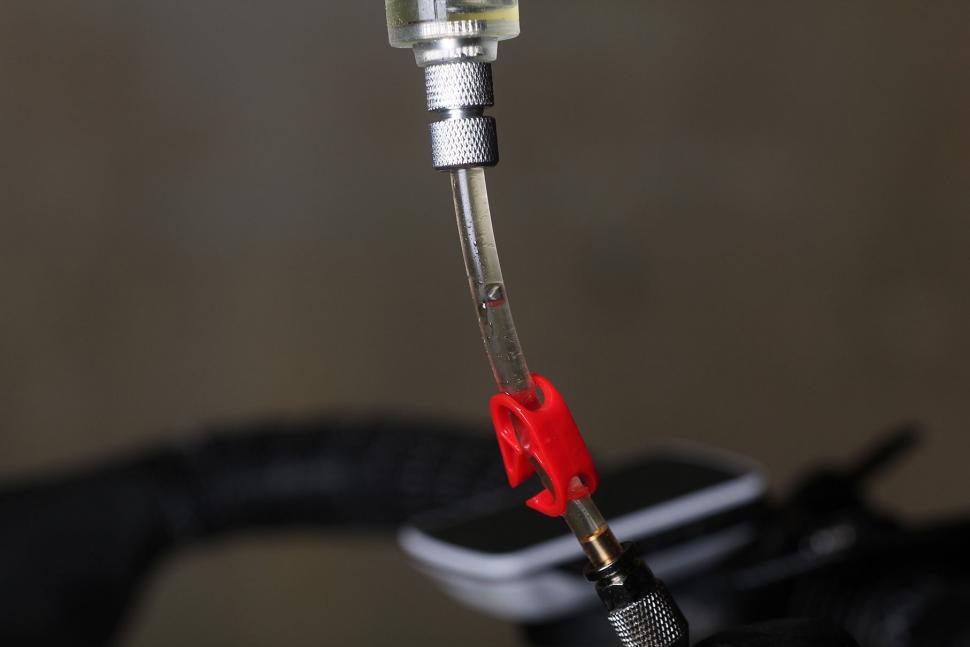
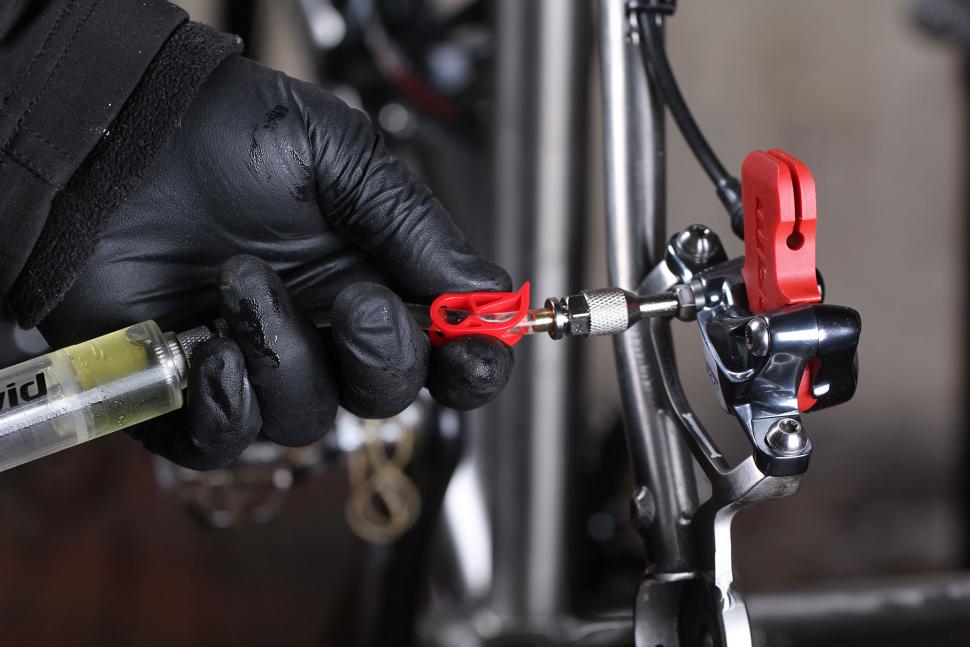
2 Tap out the bubbles. There will be air in with the fluid, however careful you've been in filling them. Tap the sides of the syringes to release the bubbles into the spout area of the syringe. Gently apply pressure to the plunger and push the bubbles up the clear hose and out past the red clamps.
3 Remove the pads. Remove the safety circlip from the calliper, then the threaded pad carrier bolt and finally slip the pads and their divider spring out of the calliper. We do this because hydraulic brake fluid kills brake pads. It is vital no brake fluid touches the pad material, so remove them, and put them somewhere safe.
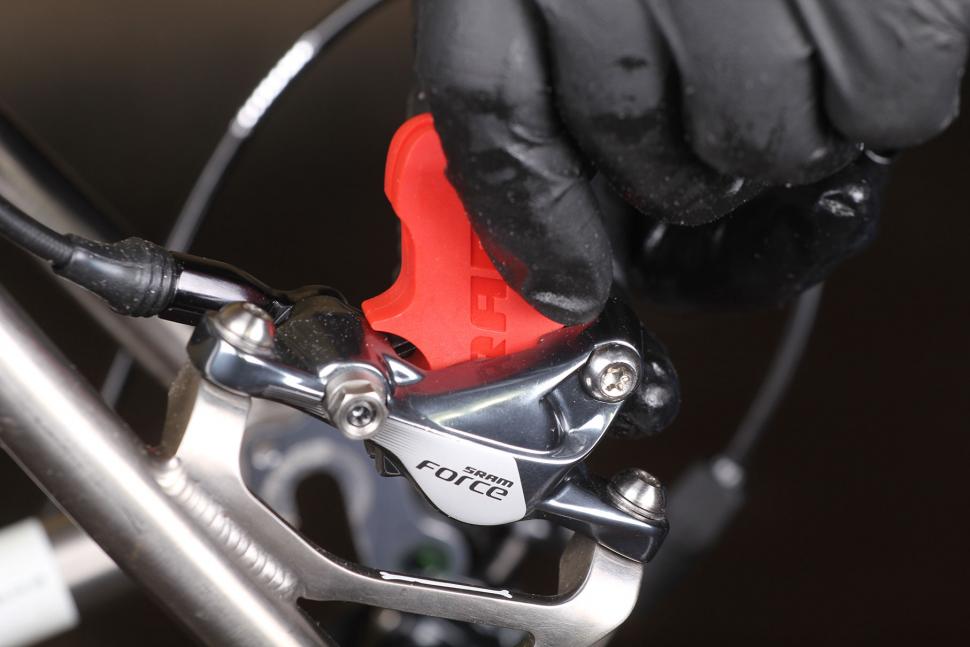
4 Insert the bleed block. With the calliper open, slot the SRAM brake bleed block into the space where the pads were. The bleed block is designed to stop the pistons in each side of the calliper from pushing out as you force more fluid into the system. If you don't have the specific bleed block any non-compressible item will do. We've used the end of a ring spanner before.
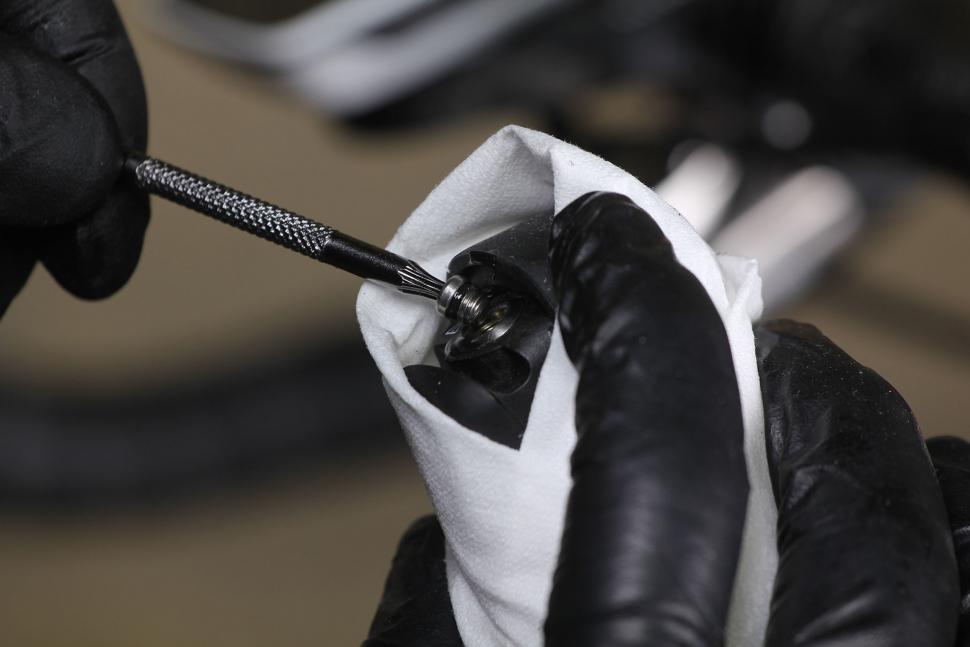
5 Remove the calliper bleed port screw. Don't be alarmed to see a drop of fluid seep out, this is quite normal. Just don't let it get on your components or frame. Water neutralises its effects, though disc brake cleaner can also be used. Place the tiny bleed port screw somewhere safe.
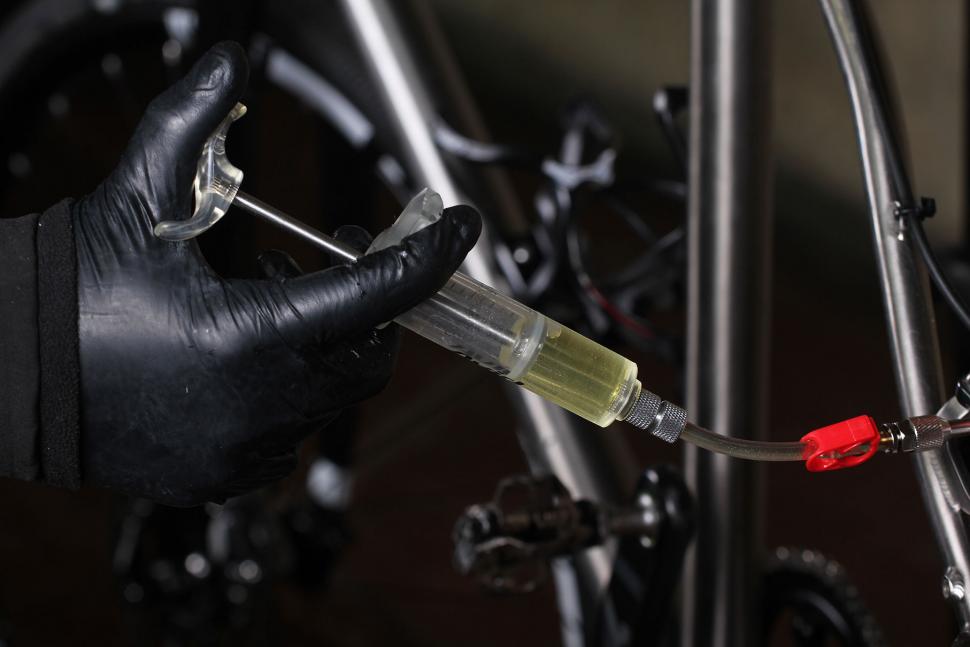
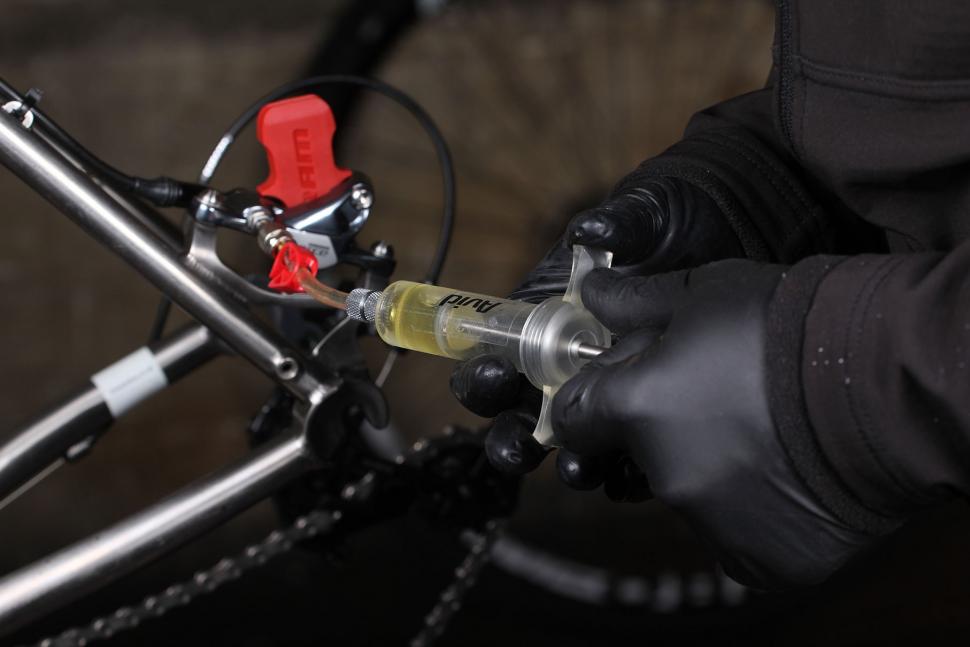
6 Screw in the half-full syringe. The red pinch clamp on the hose should be open.
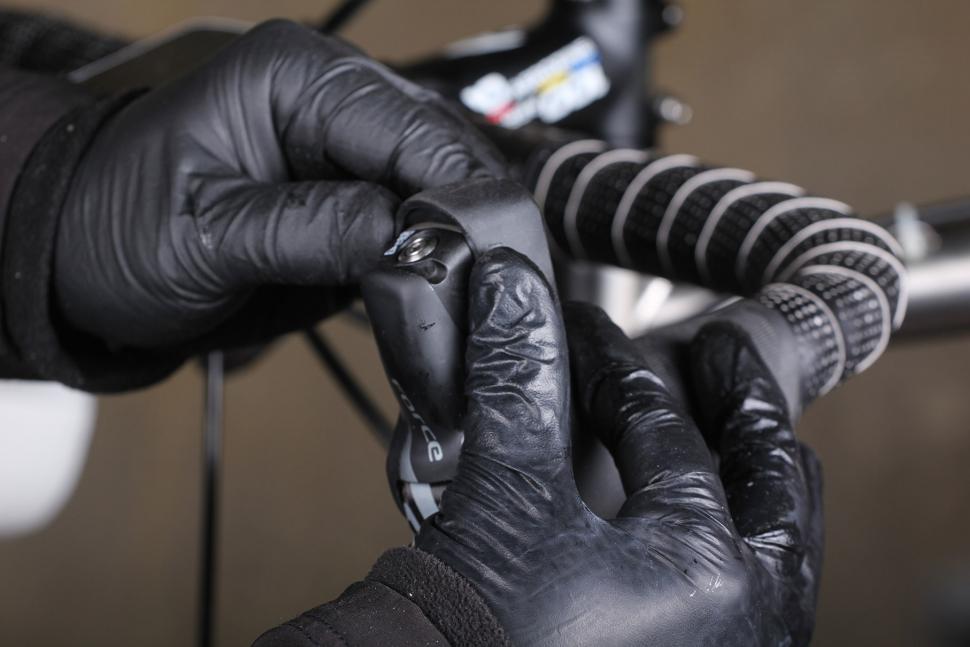
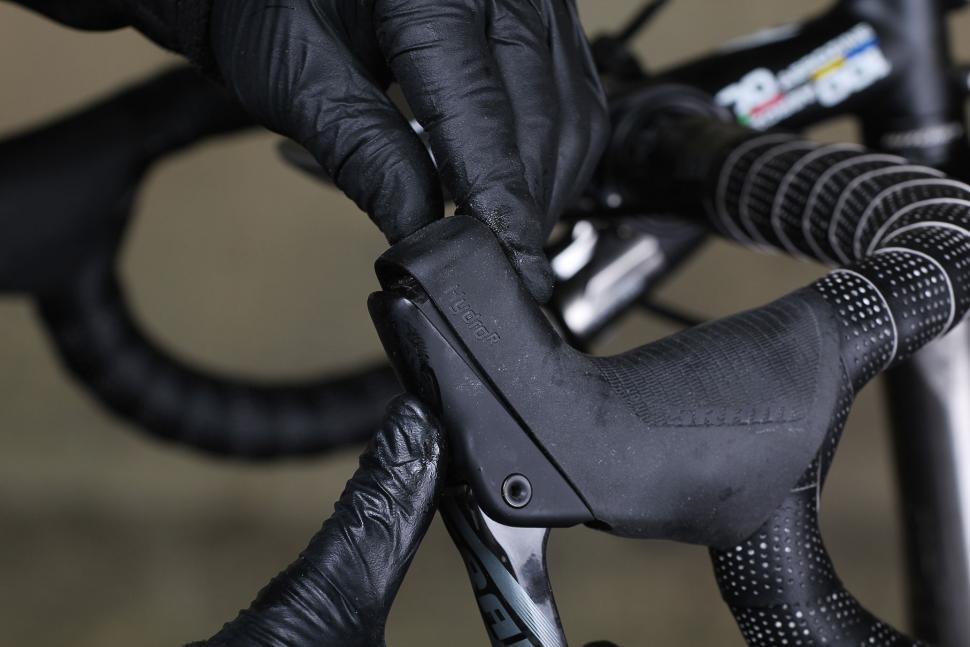
7 Expose the lever bleed port. Peel back the rubber brake hood cover of the relevant brake. This will expose the plastic brake architecture. On the front of the uppermost part of the lever is another bleed port.
8 Remove the screw. Unscrew and remove the lever bleed port screw. Place it wth the rear one you've already removed from the calliper. Wipe away any drips.
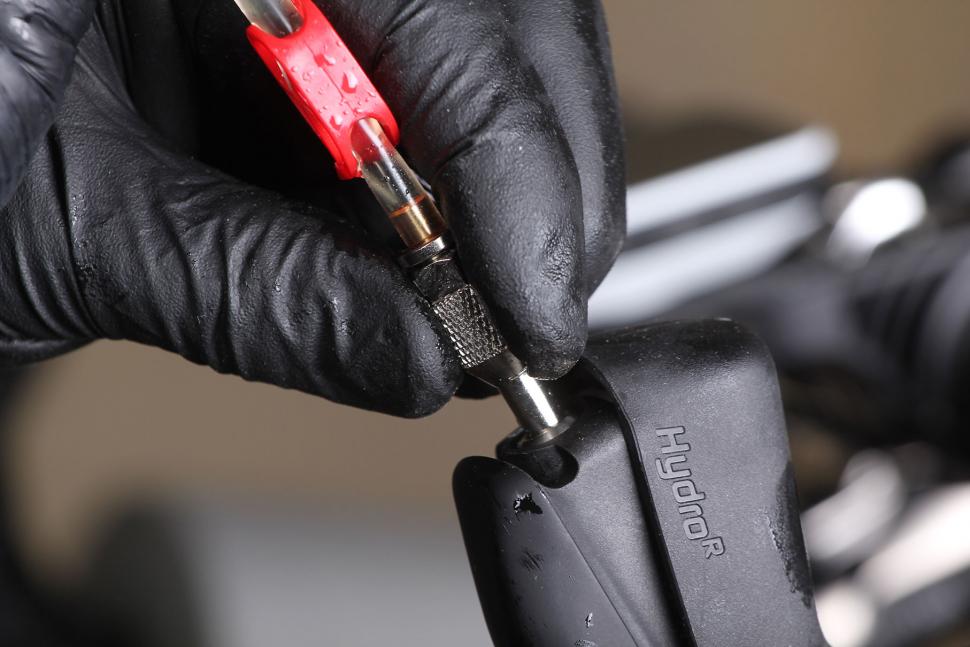
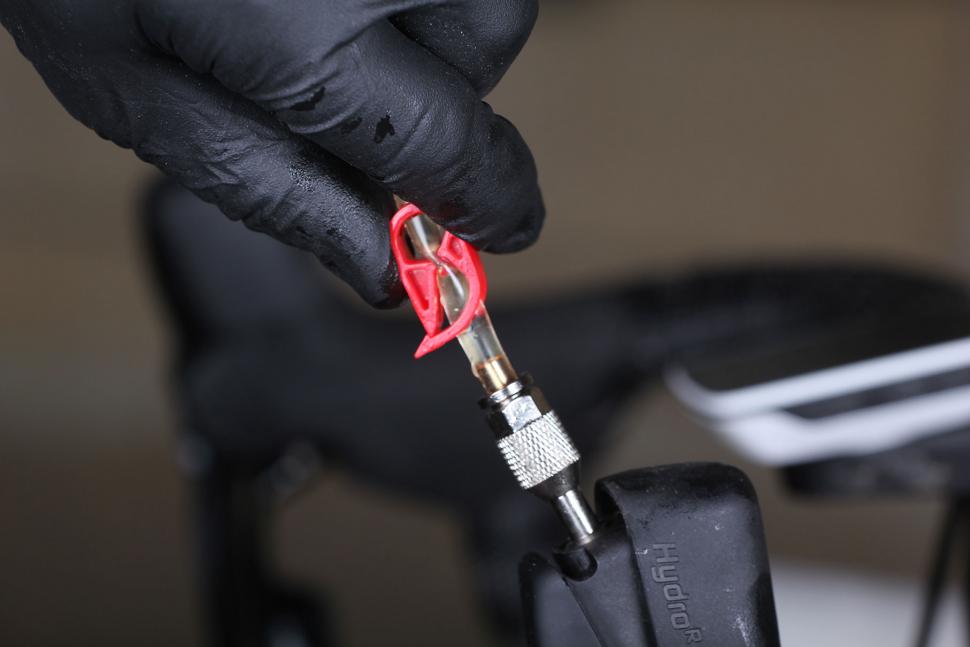
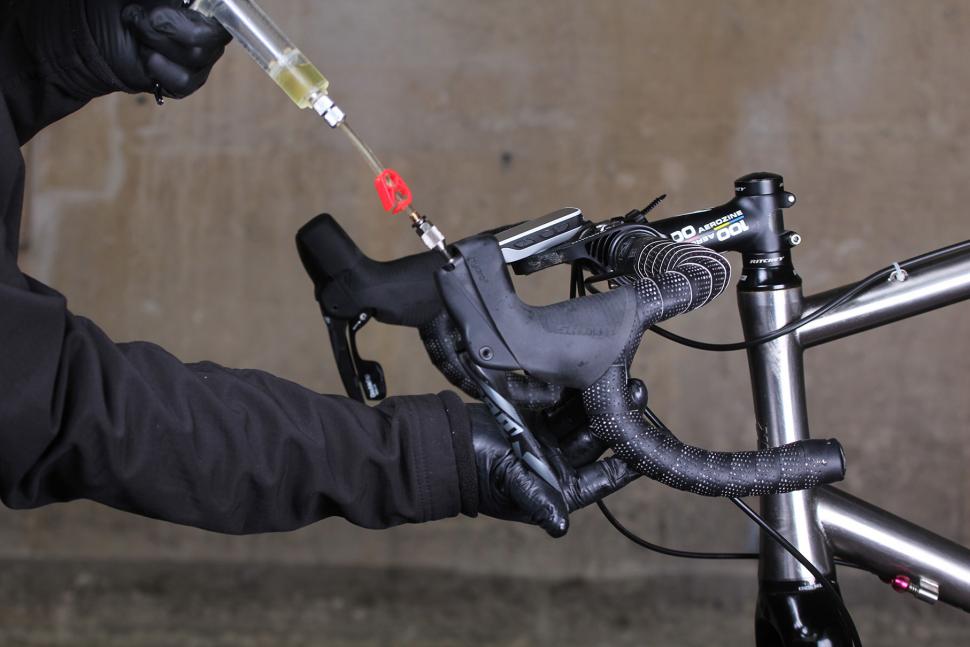
9 Fit the other syringe. Screw the quarter full syringe into the open lever bleed port.
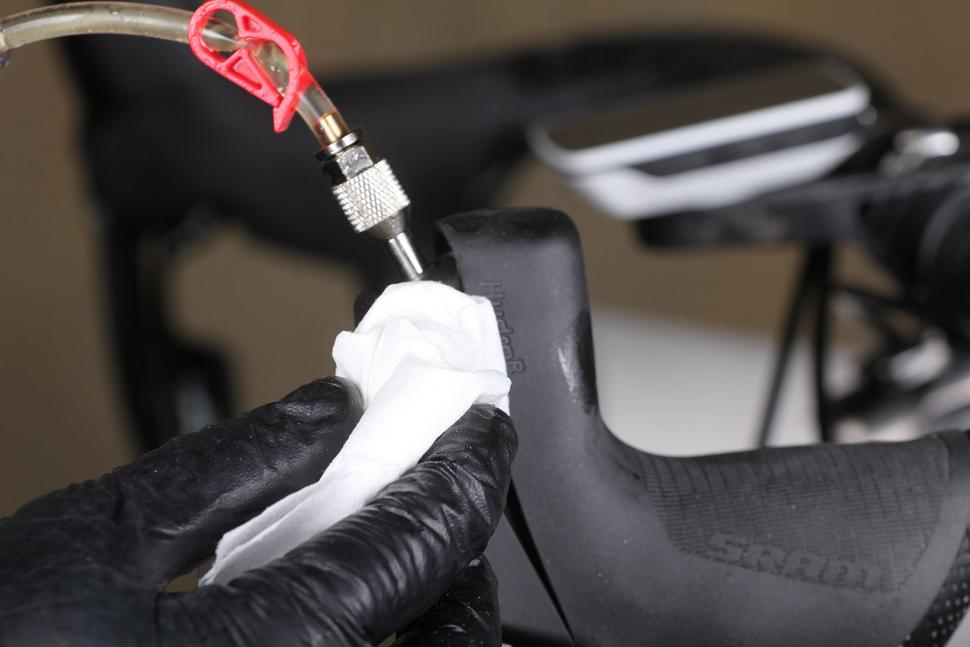
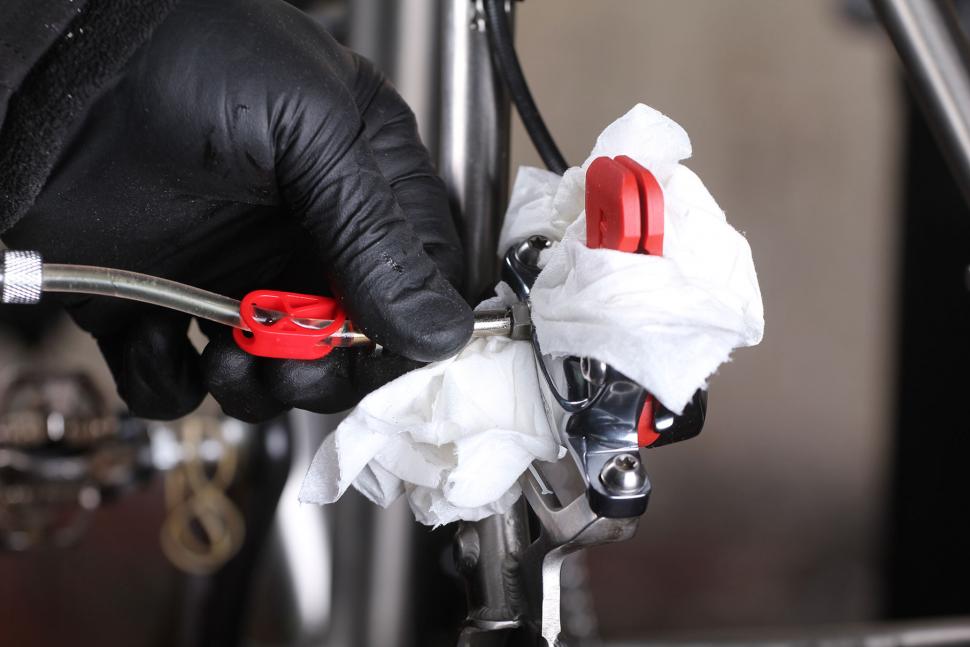
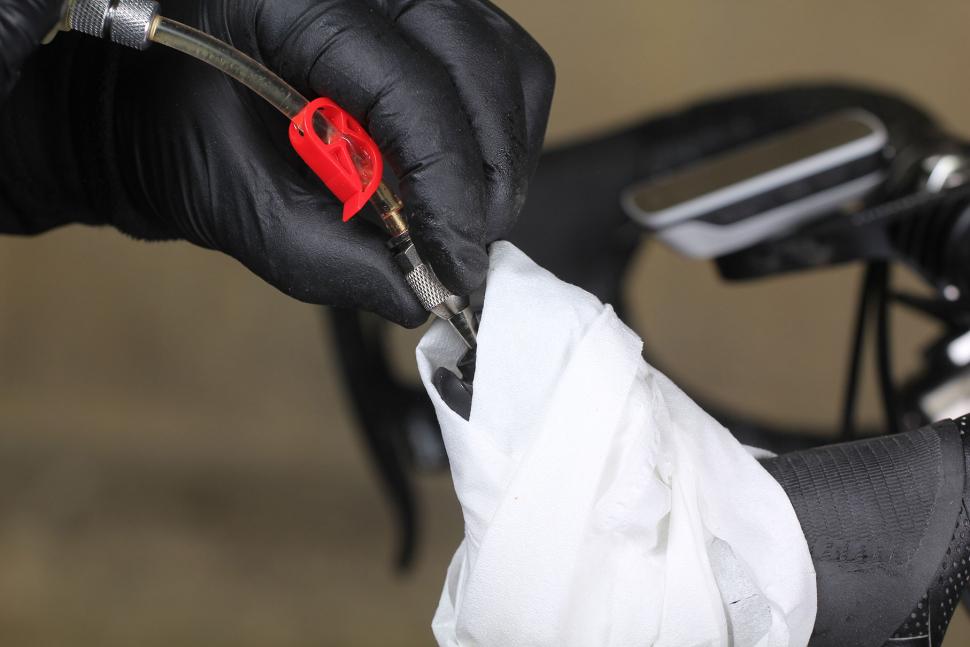
10 Keep it clean. Have tissue or rag handy to wipe up any drips. Remember water neutralises DOT brake fluid, so have some stood by.
11 Open the red plastic hose clamp on the brake lever syringe.
12 Push fluid through the system. With both syringe hose clamps now open, apply a gentle and steady pressure to the calliper syringe plunger. This will force fluid through the entire system. Push half the contents of the calliper syringe through (a quarter of a syringe). The same amount of fluid will be pushed out of the brake lever port and into the attached syringe...
13 Repeat to remove bubbles. There will also be some air bubbles being pushed out of the system. These will pass up the tube, into the syringe, gathering at the plunger base, stop when you've pushed a half the contents of the calliper syringe through. Because you won't get all the bubbles out in the first pass, carefully push the fluid back to the calliper -taking care not to reintroduce any of the air you've painstakingly removed. Slowly repeat the process three or four times. Each time the fluid emerges from the lever it will have a few more bubbles. When no more emerge, you're ready to move on...
14 Close the the red hose clamp of the brake lever syringe.
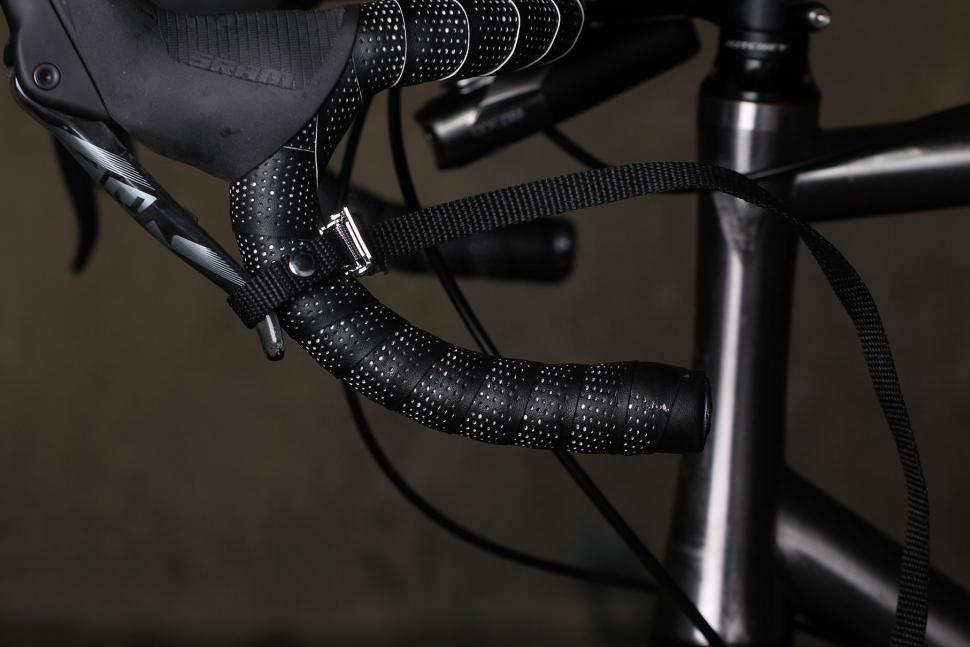
15 Clamp the lever. Use a toe strap (remember those..) or an elastic band to hold the brake lever firmly back to the handlebar.
16 Pressurise the system. Gently pull out on the calliper syringe plunger, then push in on the plunger to pressurise the system. Repeat this process until bubbles stop coming out of the calliper. Don't pull the plunger too hard or you risk compromising the syringe seal and introducing more air into the system.
17 Remove the toe strap and without releasing the brake lever continue to hold it into the bar. Apply gentle and steady pressure to the calliper syringe. You'll feel the resulting fluid pressure trying to push the brake lever out . Gently allow the lever to move back to its normal static position.
18 Close the calliper syringe hose clamp.
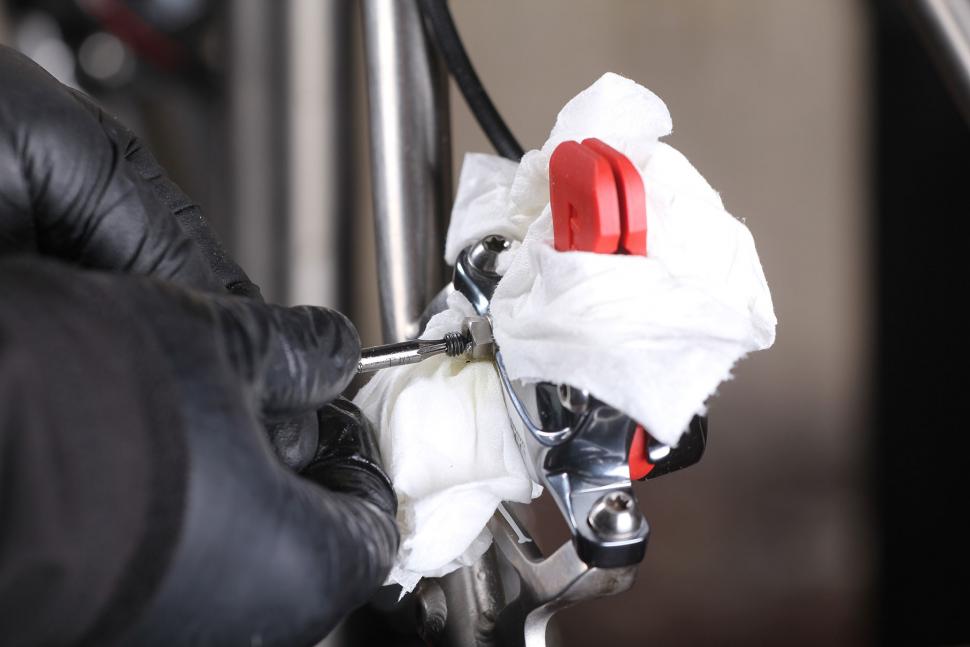
19 Remove the calliper syringe. Wrap some rag or tissue around the calliper to catch any drops.
20 Refit the calliper bleed port screw.
21 Open the brake lever syringe hose clamp.
22 Pull out on the brake lever syringe, then push it back in. This will pressurise it. Now squeeze the brake lever and allow it to flick back into its static position. Do this ten times, or until bubbles stop exiting the brake lever. Then gently press on the syringe to add some pressure to the brake lever syringe.
23 Wrap some rag or tissue around the lever bleed port to catch and drips, close the red hose clamp. Unscrew the brake lever syringe from the brake lever.
24 Remove the brake lever syringe.
25 Replace the brake lever bleed port screw. A little fluid may be displaced as you do this, so be ready to catch it.
26 Flip the rubber brake hood covers back into their normal positions.
27 Remove the plastic bleed block from the calliper.
28 Refit the pads and pad carrier bolt and finally the brake pads. Finally, don't forget the safety circlip. This stops the carrier bolt from backing out.
You're now fully bled. However as with any brake servicing, it's always a good idea to test your work thoroughly some where safe. The brake should have some lever travel before the bite point and feel firm under a light hand pressure. There will be some squeeze - this is what allows modulation and control of braking force - essential when you've got road tyres with limited braking traction.
>> Read more: The full archive of road.cc maintenance features
Latest Comments
- the little onion 3 sec ago
The other thing about the changes in Paris is that it is just so much more pleasant than it was before. Not only is the air cleaner, but the...
- froze 57 min 49 sec ago
Replace those flimsy shutters with steel security bars, or they could use both together with the security bars on the outside of the shutters. ...
- lonpfrb 1 hour 33 min ago
Glad to see they haven't lost the plot on sustainably, oh, never mind...
- Rendel Harris 3 hours 25 min ago
She may have a disability and have the car through Motability. She may have recently lost her job and the car dates from more prosperous times. For...
- TBR 3 hours 58 min ago
I got myself a klickfix freepack sport with the seatpost mount about 15 years ago which does exactly the same with more distance between saddle...
- wtjs 4 hours 53 min ago
Traffic lights should routinely be programmed to turn red where sensors show speeding drivers are approaching...
- David9694 5 hours 19 min ago
Mum shocked as driver crashes into Helston house in the night...
- Rendel Harris 5 hours 35 min ago
By my reckoning there are eight comments from cyclists who don't think it's necessary, five comments from cyclists who think it's good, four...
- Rendel Harris 5 hours 59 min ago
Well obviously they couldn't touch the central line because there was traffic coming in the opposite direction and so they had to pass you within...
- David9694 6 hours 1 min ago
What are left with, from among the individual builders listed here I wonder, how many are taking orders? https://www.framebuilding.com/custom_uk...







Add new comment
14 comments
I don't think Dot 5 absorbs water. SRAM brake fluid appears to be Dot 5.1 which does - maybe some clarification in the article is required?
DOT 5 is a silicone oil, it is NOT the same as (nor compatible with) DOT 5.1.
Dot 4 and DOT 5.1 are both glycol based and are completely miscible (all that happens is the boiling point drops a bit since 4 boils at about 230 C while DOT 5.1 is about 270 C.
To a certain extent they'll all abosrb some moisture over time but that normally happens from the storage container. If a regular punter (needing to bleed brakes once a year at most) buys a 1L can of it, you can be fairly sure that the remaining 800ml of it will have degraded substantially a year later.
The oil in the system is completely sealed and if you've bled it correctly with no air bubbles using fresh fluid it should last a year or more of regular use. Might want to bleed it more often if it's a brake system on a mountain bike used for DH racing for example but road bikes - espeically a pure race bike where braking is far less frequent and intense than say a commuter bike - shouldn't need bleeding more than annually.
The whole point of having an oil that absorbs water is to ensure that any water that does find its way in (and it'll be microscopic amounts via moisture in the air) can be absorbed but the fluid can still do its job.
28 steps and £30+ of kit to keep hydro disk brakes working. Honestly 98% of cyclists are very well serviced by normal caliper rim brakes, be careful what you peddle road.cc.
To perform this exact action on rim brakes is just to twiddle the barrel adjuster. Bikes always 2 steps forwards, 2 steps back.
Ever heard of mechanical disc brakes? They are a little more fiddly to keep the pads close to the rotor as they wear, but require none of this bleeding routine.
Maybe I'm using them wrong, but my hydraulic disc brakes have needed nothing beyond a new set of pads, and that was a doddle. Certainly I have never bled them - easiest brakes I've ever had for both use and maintenance, by miles.
Ever heard of mechanical disc brakes? They are a little more fiddly to keep the pads close to the rotor as they wear
Not really! When there are pistons both sides of the disc, as on the excellent TRP Spyre, you just screw out the barrel adjuster. You probably don't need to use the pad adjusting allen bolts to centre the pads on the disc, but it's a moment's work with a 3mm key. My disc brake bike is off the road because of the collapsing rim mentioned in another topic, so I've brought out the trusty rim-brake Hewitt- this has reminded me how much better disc brakes and 35 mm tyres are!
1. Take bike to Simon and ask him to check the brakes
2. Pay him
3. Don't forget biscuits at Christmas
28 steps...
It’s a joke. I’m taking care of my Shimanos myself but only the cost of those SRAM syringes will cover the job done at my local bike mechanic for the next decade.
I've got the Avid kit when I fixed the Hayes brakes on my sister's mountain bike.
If all else fails, just push a full measure of brake fluid up from the caliper end, making sure there are no high points in the hose run that might trap air.
I've also used the "pull fast, release slow" method of working the brake lever to help get rid of air at the lever end on mountain bike brakes - should work on road ones, too.
Most important point - NEVER shake or drop a bottle of brake fluid and you "should" always use a fresh bottle of it, so you don't have any air/moisture in it.
Also, before connecting the syringes, do up the clamp and hold them clamp upwards and try pulling the plunger gently - the decrease in pressure will make any air bubbles expand and rise to the end, where they can be purged.
I've got an Avid bleed kit, and have followed numerous tutorial videos, and still cannot get the brakes bled right. It is total voodoo.
Whereas bleeding a shimano MTB brake (and I assue road brakes are similar) is a total breeze.
This process doesn't make sense. All you seem to be doing is pushing the fluid backwards and forwards to expel any air.
Brake fluid is hydroscopic so it absorbs moisture which compresses (like air) and also causes internal components to rust.
Properly bleeding brakes requires replacement of the fluid.
Moisture doesn't compress.
Does get a bit spongy once it gets heated to vapour however.
Feels like the Shimano system of bleeding is a little more newbie-/idiot-friendly. Not to mention that their mineral oil is nowhere near as dangerous to handle as DOT 4 fluid.