- News
- Reviews
- Bikes
- Accessories
- Accessories - misc
- Computer mounts
- Bags
- Bar ends
- Bike bags & cases
- Bottle cages
- Bottles
- Cameras
- Car racks
- Child seats
- Computers
- Glasses
- GPS units
- Helmets
- Lights - front
- Lights - rear
- Lights - sets
- Locks
- Mirrors
- Mudguards
- Racks
- Pumps & CO2 inflators
- Puncture kits
- Reflectives
- Smart watches
- Stands and racks
- Trailers
- Clothing
- Components
- Bar tape & grips
- Bottom brackets
- Brake & gear cables
- Brake & STI levers
- Brake pads & spares
- Brakes
- Cassettes & freewheels
- Chains
- Chainsets & chainrings
- Derailleurs - front
- Derailleurs - rear
- Forks
- Gear levers & shifters
- Groupsets
- Handlebars & extensions
- Headsets
- Hubs
- Inner tubes
- Pedals
- Quick releases & skewers
- Saddles
- Seatposts
- Stems
- Wheels
- Tyres
- Health, fitness and nutrition
- Tools and workshop
- Miscellaneous
- Tubeless valves
- Buyers Guides
- Features
- Forum
- Recommends
- Podcast
feature
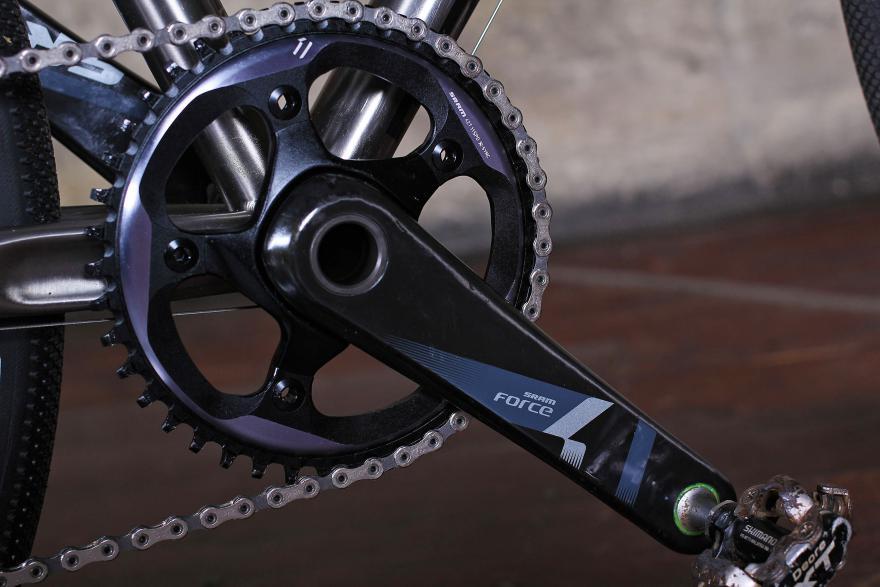 sram-force-cx1-groupset-chainset_0
How to fit new cranks to your bike in 15 easy steps
Cranks are the heart of your bike's transmission. Being able to fit and remove them is a very useful skill if you're going to properly maintain and service your bike yourself. Here's how to do it.
Our guide below shows you what we believe is the best method to fit a crankset. We've included a list of the tools and materials that you will need to complete the job and in some cases where you can buy them. If there are others that you prefer then feel free to let everybody know in the comments.
Tools & Materials
Bottom Bracket spanner (if you're fitting the bottom bracket at the same time)
Fitting a crankset
By crankset we really mean the left and right crank arms, bottom bracket axle, spider and chain rings. In most modern cranksets the axle is permanently attached to one of the cranks, but you do still see three-piece cranks in which the axle is built into the bottom bracket unit. Two-piece cranks with bottom bracket bearings that sit outside the frame have made the job of changing cranks substantially easier.
Why would you be fitting or removing your cranks? You might be building a bike from a bare frame, as we have here; or cleaning and inspecting cranks or bottom bracket, jobs which are much easier if you remove the cranks from the bike.
In this article we're showing the process of fitting a SRAM Force crankset to a frame with a 68mm threaded bottom bracket shell. We will cover fitting the bottom bracket as well. In this instance the bottom bracket screws into the frame, which is still the most common fitting on entry level and mid priced road bikes.
Depending on your particular crank, there are spacers to adjust the bottom bracket width to ensure a proper chainline and slop free-fit of the cranks. Press-fit bottom brackets also use spacers. You'll be able to find details on bottom bracket spacing on the website of your specific bottom bracket and/or crankset manufacturer.
1 Keep it clean.
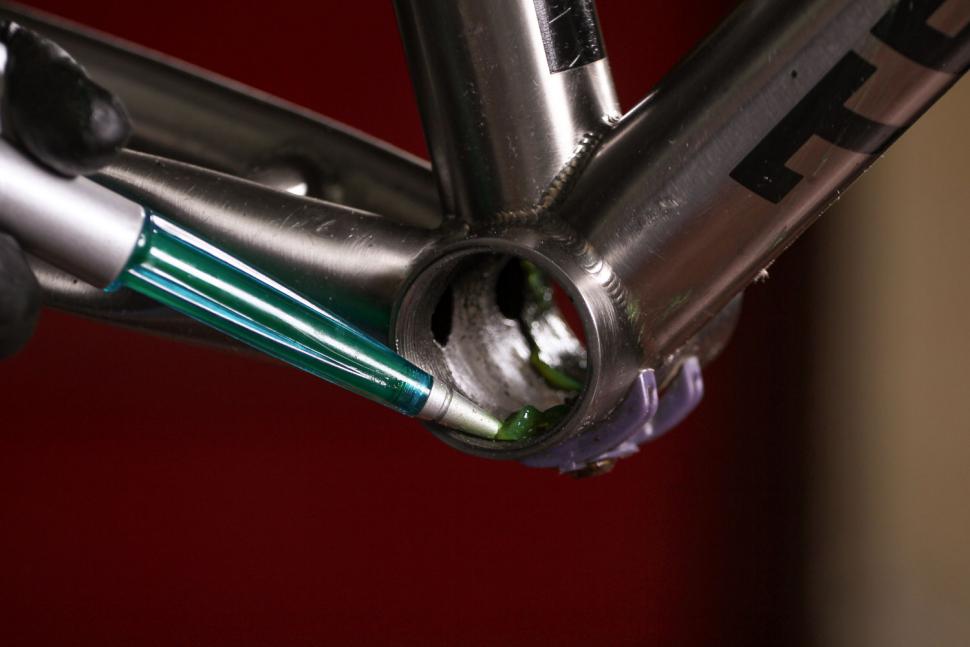
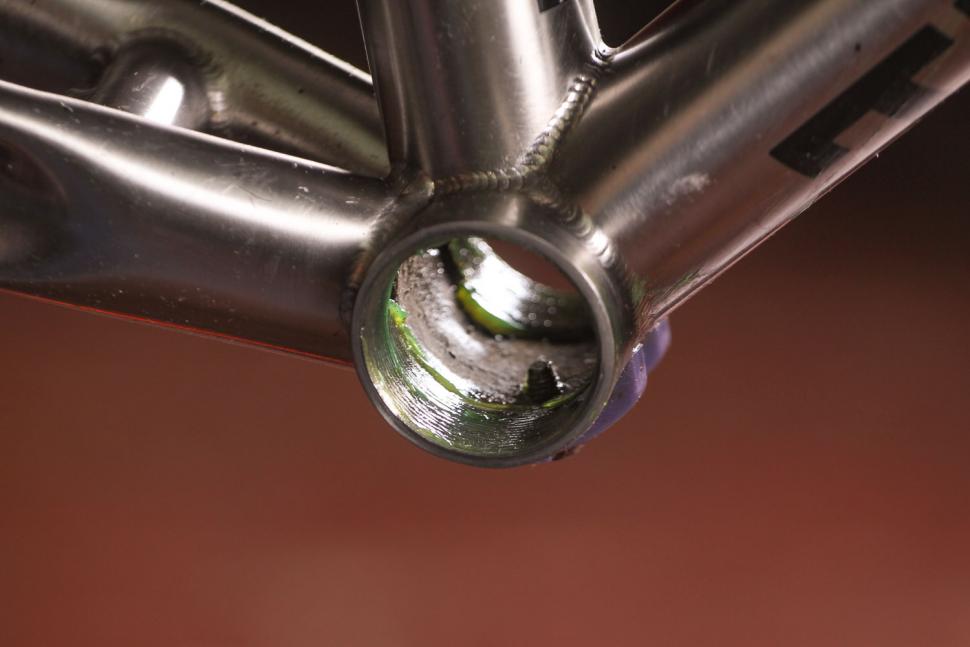
It's good form to keep the bottom bracket clean. This is very easy with threaded cups as they can be screwed in and out over and over again. It's less easy with press-fit cups which don't, on the whole, like to be fitted and removed more than once or twice. Clean any moisture out, de-grease, dry and re-grease.
2 Grease the threads. Run the grease around the threads. Don't be shy with it, grease is good.
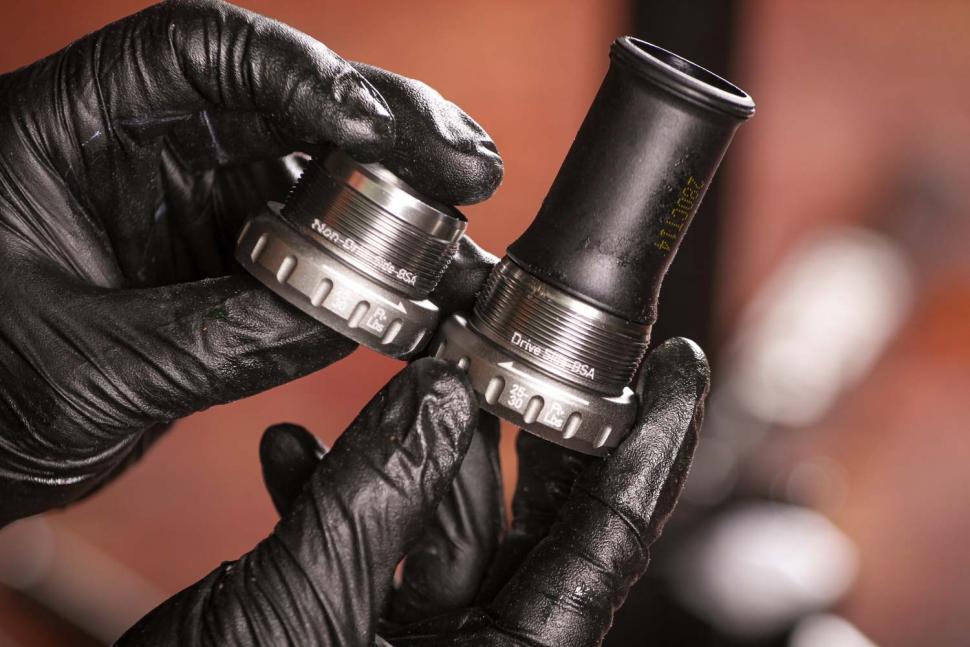
3 The bottom bracket bearings. Screw fit bottom bracket cups have different threads and fit into specific sides of the frame. Here you can see they are marked 'Drive side' and 'Non-Drive side', along with an arrow to tell you which direction it must be turned to tighten it.
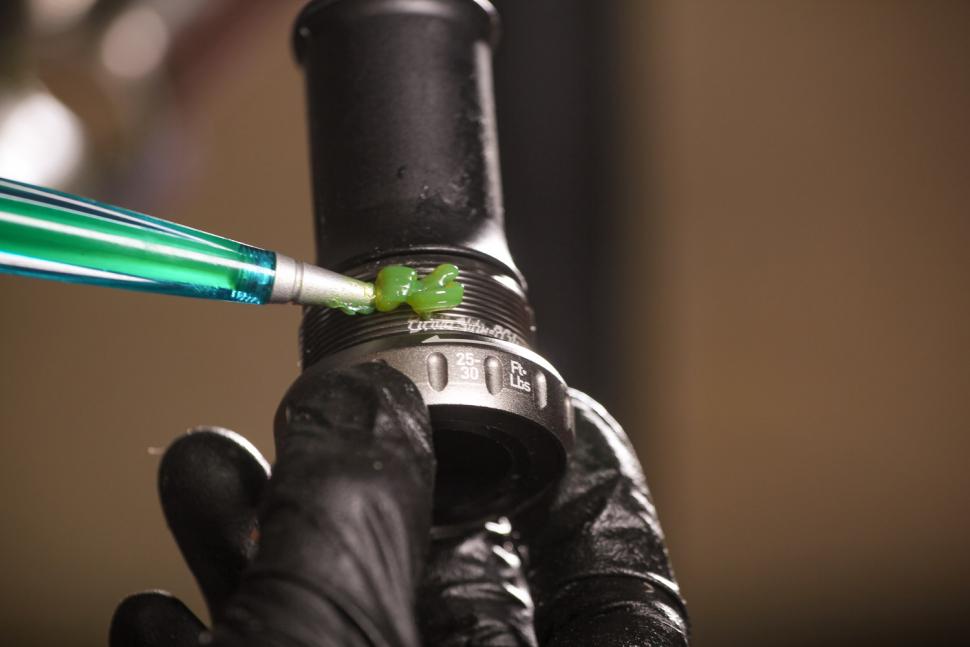
4 Grease the threads. Screw fit cups should also be lightly greased. It's good practice even though you've also greased the threads of the bottom bracket shell. You can see the recommended torque setting – 25-30 ft-lbs – on the bearing housing here.
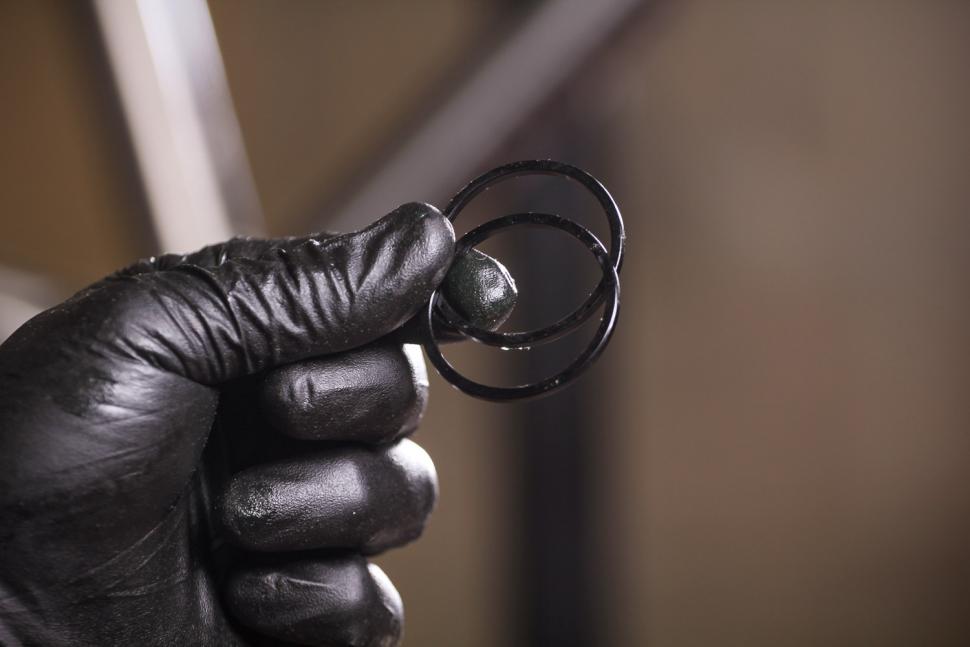
5 Spacers. External bottom bracket cups can be spaced away from the frame, effectively increasing the width of the bottom bracket shell. Our SRAM Force crank fits a 68mm bottom bracket shell perfectly without any. Refer to your crankset manufacturer's information to determine how many (if any) you need and on which side you need them.
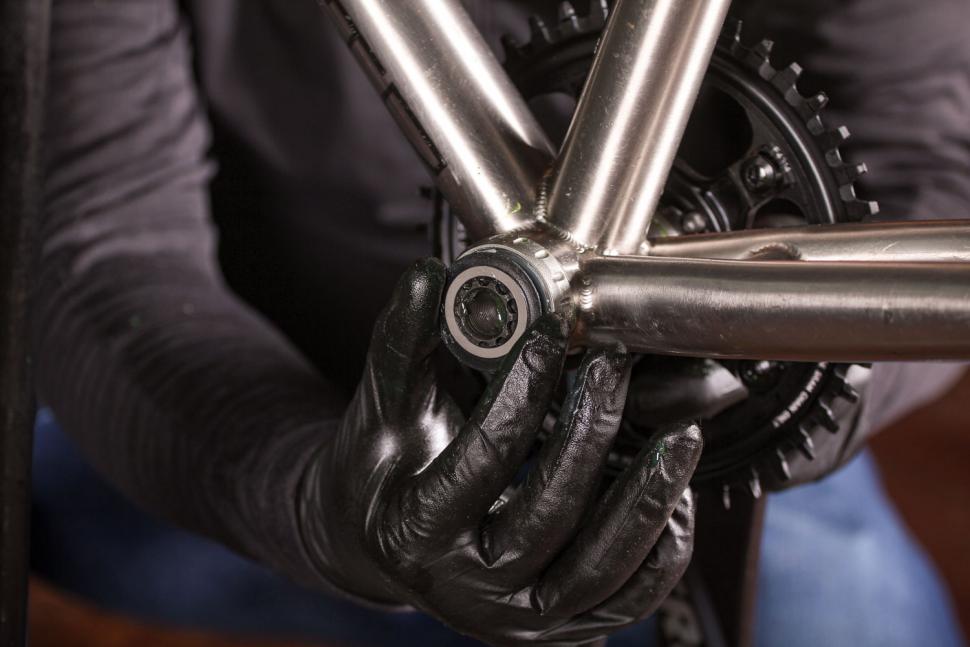
6 Fit the drive side cup. Present the right hand, drive side cup to the frame and turn it clockwise to find the engagement of the first threads. They should engage cleanly and be relatively easily to turn by hand.
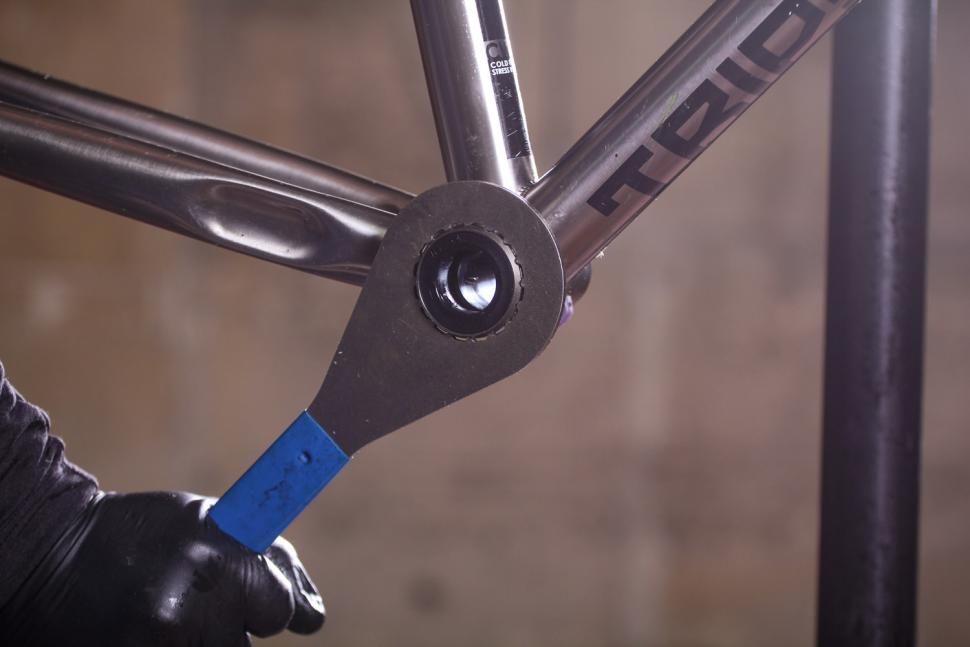
7 Tighten the cup. The final turns and tightening will need to be achieved with an appropriate bottom bracket tool. This is a full contact ring type made by Park Tools. The full ring fit makes it harder for the tool to slip off and damage the cup splines.
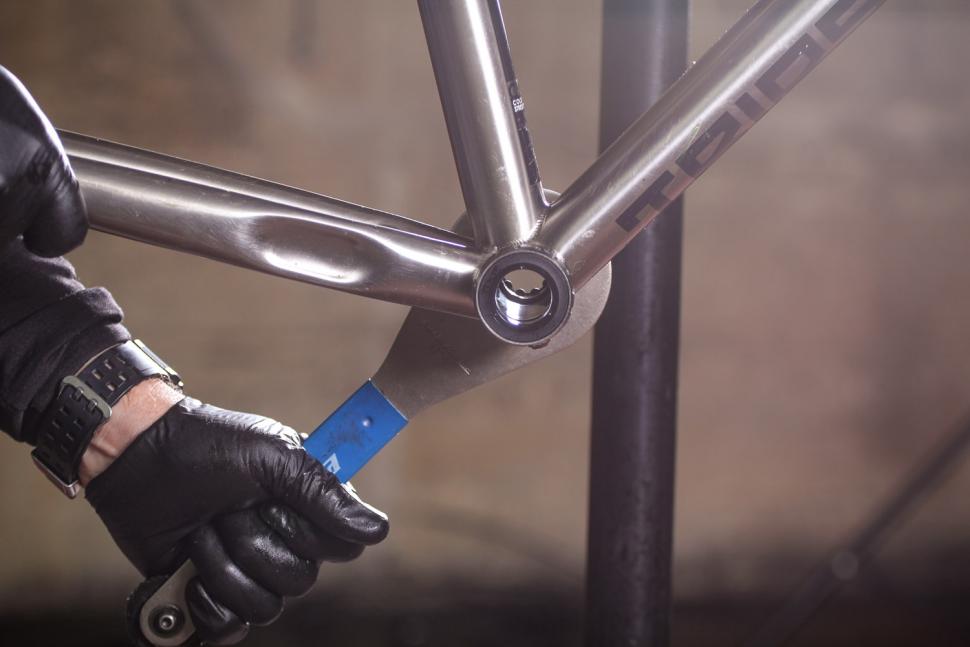
8 Fit the non-drive-side cup. Fit the left and cup in exactly the same way. Remember that it screws in anti-clockwise which will feel quite off if you've got any sort of muscle memory from screwing threaded parts together.
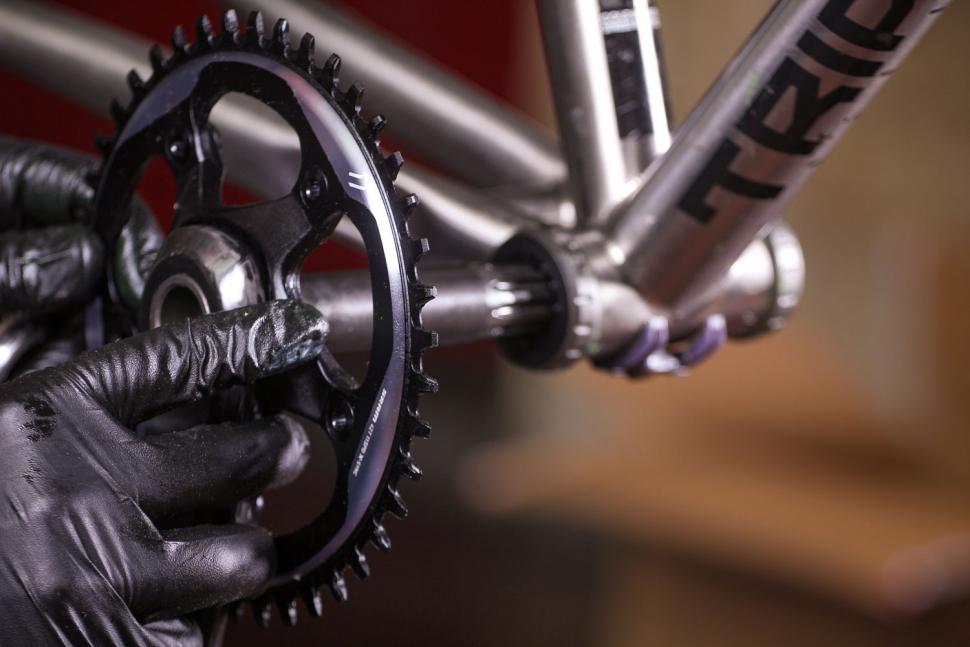
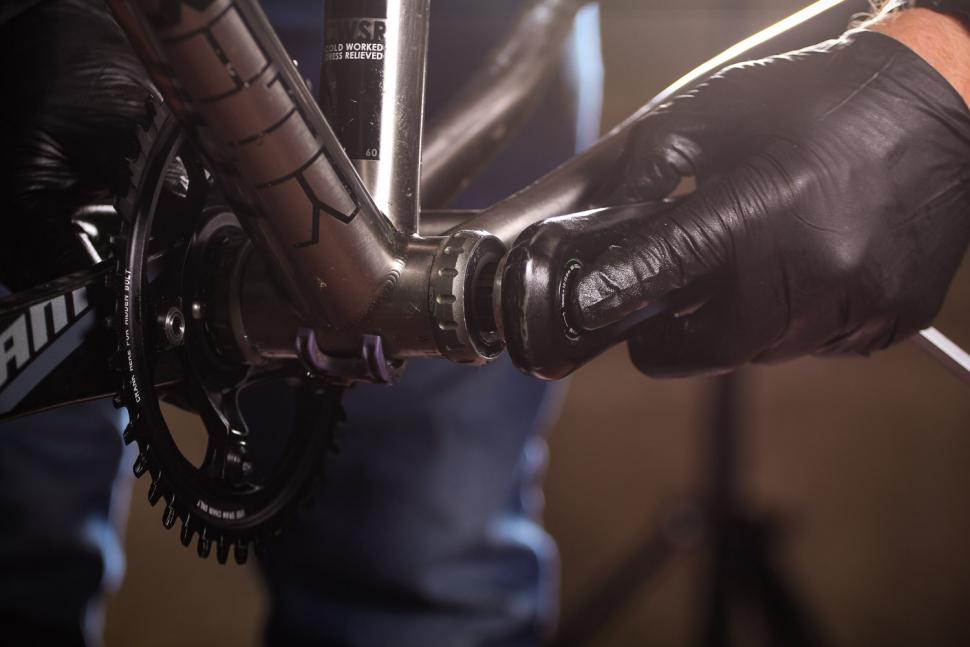
9 Fit the crank. Present the crank to the drive side bottom bracket cup. Place the end of the axle carefully into the open seal, taking care not to damage the hard rubber edge as this could compromise the bottom bracket's ability to stop ingress of water.
10 The axle emerging from the other side. Ease the axle through the bottom bracket cups. If you've left the dust seal in position when fitting the left hand cup, don't be surprised to see it pop out when the axle pops through. Pick it up, clean it and replace it. The seal has castellations on its inside edge to allow the crank splines to pass through it. Align those and push it over the stub as shown. It should seat neatly over the bearing.
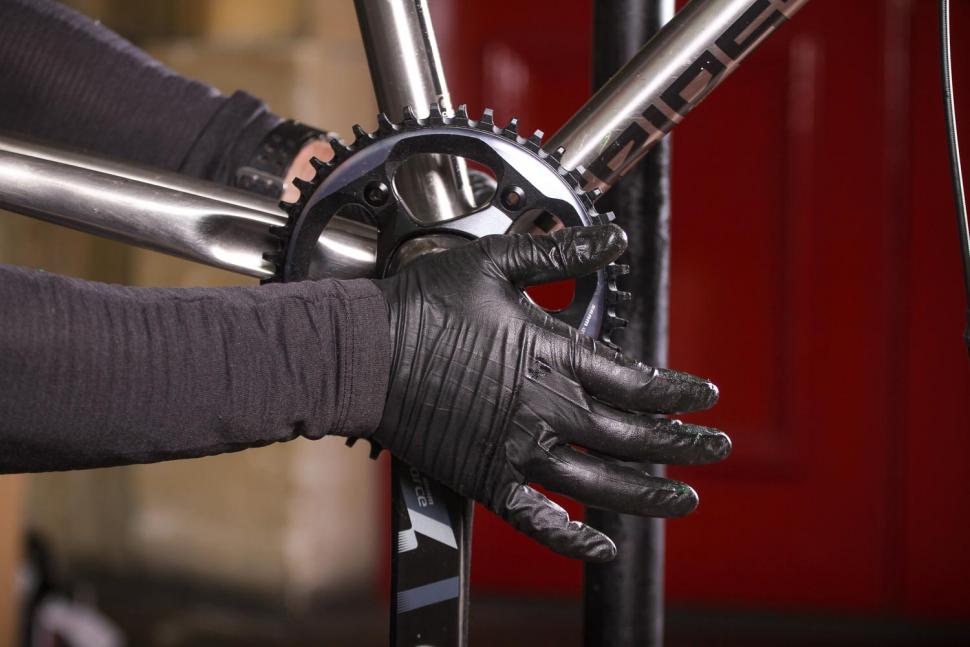
11 Shove the crank into place. If you just push it in, the crank is unlikely to immediately fit tightly right up into the right hand cup, as the last bit of the axle is a tight fit into the drive side bearing. Give the central point of the drive side crank a good hard hit with the heel of your palm. This should get it most of the way there. The final millimetre or so will be pulled through when you tighten the left hand crank arm.
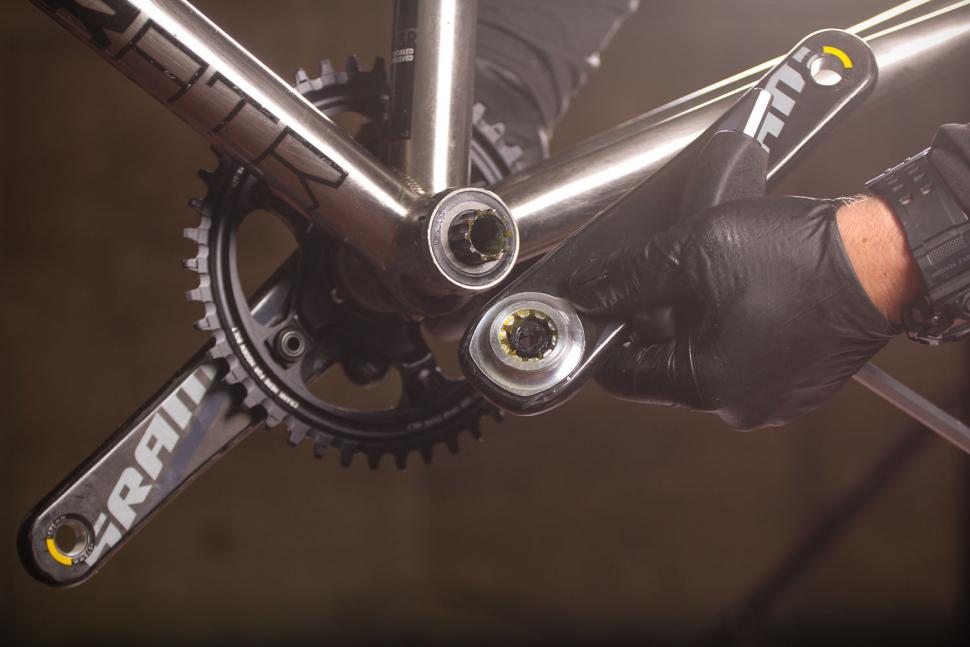
12 Fit the other crank. The axle will now be protruding from the left hand cup with the dust seal in position, so you can fit the left hand crank. The crank arm has the matching female splines to the male ones on the axle stub. On a new crank these will have some grease pre-installed (as you can see here its the yellowy stuff in the splines). If you're refitting a previously-used crank arm, clean the splines and add some fresh grease.
13 Make sure the crank is aligned. Position the left hand crank at 180 degrees to the right hand crank, unless you're auditioning for the circus. The left hand crank will need lightly easing on to the splines as the attachment bolt can stop them from engaging cleanly.
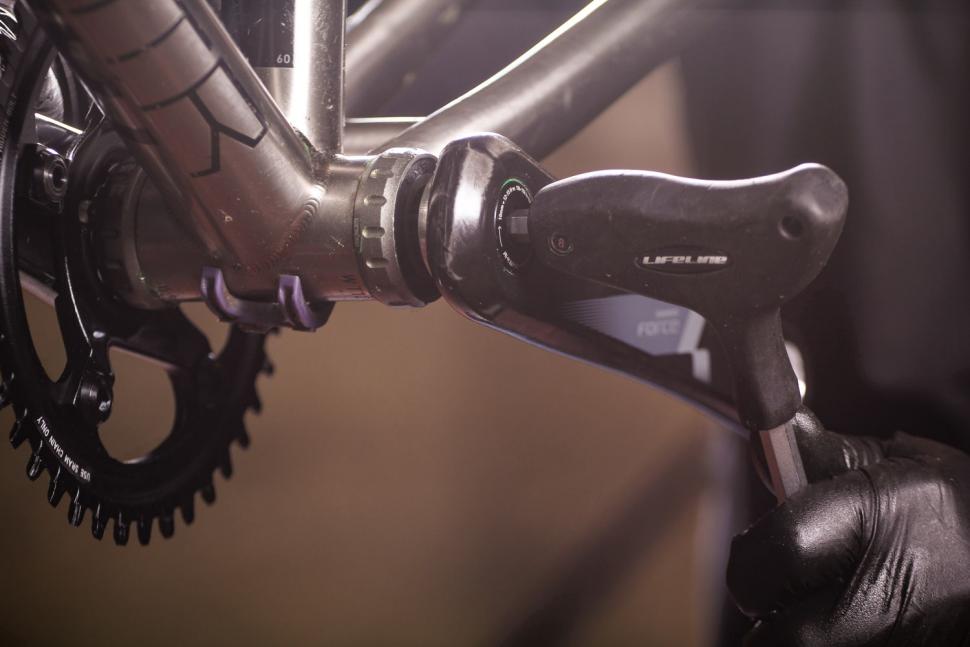
14 Tighten the attachment bolt. When you can feel the splines engage use an 8mm Allen wrench to tighten the crank arm to 12-15 Nm (106-133 in-lbs). Basically you'll be tightening it until you feel it reach its stop.
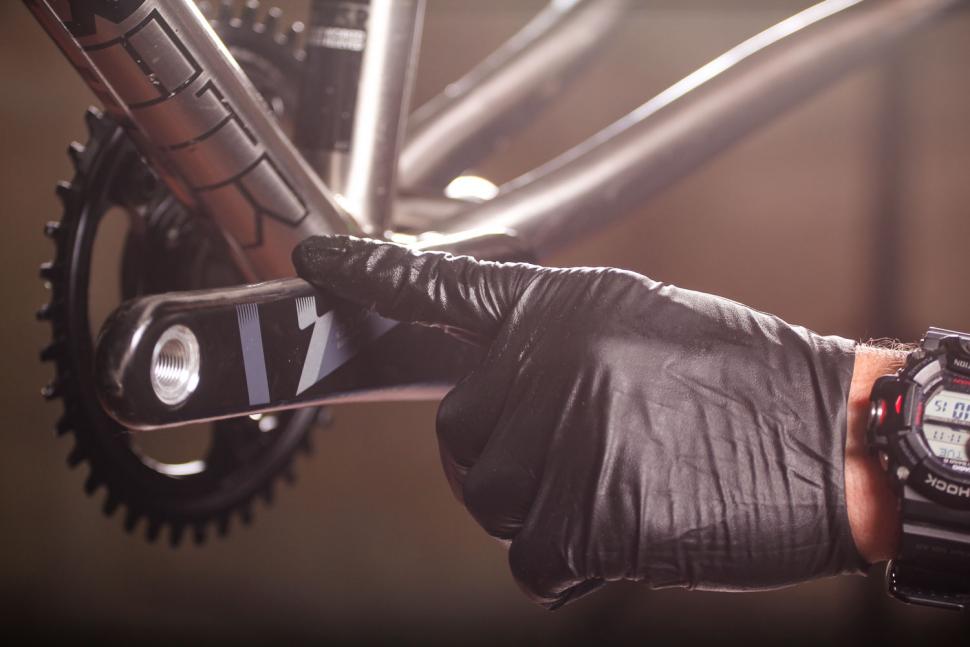
15 Check the bearings. With the left hand crank arm full tightened the crankset is fitted. You should be able to spin the cranks with a finger and they should, if everything has been correctly installed, spin freely.
Check for play by gripping the tips of the two crank arms and attempting to waggle them against each other. You shouldn't feel any looseness. This will indicate wear in the bottom bracket bearings. Naturally with new cups we've not got any here, but old and worn cups can develop wear. The bearings in external bottom bracket cups cannot be serviced and simply need replacing with new ones.
>> Read more: The full archive of road.cc maintenance articles
Latest Comments
- mark1a 5 hours 9 min ago
Good point but... sometime ago I bought a 3d printed light mount, in order to use a Garmin Varia Radar light on the Specialized SWAT saddle...
- BigDoodyBoy 6 hours 52 min ago
Regarding the article about Mr Chapman and his comments about cyclists wanting to control the roads, I am not a fan of the type of mockery therein....
- Tony W. 6 hours 52 min ago
If all drivers adhered to the highway code, we wouldn't need traffic calming or anything else, drivers are their own worst enemy.
- Barraob1 7 hours 8 min ago
Froome's "crash" had nothing to do with gearing. Maybe the real issue is money and where you finish at the end of the season. Teams need...
- Geoff H 7 hours 14 min ago
Any chance of (voluntarily or involuntarily) taking some of these inspectors on a bike ride where they have declared it safe?
- David9694 7 hours 58 min ago
Car ploughs into Stoke-on-Trent house as firefighters cut driver free...
- Rendel Harris 8 hours 5 min ago
Anyone remember the last new cycle crossing built over the Thames in London, me neither because they've never built one. We were told we couldn't...
- Rendel Harris 8 hours 33 min ago
I wonder how pleased they were with the company's decision to stop paying the "real living wage" in April last year? Being a real ale man myself I...
- Spangly Shiny 8 hours 36 min ago
How about a new wardrobe of slightly looser garments. There are already some excellent alternatives to lycra jerseys from the likes of Torm, so how...

Add new comment
20 comments
There's a comment from 5 years ago pointing out that it tells you to screw in the bottom bracket the wrong way and it's still wrong. Very poor show.
I pity the poor sod who reads this and then sets about exchanging his cranks. As is pointed out below, the article only really applies to one potential scenario. Even then it's a very optimistics 'how to go about it if absolutely everything goes smoothly' approach.
I'm still struggling to remove my cotter pins. This guide is useless.
http://forum.cyclinguk.org/viewtopic.php?f=5&t=101061&p=947474&hilit=pow...
power torque isn't devils work or requiring knowledge of any black art.. pat
BB86 on my TCX. Have never had any problems with the two bottom brackets I've ran - an FSA unit for a 19 mm crank spindle, and a Shimano one for the more common 24 mm spindle cranks.
Only real downside is I don't have the tools to do the removal and install myself.
Don't buy nice looking but shit anodised external bottom brackets off ebay. Shimano didn't do a red one. I wanted a red one.
The outer seals were made brittle plastic that cracked when I put the spindle through and then the bracket last about a month before the creaking set in. Lesson being, buy Shimano part.
Token make a shimano compatible bottom bracket in red.
finding/fitting a french threraded external BB has proven to be an absolute nightmare for me.
NB.
When buying a classic frame check BB threading. Who on earth thought metric would catch on anyway...
Surely in points 6 & 8 the threading orientation is meant to say ACW for drive side, CW for non-drive side? (as you look at them?). Point 3 pic even shows the arrows correctly.
Must say I love SRAM GXP cranksets, easy to install and remove, no issues so far.
On a side note, I remember the SRAM service manual stating that the required torque for installing the non-drive side crank arm to the spindle is 48 to 54 N-m.
It could always be worse. I ride a BB30, which is great until it rains (usually a wet ride is followed by a visit to the LBS).
Removed the bolt and the non drive side crank arm wouldn't budge till I used an old Park hollow tech tool which worked a treat.
Reassembled and sorted.
New SRAM BB and no need for spacers on a road bike if the shell is 68mm. The road crank spindle is shorter than the mtb equivalent that only needs spacers for a 68mm BB turning it into a 73mm, otherwise it's straight fit.
Can be a problem with SRAM 10 speed roadbike crank fitted to a CX with a 135mm rear axel. Compact chainsets sort this out.
@srchar ... power torque ... once fitted, never removed ... been there too
they are the work of satan, pretty, but still evil to the core !!!
The venerated Mr Zinn, he of those excellent maintenance books, has a technique for removing the power-torque left crank from an external, threaded bracket. Just take an open-ended BB spanner and unscrew the bearing. Slowly.
The crank will pop off, he reckons, as you bring the bearing cup out to meet it. I have filed this away for future reference. But first I will try my cheap puller, bought from a car accessory shop and ground down to fit.
That's a great idea. I'll definitely try that next time (if there is a next time...)
This worked, by the way.
My experience of fitting Campag Power Torque:
1) Insert one-piece drive side crank, spider & spindle
2) Mount non-drive side crank arm to spindle
3) Tighten nut
My experience of removing Campag Power Torque:
1) Buy bearing puller
2) Swear a lot
3) Ruin non-drive side crank arm
4) Swear more
5) Take to LBS
6) Look away
7) Resolve never to buy anything designed in Italy ever again
8) Order Ultra Torque cranks
My experience of SRAM
1) fit bottom bracket (pf30)
2) slide axle into BB with multiple spacers.
3) mess around with spacers because I've for gotten how it all went together. What's with all the spacers!
4) tighten drive side bolt
5) f around with preload.
6) ride bike f around with preload some more.
Since I transferred these cranks from my other bike I've had nothing but issues and none of them related to to the PF30. Stupid half arsed system.
Following on from my many step SRAM cable fitting guide, here's my SRAM Crank guide.
1. Install the GXP bracket.
2. Slide the drive side through.
3. Locate the left arm into the spline.
4. Tighten.
Have a beer.
Honest now, GXP longevity aside it's so easy.
Are these photo's showing a burgalry in reverse?