- News
- Reviews
- Bikes
- Accessories
- Accessories - misc
- Computer mounts
- Bags
- Bar ends
- Bike bags & cases
- Bottle cages
- Bottles
- Cameras
- Car racks
- Child seats
- Computers
- Glasses
- GPS units
- Helmets
- Lights - front
- Lights - rear
- Lights - sets
- Locks
- Mirrors
- Mudguards
- Racks
- Pumps & CO2 inflators
- Puncture kits
- Reflectives
- Smart watches
- Stands and racks
- Trailers
- Clothing
- Components
- Bar tape & grips
- Bottom brackets
- Brake & gear cables
- Brake & STI levers
- Brake pads & spares
- Brakes
- Cassettes & freewheels
- Chains
- Chainsets & chainrings
- Derailleurs - front
- Derailleurs - rear
- Forks
- Gear levers & shifters
- Groupsets
- Handlebars & extensions
- Headsets
- Hubs
- Inner tubes
- Pedals
- Quick releases & skewers
- Saddles
- Seatposts
- Stems
- Wheels
- Tyres
- Health, fitness and nutrition
- Tools and workshop
- Miscellaneous
- Tubeless valves
- Buyers Guides
- Features
- Forum
- Recommends
- Podcast
 Step5
Step5How to easily fit & remove through-axle wheels
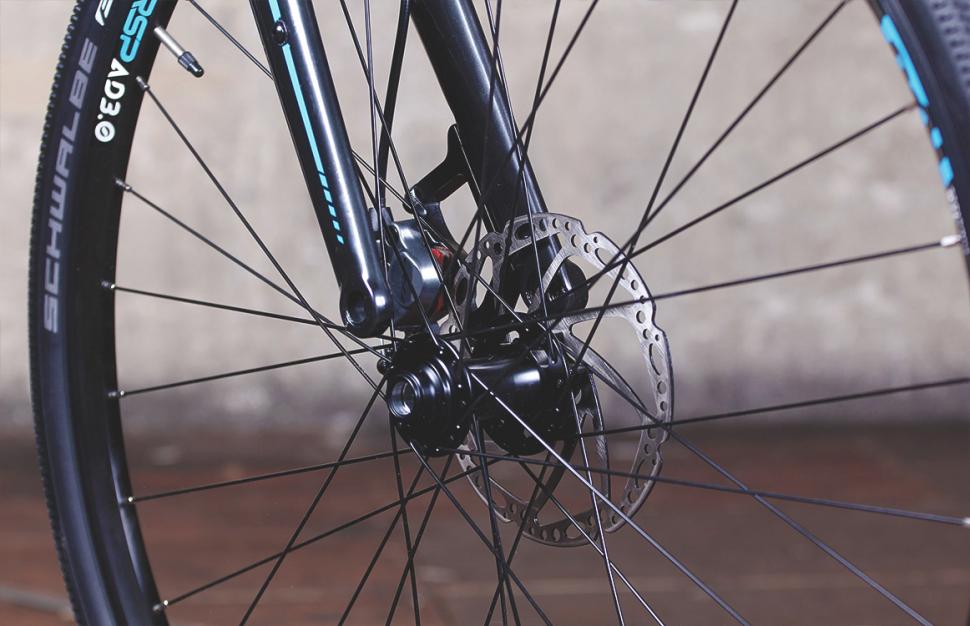
Increasing numbers of road bikes have wheels with bolt-through axles. The advantages are increased stiffness between the frame, fork and the wheels, and they make correct wheel alignment easier, especially if the bike uses disc brakes. Here's how to remove and fit wheels equipped with through-axles.
Our guide below shows you what we believe is the best method to fit and remove wheels with bolt through axles. If there are other methods that you prefer then feel free to let everybody know in the comments.
Removing the front wheel
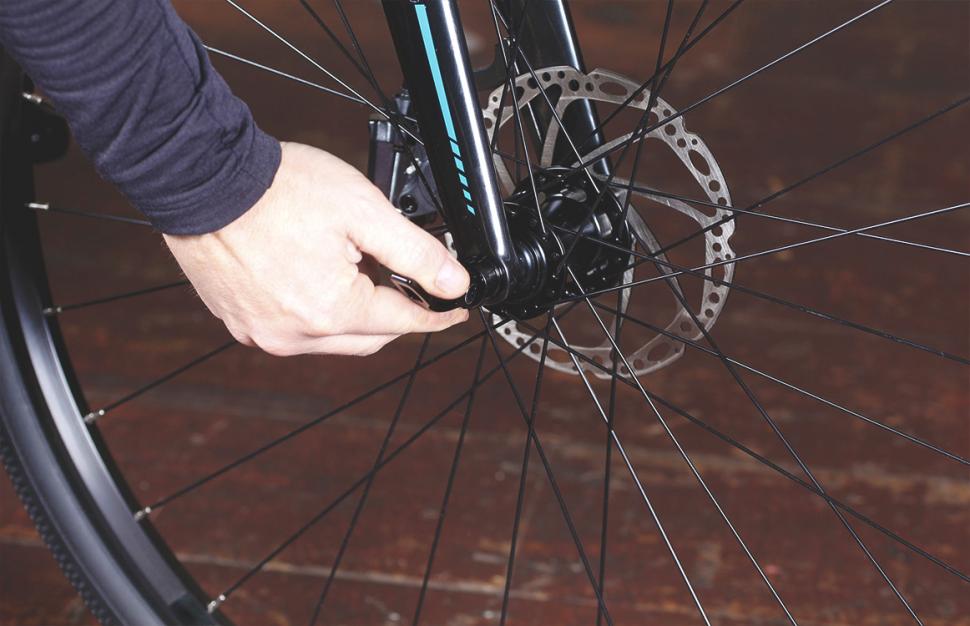
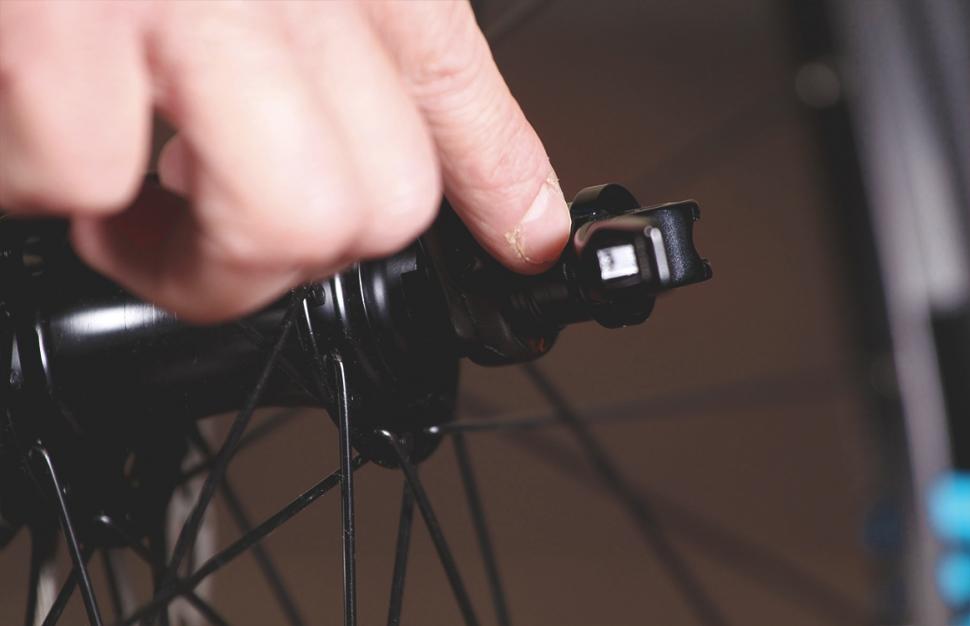
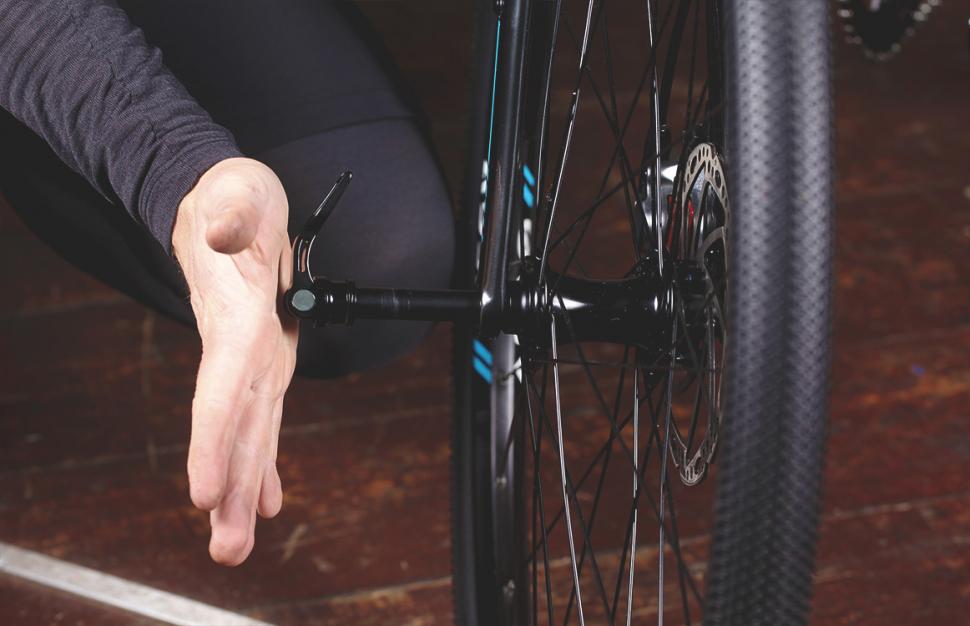
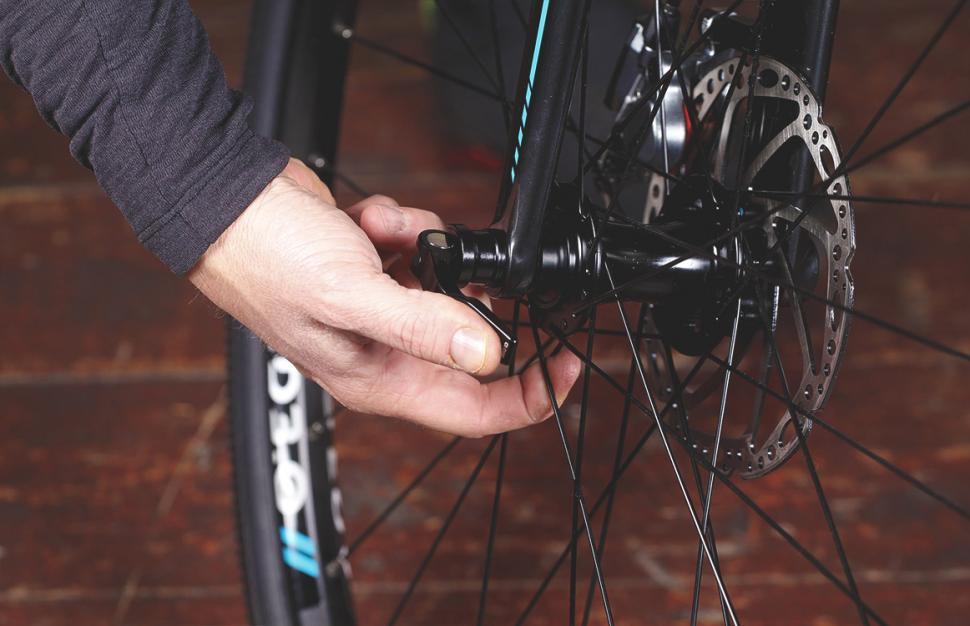
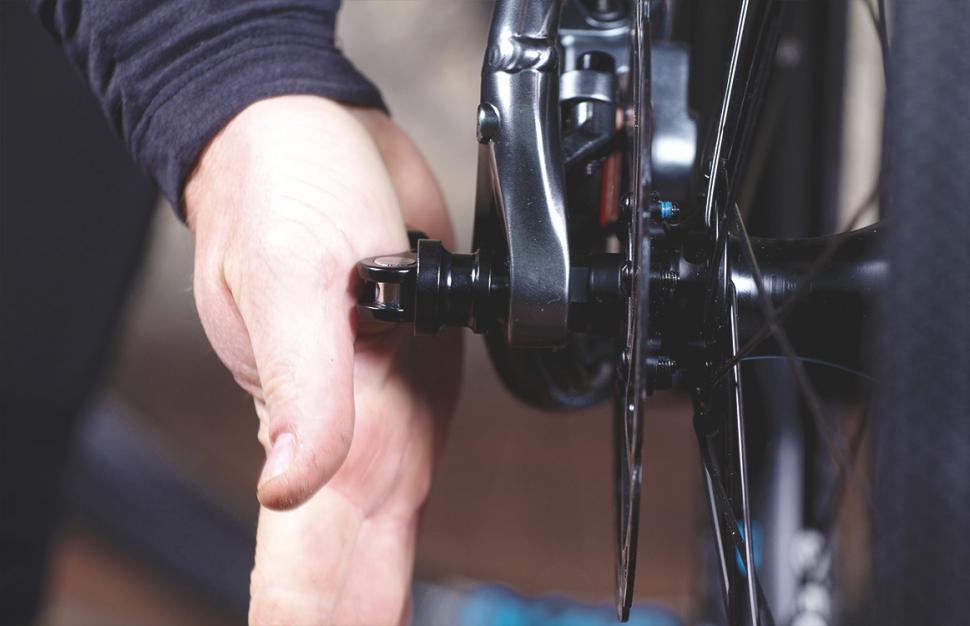
1 Open the lever Just like a traditional quick release lever, most through-axles also use a flip lever. This has to be opened in order to remove the wheel. Usually it will have a slightly curved shape and the curve should point in towards the frame (or fork) when closed and away from them when open.
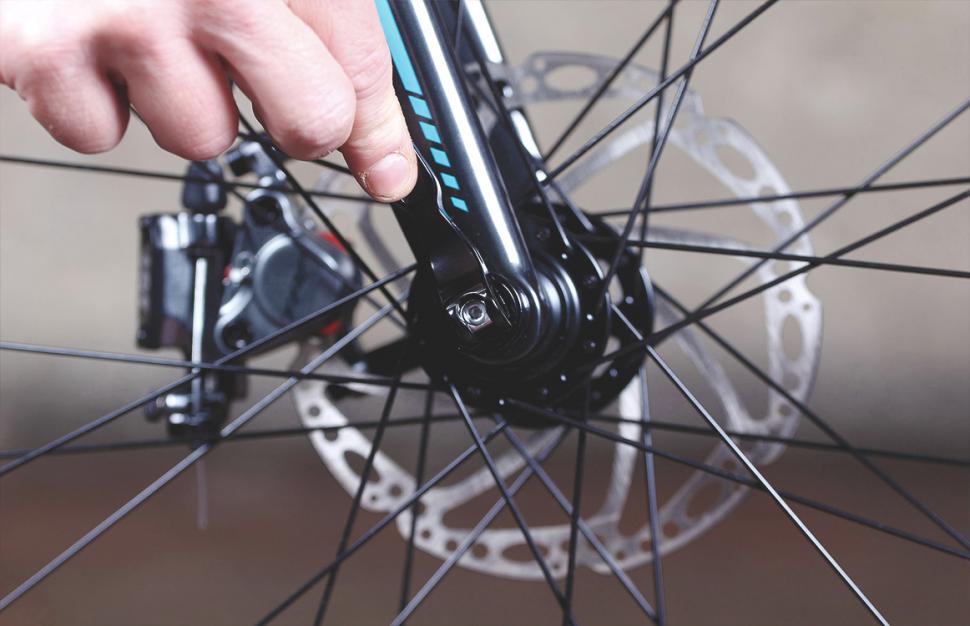
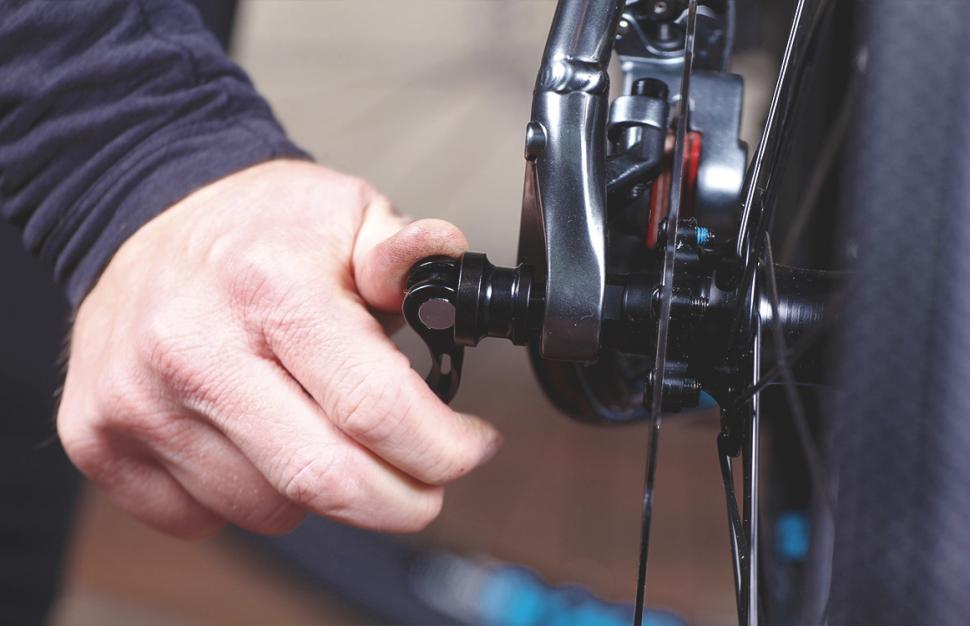
2 Locate the lever in the axle As you open the lever you must look for the recess in the alloy collar underneath the pivot. The back of the lever must sit in this recess, so that you can turn the axle and begin unscrewing it.
3 Unscrew the axle With the lever engaged into the recess in the collar, you can rotate the lever. The lever turns the collar and unscrews the axle.
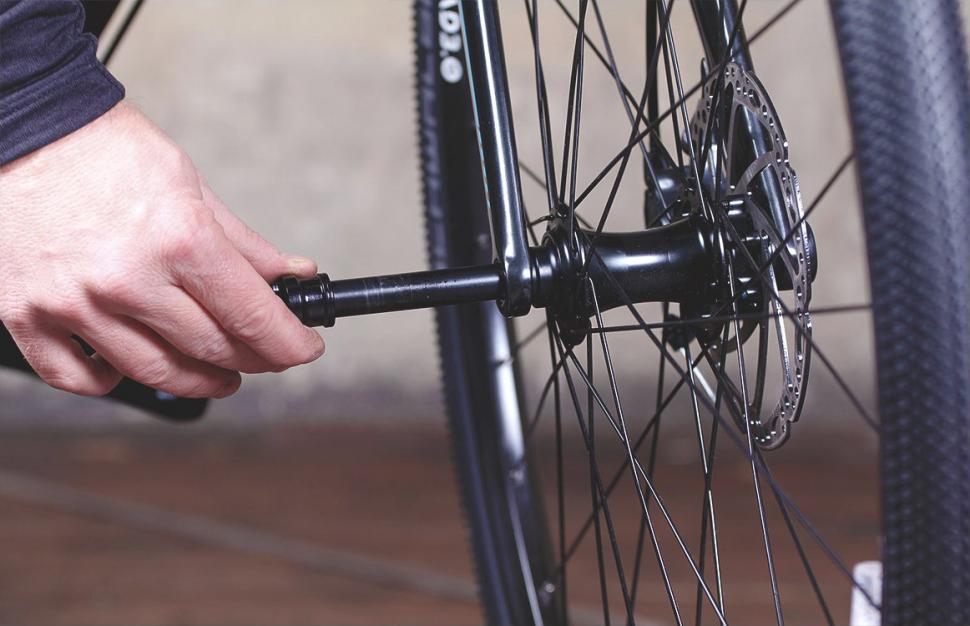
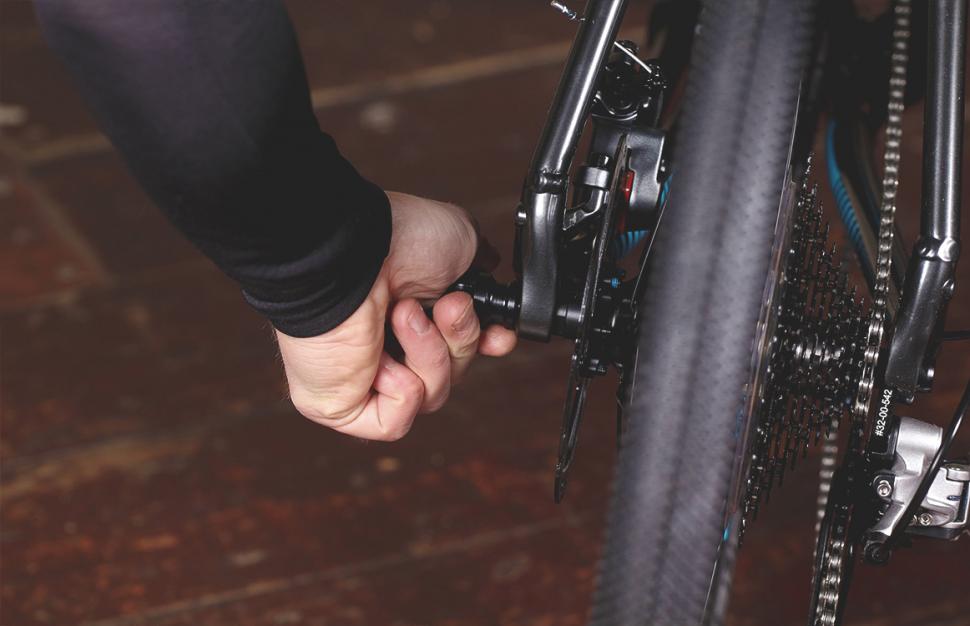
4 Pull the axle out As you unscrew the first few turns of the lever, you'll feel the threaded portion of the axle (the bit which screws into the opposite drop out) disengaging from the fork. When you feel this, you can just pull the rest of the axle straight out.
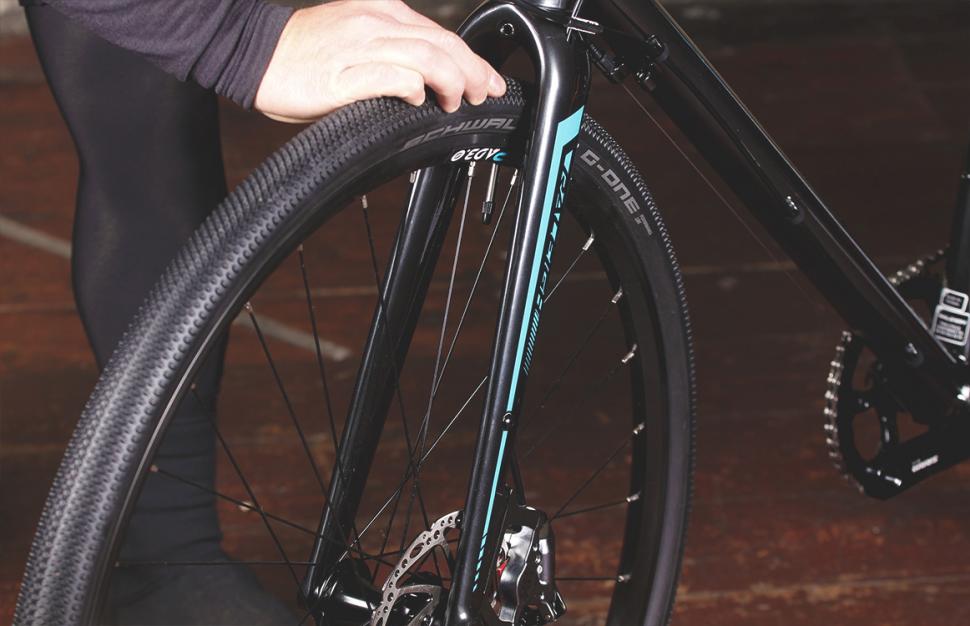
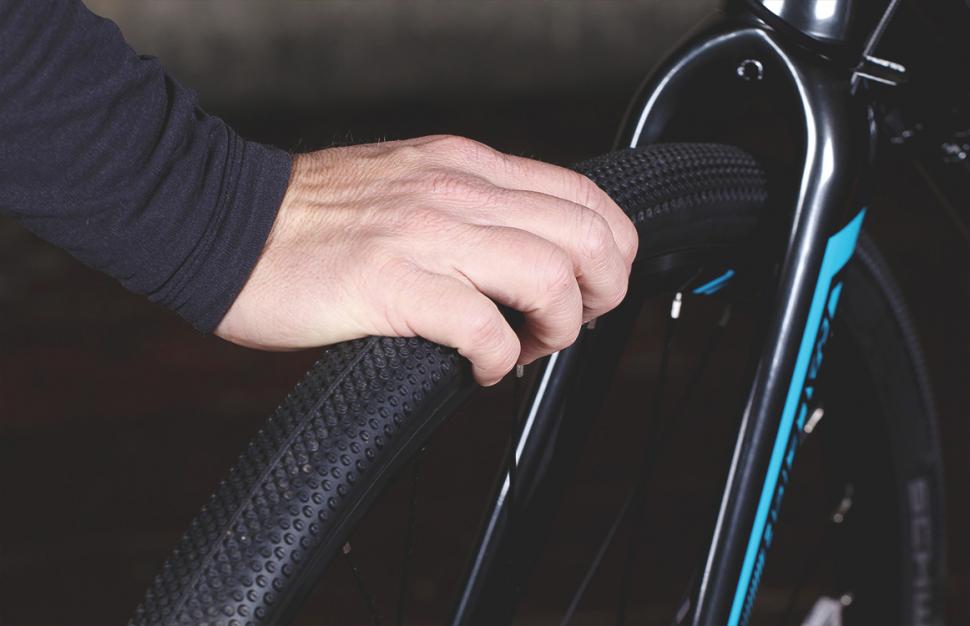
5 Drop the wheel out With the axle removed from the fork, you can now drop the wheel out. Sometimes you'll need to give the top of the tyre a little tap, because the fork dropouts can grip the hub axle caps.
Refitting the front wheel
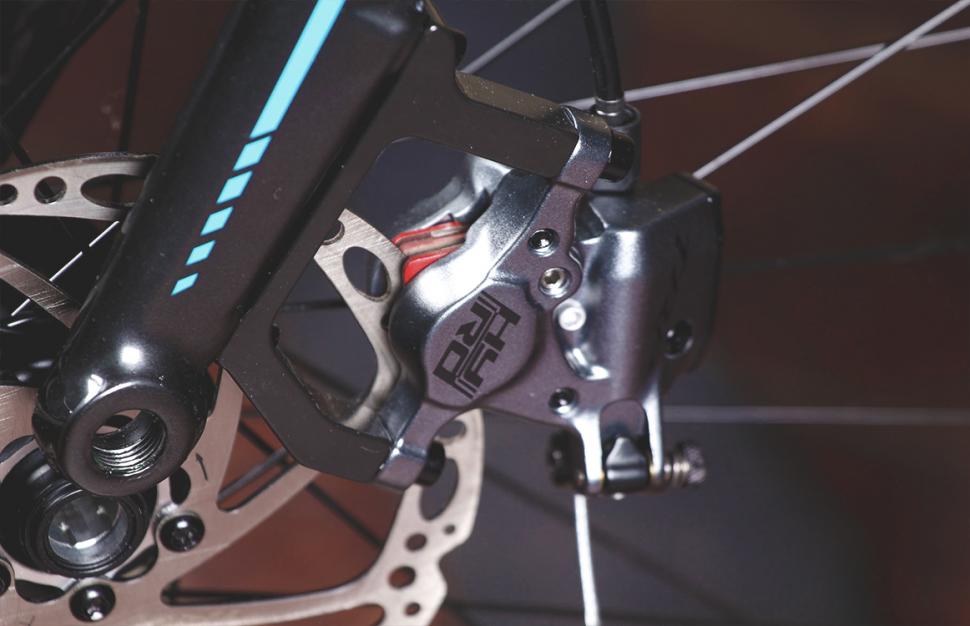
1 Locate the rotor in the brake and hub in the drop outs When refitting the front wheel in the fork, make sure the disc pads aren't dislodged. They shouldn't be as they're pinned in, but it's happened to us before. We've also mangled a pad carrier spring, so get the rotor lined up before you try and slam the wheel into position.
2 Check the wheel's in position As the disc rotor enters the calliper the wheel hub axle ends will find their slots in the fork. Some times a gentle wiggle and pull on the top of the wheel is needed to get everything seated and centered. Make sure the wheel is centered; if it's off the axle won't pass through the hub and engage cleanly.
3 Slide the axle in With the wheel now sitting squarely in the drop outs and brake calliper, it's time to fit the axle. They only fit from one side, usually the right hand (non disc) side. This keeps the lever away from a potentially hot disc brake rotor. On some hubs the central tube through which the axle passes inside the hub body can float about a bit and not immediately line up. This can make engagement with the threaded portion of the opposite fork leg a bit tricky. If this happens, you'll need to waggle and turn the axle at the same time to gently to align this tube and engage with the fork thread.
4 Screw in the axle Wind the axle lever in to pull the fork legs together. Check to feel the action of the lever assembly, you should need some force to flip the lever to closed, though not as much as a traditional open dropout quick release lever, as once closed there is no way for it to allow the wheel to fall out. Fold the lever over into the closed position.
5 Check it's tight Give the top of the wheel a little wiggle just to make sure it's firmly held. If that's fine give the wheel a spin to check the rotor is running cleanly through the brake calliper.
Removing the rear wheel
Removing the rear wheel seems to cause many people headaches. True, the design of the drop outs on some bikes does make it a little tricky, but there are a few tricks to help make it as quick and easy as possible.
1 Downshift to the smallest sprocket You want to let the rear wheel drop out of the frame as easily as possible. If the chain is on anything other than the smallest sprocket, tension in the rear derailleur and interference between the sprocket and jockey wheel will make it harder to drop out the wheel. The further up the cassette the chain, the more likely it is that you'll have problems.
2 Undo the lever Flip the rear lever to the open position, as you did for the front wheel. Engage the back of the lever into the carrier recess and unwind the threaded end of the axle from the drive side dropout. When you sense the clunk of the thread releasing, you can slide the axle out of the wheel.
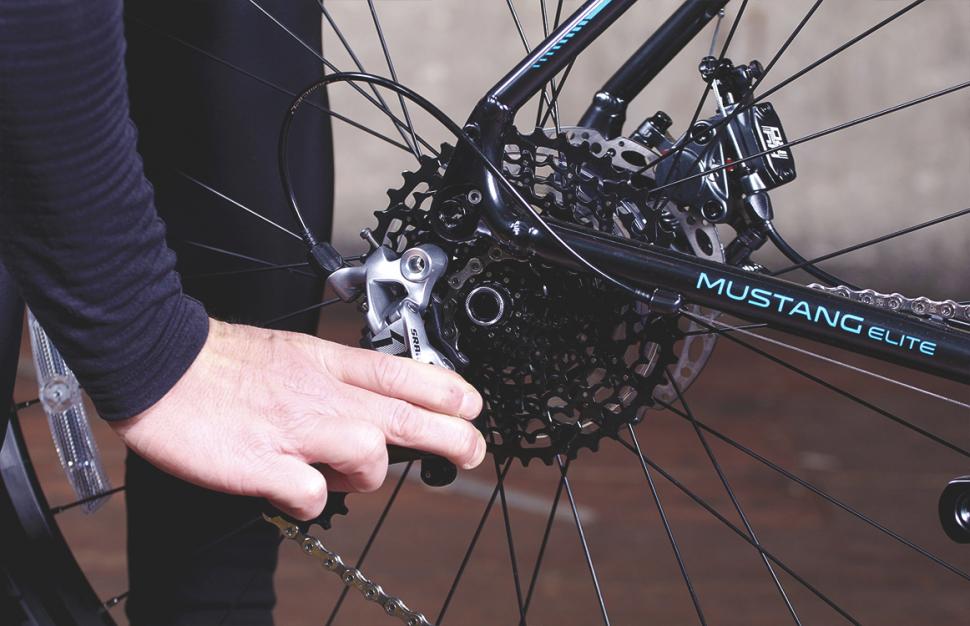
3 Let the wheel out For a standard rear derailleur pull the body of the derailleur backwards and the rear wheel should fall out.
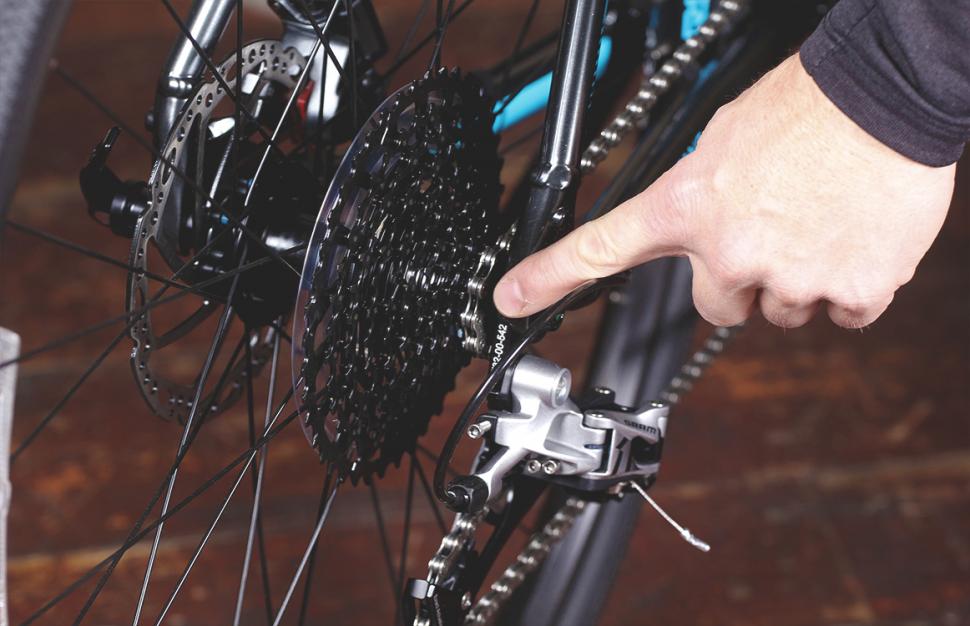
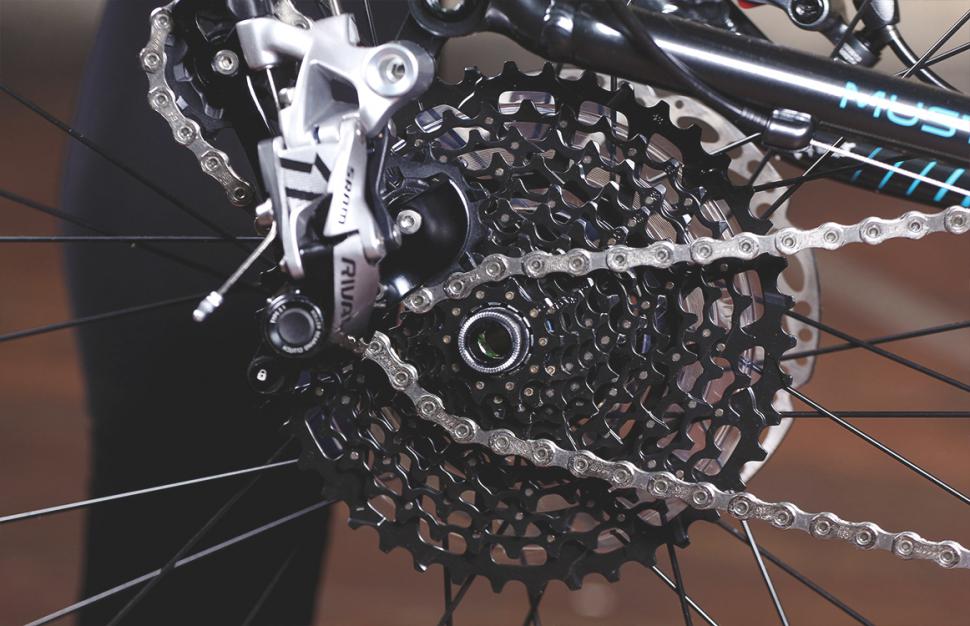
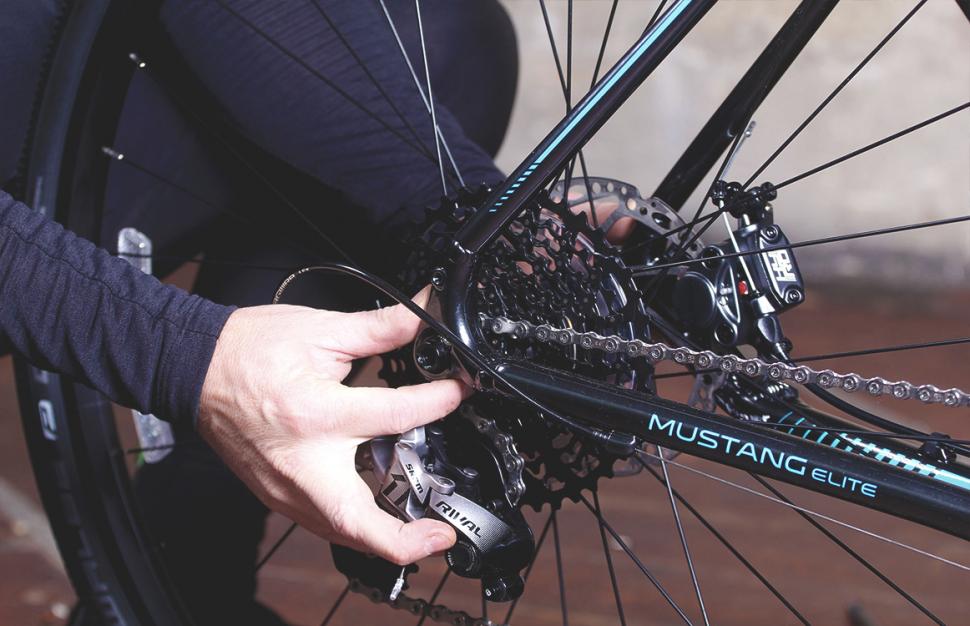
If you have a SRAM Type 2 rear derailleur (as shown), depress the lock button and swing the arm of the derailleur forward to lock it. This creates a slack chain. The wheel will now release from the frame, it night take a little nudge on the top of the tyre to get it moving. Similarly for a Shimano Shadow type clutch rear derailleur, move the clutch switch to the off position.
With the chain now slack you can pull the derailleur body backwards to create an obstruction-free path for the axle (the silver circle in the centre of the black cassette, above).
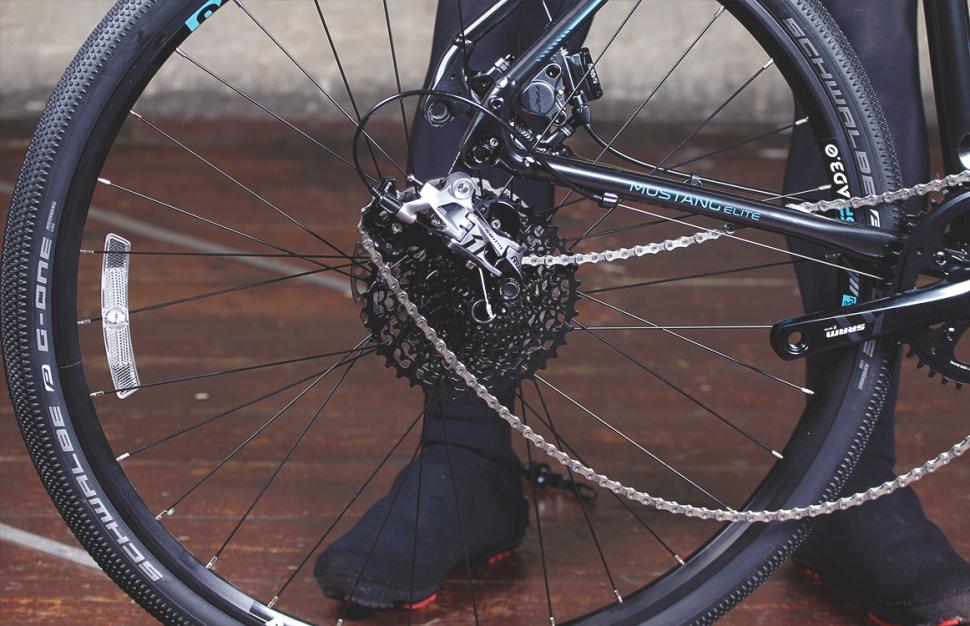
4 The wheel out The wheel is free from the frame and disc brake.
Refitting the rear wheel
This can be a little more tricky, as you have to simultaneously line the chain up on the sprockets, guide the disc rotor between the brake pads and into the calliper, and ensure the axle is going to line up with the frame drop outs.
1 Position the sprocket and chain Line up the top run of chain so that it sits on the smallest rear sprocket. Ensure the lower run of chain is running below the axle.
2 Pull the wheel into place It should just be a case of bringing the wheel and the frame together gently to get a fit, but you often need to guide the axle with your fingers. Mind out for sharp edges. There should be a sense of the axle hitting its dropout stops and sitting squarely in the frame. Check the tyre position in the seat stays, if it isn't central, it's not properly seated. Pull the wheel out for another go. As you get to know your wheels and frame and the way they fit together become more familiar, you'll find the process becomes easier.
3 Replace the axle With the wheel lined up you can reinsert the through-axle. Try gently rotating the axle as you insert it, it can help the axle move through the hub.
4 Screw the axle into place When the threaded end of the axle touches the far drop out, make sure the lever is open and begin to wind the lever to engage the axle and frame threads.
5 Tighten the axle Make sure its tight enough to stop any movement between the hub and frame and close the lever.
>> Read more: The full archive of road.cc maintenance articles
Latest Comments
- MTB Refugee 12 min 14 sec ago
Your argument doesn't really hold water....
- quiff 13 min 16 sec ago
Which makes the following a bit disingenuous:...
- wtjs 14 min 3 sec ago
the vast majority of the decisions made by the 'police' in these instances are actually made by civilians...
- brooksby 17 min 20 sec ago
https://en.wikipedia.org/wiki/Sun_City_(song) ?
- belugabob 1 hour 21 min ago
Yes, they have limited time to search the CCTV footage - which is why you'd hope they'd be familiar with the binary search method,which reduces the...
- brooksby 2 hours 13 min ago
The citizenrider blog always refers to them as "smokeless mopeds".
- OnYerBike 3 hours 43 sec ago
Out of interest, how much difference does Columbus versus Reynolds make? Both come across as comparably premium brands making "nice" steel tubes. I...
- Secret_squirrel 3 hours 5 min ago
The only facts there are that some of your statements apply to some Chinese companies some of the time. For example - China's Renewables mix hit...
- jaymack 3 hours 23 min ago
Alternatively you could make your own for pennies a bar. After all if you've got the time to train to the extent that you 'need' this sort of ultra...
- wtjs 3 hours 34 min ago
Bungle_52 below says: Gloucestershire will now only send an advisory letter for a close pass no matter how close. That shows how much progress is...

Add new comment
15 comments
One bit of useful advice you ommitted was copper slip paste or other compound on the axles to prevent them siezing.
And yes, before anyone asks, it did happen to me. Whether a freak occurrence or not, the axle bonded to the free hub and had to be cut out.
Looking forward to "how to blow up a tyre"
It's all a lot easier if you turn the bike upside down. Don't know why it's so tabo?
I prefer the Allen key bolt through, rather than a QR handle. I've had the notch in the handle round off, and you have to fiddle to get it to the correct angle.
Canyon have a neat system where the handle stows inside the axle which solves most of these issues.
tl;dr
Leftie loosey, righty tighty.
That's it folks.
Which bit should I be turning left / right? The top or bottom of the bolt?
My new bike has through axles and I really like them. The ones on my bike don't have a lever, just a hex key hole which I think looks much smarter.
I've always though that quick release was utterly pointless unless you have a car following you around with spare wheels that would allow for a quick change. For pretty much every other situation, if you get a puncture you're going to have to stop and sort it out and having to use an allen key, or even a spanner for wheel nuts, instead of using a quick release skewer, really isn't going to add much time to the overall process.
^ Ah; the Oscar Wilde benefit.
My bike has through bolt on the front wheel and standard skewer on the rear. I much prefer the through bolt. I do often add a small dob of grease on the threads of the through bolt before reassembly.
Why is the through bolt better Augsburg? I've never used one and, although it looks simple enough, I feel it might be a case of belt and braces?
1. Much tighter tolerances than a standard QR - virtually zero ability for the wheel to be crooked or move in the dropout under braking relative to the fork, which leads to brake rotor rubbing on pads. This is 95% of the benefit, IMHO as rubbing pads are a PITA, either the moment you start riding, or after heavy braking if the (standard QR) wheel shifts in the dropout.
2. Stiffer package overall - gives better handling (argubaly minor benefit as most people don't get anywhere close to the limit with standard QR's)
3. Completely removes the risk of something going horribly wrong under heavy braking - on the front wheel the natural force when braking is to try and rotate the wheel down and out of the dropout. If your standard QR has come loose, the wheel could be dislodged. This is pretty darn unlikely, granted.
4. I believe the overall package is safer for beginners, too - it's harder to incorrectly install a through-axle.
Rubbing rotors are what has put me off road disc brakes. Is this mostly a problem on the front as opposed to the rear?
I'm thinking of getting a Genesis Datum which had a qr rear and thru front.
[/quote]
1. Much tighter tolerances than a standard QR - virtually zero ability for the wheel to be crooked or move in the dropout under braking relative to the fork, which leads to brake rotor rubbing on pads. This is 95% of the benefit, IMHO as rubbing pads are a PITA, either the moment you start riding, or after heavy braking if the (standard QR) wheel shifts in the dropout.
2. Stiffer package overall - gives better handling (argubaly minor benefit as most people don't get anywhere close to the limit with standard QR's)
3. Completely removes the risk of something going horribly wrong under heavy braking - on the front wheel the natural force when braking is to try and rotate the wheel down and out of the dropout. If your standard QR has come loose, the wheel could be dislodged. This is pretty darn unlikely, granted.
4. I believe the overall package is safer for beginners, too - it's harder to incorrectly install a through-axle.
[/quote]
The bolt through design was originally from MTBs with upside down forks, then they started becoming the norm on long travel forks and are now the norm on most reasonable quality forks.
Initially it was just a case of stiffening things up both in general and so that the braking forces were more evenly distributed. Later it was noticed that you could actually make a lighter fork using a bolt through because you don't need to beef up the caliper side leg to take twisting forces.
I'm guessing the latter point is more the focus with the road market. Incidentally it probably makes manufaturing the carbon fork legs eaasier too as the dropouts can be milled up easily and the legs only face simpler forces.
What is the point?
Lots of point. Ever since I upgraded my track bike from standard QR to Through Axle with discs, the guys at Herne Hill can't stop talking about my setup.