

- News
- Reviews
- Bikes
- Accessories
- Accessories - misc
- Computer mounts
- Bags
- Bar ends
- Bike bags & cases
- Bottle cages
- Bottles
- Cameras
- Car racks
- Child seats
- Computers
- Glasses
- GPS units
- Helmets
- Lights - front
- Lights - rear
- Lights - sets
- Locks
- Mirrors
- Mudguards
- Racks
- Pumps & CO2 inflators
- Puncture kits
- Reflectives
- Smart watches
- Stands and racks
- Trailers
- Clothing
- Components
- Bar tape & grips
- Bottom brackets
- Brake & gear cables
- Brake & STI levers
- Brake pads & spares
- Brakes
- Cassettes & freewheels
- Chains
- Chainsets & chainrings
- Derailleurs - front
- Derailleurs - rear
- Forks
- Gear levers & shifters
- Groupsets
- Handlebars & extensions
- Headsets
- Hubs
- Inner tubes
- Pedals
- Quick releases & skewers
- Saddles
- Seatposts
- Stems
- Wheels
- Tyres
- Health, fitness and nutrition
- Tools and workshop
- Miscellaneous
- Cross country mountain bikes
- Tubeless valves
- Buyers Guides
- Features
- Forum
- Recommends
- Podcast
review


£49.99
VERDICT:
A sensible way to convert normal rims for tubeless use, with a few caveats and the right tyre
Weight:
681g
Contact:
At road.cc every product is thoroughly tested for as long as it takes to get a proper insight into how well it works. Our reviewers are experienced cyclists that we trust to be objective. While we strive to ensure that opinions expressed are backed up by facts, reviews are by their nature an informed opinion, not a definitive verdict. We don't intentionally try to break anything (except locks) but we do try to look for weak points in any design. The overall score is not just an average of the other scores: it reflects both a product's function and value – with value determined by how a product compares with items of similar spec, quality, and price.
What the road.cc scores meanGood scores are more common than bad, because fortunately good products are more common than bad.
- Exceptional
- Excellent
- Very Good
- Good
- Quite good
- Average
- Not so good
- Poor
- Bad
- Appalling
When it comes to tyres, it's now accepted wisdom that softer and wider is faster for a number of reasons, including a shorter, fatter contact patch giving lower rolling resistance and better grip. The Slime Pro Tubeless Kit lets you ditch your clincher combination for a fatigue-reducing, smooth-rolling silky setup. It has clear instructions, it's reasonable value, and – with the right tyre and wheel combination – still working for me 2,000km later.
In the UK a major benefit – possibly the major benefit – of going tubeless is puncture resistance. A tubeless tyre is inherently stronger and more puncture-resistant than a normal clincher or tubular. There's no inner tube to pinch flat against the rim should you hit a pothole, and the sealant should fill any small cuts that do occur.
Find your nearest dealer here
Buy this online here
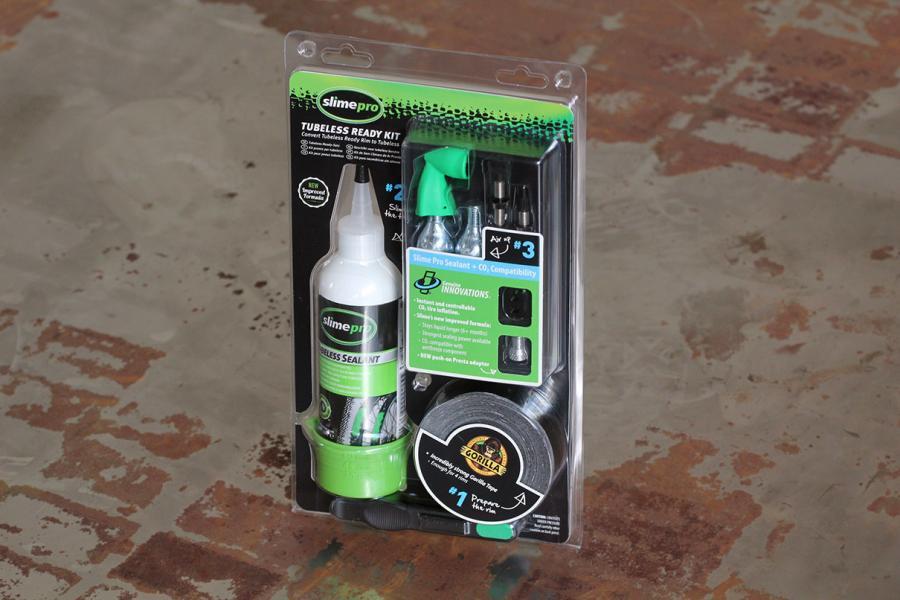
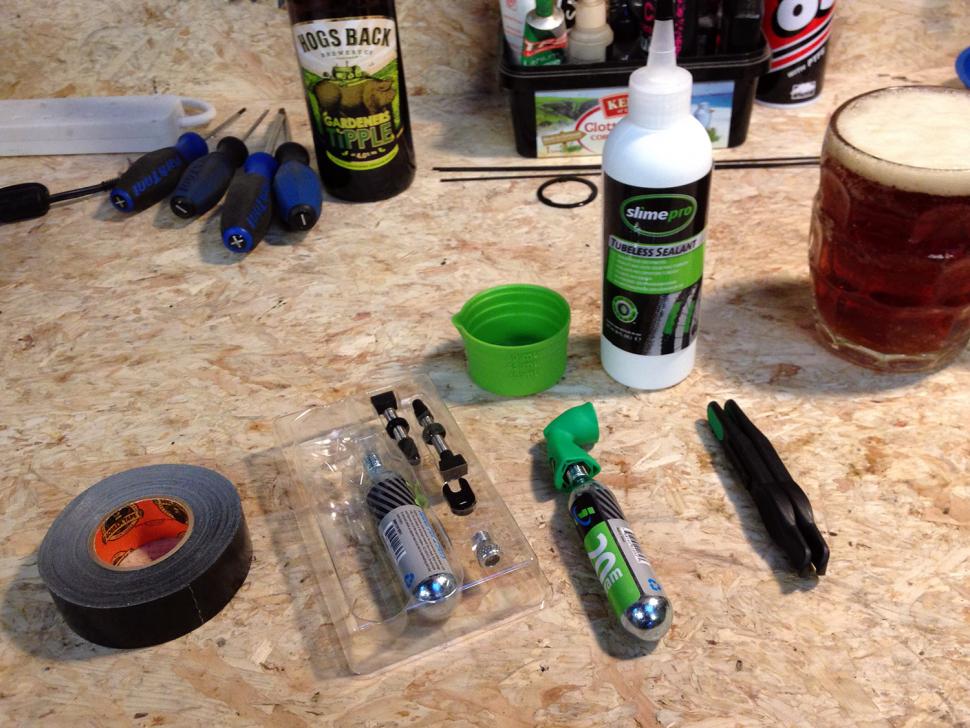
The kit consists of an 8oz bottle of Slime Pro sealant, a roll of black Gorilla fabric tape, two 40mm tubeless valves with a valve core tool, a Microflate Nano CO2 inflator with two 20g cartridges, two Genuine Innovations tyre levers and a Presta-Schrader valve adapter if you need to use a compressor.

The kit is intended for mountain bike as well as road use, hence the wide tape and inclusion of a large-volume CO2/Schrader compressor adapter – you're much more likely to be needing CO2 or compressed air to seat a large-volume mountain bike tyre than a smaller, tighter-fitting road tyre.
Given the warnings on the packaging you'd have hoped for some rubber gloves as well – make sure some are to hand for fitting. Half the sealants' ingredients are of 'unknown acute toxicity', while three-quarters pose 'unknown hazards to the aquatic environment'.
The instructions clearly state 'NOT FOR USE TO CONVERT NON-TUBELESS SYSTEMS TO TUBELESS'. Fortunately here at road.cc we drop icecubes down the vest of all-caps bolded instructions.
While you can bodge the rest of a tubeless road setup, there's one thing you have to use: a proper tubeless tyre. This is a must. In the mountain bike world, people repurposed tubed tyres for years, but on a road bike this is a total no-go that could get you killed or worse.
The issue is 'burping'. As you roll over into a corner the tyre deforms and eventually the looser-fitting or more elastic bead unseats from the outside edge of the rim, allowing some air to escape. Road tubeless tyres have much stronger beads (usually carbon fibre) and tougher sidewalls to prevent this.
On a slow dirt track a burp is usually recoverable and you just pop some more air in. If it happens in the apex of a 70kph Alpine hairpin the consequences would be injurious at the least. Don't even think about it. Get yourself a decent tubeless tyre such as the Schwalbe One, and be confident that it's probably going to be a tight bugger to fit.
Setup
I started off with a set of standard Shimano RS500 wheels and a pair of Hutchinson Sector 28 tubeless tyres.
The instructions are pretty good – non-mechanically-minded persons shouldn't have a problem.
I cleaned the rim with a cloth and iso alcohol to ensure best possible tape adherence. The tape needs cutting down to your rim's internal width plus 3mm. Fortunately it rips along its length beautifully: just measure the right width, make a small cut, rip a bit along and start taping, pausing to rip the excess tape off as you go. Some tension is needed to 'walk' the tape down between the rim walls and onto the bed – it quickly becomes both intuitive and strangely pleasurable.

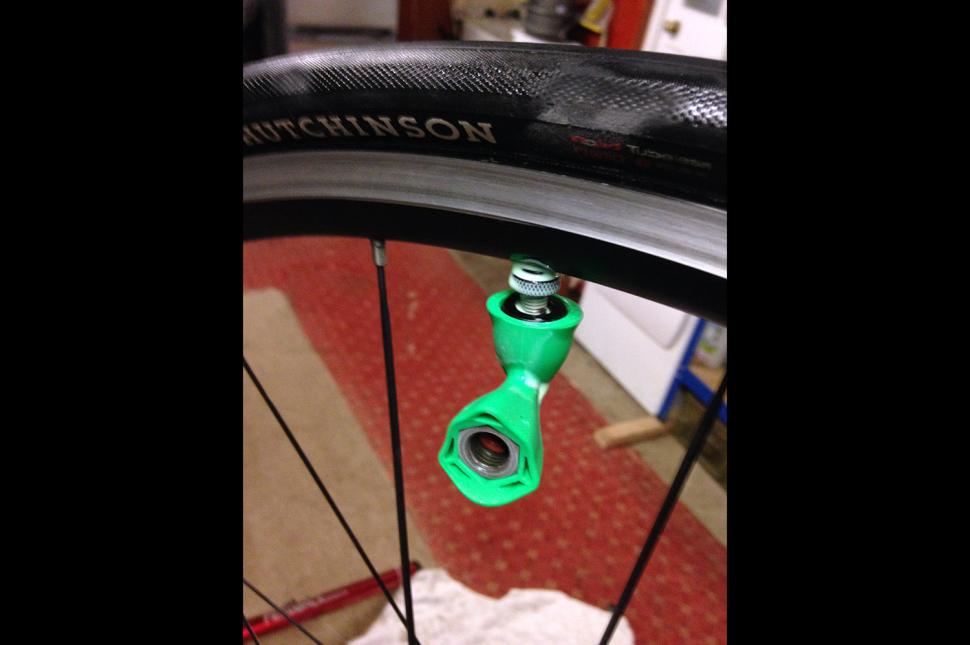
After two laps of the rim (see later comments regarding one layer vs two), seat the tape down well with a cloth and carefully get the edges done with a plastic tyre lever. Poke the valve through the tape and tighten it down hard.
Fitting the tyre is fun – the thicker bead makes for a squeeze between the protruding valve block and rim, with the tight tolerances meaning getting the bead over the whole rim is quite a battle.
Both GI tyre levers snapped immediately. Note: take great care not to damage the new tape.
Finally, tipping 1.5oz of Slime in using the cup provided was easy. Rotate the wheel and fit the rest of the tyre.

The point of including the Microflate Nano CO2 inflator (and the compressor-friendly Schrader adapter) is to seat the tyre the first time. GI advise that Slime Pro is the first sealant to be both CO2-compatible and to contain an antifreeze – both important issues if you use CO2 for installing tyres or reinflating on the road, and ride in cold weather.

Getting the Sector 28s to seat on the RS500s required a whole cartridge for the first wheel. The second one went on with a trackpump. Unfortunately, after about two or three hours the tyres were down to about 20psi. There were no evident leaks around the tyre bead or valve – it turned out to be micro-leaks through the Sector tyre wall. The Sector doesn't have a Butyl liner in the sidewall, and the combination of that plus the latex-free Slime Pro sealant means an airtight system couldn't be established. This is no slight on either product - the Sector 28 is a highly-regarded tubeless tyre that got 4 stars from road.cc. Rather, the lesson is that this combination is to be avoided.
The next combination I tried was a pair of Schwalbe One tyres on a new pair of Cero AR24 wheels, which needed some encouragement with decent levers to go on but nothing unseemly. This time one wheel held air from the start – 100psi, well over the likely user pressure. The other was down to 20psi after a few hours, but no sidewall leaks at all.
After a bit of investigation I came to the conclusion that it must be the Gorilla tape leaking in some way, so added another layer. This time the wheel held air fine.
After a week the first wheel started losing air, so I added another tape layer. Again, success. The tape had some marks where I hadn't been careful enough with the tyre lever, the second was unmarked – so the only conclusion I could draw was that after a few days of air pressure bulging the Gorilla tape into the spoke holes, there were enough micro-leaks in a single layer to make a difference.

On the road
The ride of the Cero/One combo is nothing short of a revelation, running what most would consider to be barmy pressures of 70psi rear/40psi front. My rider + bike combo weighs 83kg, with the recommended pressure for 28mm tyres being 80 rear, 50 front for a 15 per cent tyre drop.
The stiffer sidewalls of the tubeless One made for a harsher ride than the same size clincher + tube at these lowish pressures, but going 10psi lower still transformed the ride into smooth, fast, comfortable and grippy. This is comparing them with the class-leading puncture-resistant Continental GP 4 Seasons 28mm – so high praise.
Rural Hampshire roads being what they are, a few decent potholes were whanged – the sort that would have you wincing and then stopping to repair the inevitable double snakebite – but such outcomes were non-existent with this tubeless setup.
I tried the same taping and sealing on a pair of Raleigh Probuild wheels with Alex CX28 rims. Again, two layers of tape and the system held air just fine.
As a process for converting to tubeless, the Slime Pro kit works. It was even easier with a pair of Mavic Ksyrium SLR alloy clinchers, as they feature a rim/spoke design where the rim is sealed – no spoke holes needed taping. So a short strip of tape over the valve hole to assist the rubber valve block in achieving airtightness, Schwalbe Ones on with a reasonable but not outrageous use of levers and, hey presto, fat and comfy rubber on a nice light wheelset.
Long-term maintenance
I've been running the Schwalbe One + Cero AR24 setup for about three months and around 1,500 fast, hilly, flinty kilometres with no problems at all. Once a week 10psi or so needs adding, but nowhere near what was needed using a standard clincher/tube setup, which had to be topped up every few days.
The only maintenance issue I struck was after a month or so the valves started to get a bit clogged. When topping up with air, if there's even a drop of sealant inside the valve, undoing it to add more almost inevitably requires a press on the valve core – which then sprays a tiny bit of sealant through the valve itself. Over time this solidifies, eventually blocking the valve – hardly surprising, it is a coagulant, after all.
The sealant does such a good job it's impossible to unblock the valve using wire or high-pressure air. The solution is to unscrew the valve core completely once a month using the included valve tool, remove it, and unscrew the small knurled head off the valve completely (this requires pliers the first time as it's peened over to prevent it falling off when unscrewed).
Once you've removed the head you can take the core of the valve right out and get rid of the offending plug of solidified sealant. Your valve core is now as-new and can be re-installed – just don't unwind the head too far when out and about. Although if you do it's not the end of the world, as air pressure will hold the valve closed. Considering the benefits tubeless brings, as an extra maintenance step it's not onerous – just remember to do the knurled-head-peening-removal when you first install the valve, and take the tiny valve tool along so you can remove any blockage when out in the wilds.
When the (almost) inevitable happens
Slime appear to be correct with their 'seals cuts up to 3mm' advice. A 3mm-wide cut right on the centreline of the rear Schwalbe One on the Mavic Ksyrium SLR resulted in a flat tyre and all the sealant leaking out. Turning the cut to the lowest point and inflating the tyre predictably resulted in a loss of sealant, then a seal holding air at around 50psi, but the plug of green rubber in the cut couldn't withstand higher pressures. Adding another 1.5oz of sealant and a bit of spinning the system held air overnight, including a nocturnal test ride, but the next morning a slight top-up of air resulted in a catherine-wheel of green spray as the bung failed again.
After some research on tubeless repair I opted for a traditional self-vulcanising Tip-Top patch from Rema. It was a new one on me, cleaning the inside of a tyre with iso alcohol then buffing, gluing and applying a patch, but there was a minimum of mess and the end result held air.
Arguably you could perform this repair on the road if you carried a sealed alcohol swab, patches, buffer and tube of glue – properly old-school and funny how things come full-circle. Given how rare actual punctures to tubeless tyres are, though, I think I'd prefer carrying and using a small puncture kit as opposed to a full inner tube. To fit a tube you'd have to remove the tubeless system valve as well as lose all your sealant, then still have to repair it back at home. Faff.
Both Slime and Schwalbe confirmed that so long as the area to be patched is clean, there's no reason using a normal inner tube vulcanised patch shouldn't be a permanent repair. You could possibly use a self-adhesive patch in a pinch, but I've never found these to hold air long-term and there's no guarantee the adhesive would play nicely with the Slime sealant.
In the round
Slime has made a specific design choice to put in less latex to keep the sealant fluid over time and CO2/freeze-proof, so a tyre that suits that design is needed – hence the One worked, the Sector didn't. If you've invested in a pair of Sectors you could use the Slime kit and add a bottle of latex-based sealant instead. The kit includes enough Slime Pro sealant to do four wheels, or two wheels twice. There's enough tape to do four wheels with one layer, but as above you really need two layers to be guaranteed a good seal.
So really, the kit is good for one set of wheels, done properly, with spare sealant left over for next year or a tyre change. You may well wear the tyre out before the sealant needs replacing – there's no definitive lifespan for the Slime Pro liquid. With latex-based sealants you can tell it's time after about three months as the fluid has dried into an unholy mess.
At £49.99 the kit brings together everything you need to go tubeless, if you have a tubeless tyre handy. Arguably you could source the valves, tape, sealant and inflators separately – but you won't save much if anything (you can buy the kit for around £40 if you shop around). And you won't know whether you need the CO2 canister until you do. The Microflate Nano is a very nice, small inflator in its own right, for which you twist the canister to turn the gas on/off. After half-using a canister two months ago, it's still charged.
The Slime Pro Tubeless kit is sensible money with clear instructions and still working (for me) perfectly 2,000km later. I'm now at the point of not taking pump/inner tube/levers on all but the longest of rides.
Just be aware of using a tyre without a butyl liner that then requires a different latex-based sealant. And consider taking a traditional patch kit and alcohol swab on expeditions. And pre-unpeen your valve cores.
Caveat everything.
Verdict
A sensible way to convert normal rims for tubeless use, with a few caveats and the right tyre.
road.cc test report
Make and model: Slime Pro Tubeless Ready Kit
Size tested: 3-in-one
Tell us what the product is for, and who it's aimed at. What do the manufacturers say about it? How does that compare to your own feelings about it?
For anyone with standard rims, who wants to dabble with tubeless without spending a fortune.
Genuine Innovations say:
The Ultimate Tubeless Solution! Three of the best brands have come together to offer the ultimate kit to go tubeless! Genuine Innovations' Microflate Nano and two 20 gram CO2 cartridges offer instant bead locking. The NEW SlimePro Tubeless Tire Sealant is the longest-lasting sealant available on the market today. We have included the amazing Gorilla Tape that will seal up to 4 rims. Included in the kit you will find two Presta valves with our newly-patented push-on Presta valve adapter, two tire levers and a valve core remover. There has never been a better time to go tubeless!
Kit includes:
8oz bottle of SlimePro Tubeless Tire Sealant
Green measuring cup
Two (2) 20g CO2 threaded cartridges.
Genuine Innovations Microflate Nano inflator
Two (2) black tire levers
Gorilla Tape – 30ft long and 1in wide
Push-on Presta valve adapter
Black Presta valve tool, 18 x 11.7 x 4.8mm
Presta valves, 40mm, nickel plated copper and rubber
Tell us some more about the technical aspects of the product?
Suitable for converting mountain bike and road wheelsets, for tyres that include a butyl liner in the sidewall.
Rate the product for quality of construction:
8/10
The tape and valves do a good job once their applications are understood.
Rate the product for performance:
7/10
With the right application the components work well.
Rate the product for durability:
7/10
It's still working three months later.
Rate the product for weight, if applicable:
7/10
Hard to see how it could be lighter.
Rate the product for value:
7/10
If you need a CO2 inflator it's good value and much less faff than purchasing the individual components.
Tell us how the product performed overall when used for its designed purpose
With a Butyl-lined tyre and two layers of tape it performed exactly as required.
Tell us what you particularly liked about the product
Putting the tape on. Weird, I know.
Tell us what you particularly disliked about the product
The trial-and-error process of working out WTF was going on with the Hutchinson tyres.
Did you enjoy using the product? Yes
Would you consider buying the product? Yes
Would you recommend the product to a friend? Yes, definitely, but with the caveats on tyre choice and setup
About the tester
Age: 42 Height: 183cm Weight: 71kg
I usually ride: Charge Juicer My best bike is:
I've been riding for: Over 20 years I ride: A few times a week I would class myself as: Expert
I regularly do the following types of riding: club rides, general fitness riding, fixed/singlespeed, mountain biking, singlespeed and Dutch bike pootling
Living in the Highlands, Mike is constantly finding innovative and usually cold/wet ways to accelerate the degradation of cycling kit. At his happiest in a warm workshop holding an anodised tool of high repute, Mike's been taking bikes apart and (mostly) putting them back together for forty years. With a day job in global IT (he's not completely sure what that means either) and having run a boutique cycle service business on the side for a decade, bikes are his escape into the practical and life-changing for his customers.
Latest Comments
- A V Lowe 1 hour 5 min ago
Oh dear even your staff & copy checkers can't even use the right terminology...
- ktache 1 hour 14 min ago
Nokons on two of mine, longitudinal XTR on the other.
- wtjs 1 hour 42 min ago
Excellent, Lancashire Road Police! I and many others are pleased that some Police Services are stressing this point. Language is important:...
- mctrials23 3 hours 4 min ago
This is exactly the sort of thing AI enables them to do. Previously it was thought impossible to do something like "if user is travelling for 3...
- archieboy 3 hours 27 min ago
No, just to expensive, I went Jonas and Demi as the expensive picks....
- Oldfatgit 9 hours 13 min ago
[Snip]...
- chrisonabike 10 hours 32 min ago
Well, Edinburgh certainly has hills, there's quite a bit of pavé and Arthur's seat is regularly motor-traffic-free anyway, so that would work. ...
- AJ101 11 hours 8 min ago
It was never the same after David Duffield left. With no more "Turn your granny to the wall" it felt too professional. And in the era of big...
- chrisonabike 12 hours 51 min ago
I think there could be a whole other thread there... per your post on the funnies of the US vs. Switzerland. (Or possibly a report to government...
- LookAhead 13 hours 42 min ago
Now where's the fun in being logical?...


Add new comment
18 comments
Frosties did one in the 1970s ; it was gggggreat.
I'll get my tiger skin coat.
Hey it's a Masters degree, you only get those with really posh cereal like Quakers.
Law degrees gained from the back of a packet of Rice Crispies do not count...
Anyway...
Interesting.
Thanks. Particularly in the latex/non-latex sealant. I've got some tubeless ready (hunt) rims on order anyway, and was considering going tubeless. Not drying out is obviously a big advantage. I hate changing tubes/tyres. And i'm strangely lucky when it comes to punctures. I've only ever had three in thousands of miles of riding (including to Africa) and two of those were pinch flats, so am particularly unpractised.
AFAYK, lots of things. I'm not sure how you could tell one way or another from anything that I've said, but I do have a law masters as it happens, so whatevs.
If you think "big enough to read, understand, and make their own decisions" is of legal significance, I must assume that you aren't much versed in liability law either. There is actually a *reason* that such disclaimers "exist in pretty much every product user guide ever printed".
Whatevs. I withdraw my claim that you and road.cc have been wildly irresponsible here, if you're stating that you had the active collusion and encouragement of the manufacturer. But I wonder if you have any idea quite how big an issue you've created for them by saying so in a public forum.
The moment someone has a wipeout for undetermined reasons, and their lawyer starts scoping out the product manufacturers for potential liability, this is going to stand out like a sore thumb.
Let us be absolutely clear here, for the record:
You are claiming that Slime - in contradiction of the disclaimer on their packaging - tacitly encourage their product being used as a "bodge" in this way, and actively assist product reviewers in presenting it for use in that fashion?
Please bear in mind that your response will be easily searchable by anybody who suffers an injury following a burped or rolled tire. Slime's liability insurance just got a lot more expensive.
I have clearly caveated the considerations required, and explained the review process. AFAIK, you are not a lawyer versed in sporting goods liability law. Road.CC readers are big enough to read, understand, and make their own decisions. When you purchase a car the manufacturer accepts no liability for you looking at the stereo or satnav they have invitingly installed in your face instead of the road ahead. Likewise, Slime sell a product that can be used in a variety of ways, and the review describes one that worked given a particular tyre/rim combination, albeit in contravention of a clearly overly-restrictive and risk-averse disclaimer - the type that exists in pretty much every product user guide ever printed. If you cannot fathom this, I politely suggest you absent yourself from the modern world - it's full of apparent contradictions like this. Cheers.
As long as you are using tubeless tyres you will be absolutely fine. Tubeless ready rims just make the installation process easier and they retain the tyre when deflated.
Unbelievably irresponsible; a review premised on the deliberate and dangerous misuse of the product.
Unless you have proper, tubeless-ready rims or a proper conversion kit featuring ridged rim tape, tubeless tires are NOT suitable for standard clincher rims. The rim *may* hold the bead without dislodging, but it is not designed to do so, and it's not safe to trust it. It's the ridges that hold the tire in place, not the tightness of the bead, which would in any case depend entirely on the rim. Schwalbe One tubeless beads are not notably tighter than the standard clincher Ultremo ZX I had on before.
Your lawyers will have kittens if they see this; Slime Pro must be up the walls about it as well.
Stupid, dangerous advice, to a degree which casts doubt on the competence of every other product review I've seen here.
Some opinion and speculation wrapped up in a fair dollop of cross, so let me respond factually:
Slime were deeply involved in the testing process. I have about a hundred emails back and forth with their UK distributor, as well as the head product and technology people at their US HQ. They were so involved that when I struck issues with the Hutch Sectors they went out and purchased every rim I was testing, plus Sectors, plus One's, to replicate and test themselves so they could see the issues and learn themselves. They're a US company. Avoiding lawyers is a daily occurrence.
(noting that this manufacturer collaboration does not undermine the Road.CC review process - in fact the opposite. Had I gone with my original findings on the Sector I'd have bagged it as a one-star waste of cash, thereby depriving people of what is a perfectly valid way into road tubeless).
Slime make the disclaimer they do because the world of road cycling (or indeed cycling in general) is a broad church, with people trying all manner of weird combinations using kit of questionable quality/age/wear. They have zero control over how their product is used, so they caveat that with a basically nuclear statement - for road bikes, there is only *one* 'tubeless system' I'm aware of - Bontrager's TLR, where you purchase the wheel, tyre, sealant, valve and rim strip from ONE company. Tubeless in particular has been a mess of quasi-standards, incompatibility, trial & error etc. The one universal truth is that if a tyre is a cow to put on, it's going to be difficult to roll off. If you spec a tubeless tyre the bead will be inherently much stronger than a standard clincher.
Schwalbe sell repackaged Stan's sealant, rim tape and valves. They do not make any specific caveat that their tyres must be used on a tubeless-specific rim such as a Stan's Alpha or a Bontrager TLR - although huge kudos to Trek/Bontrager for leading the charge here to demystify / system-ise tubeless road with their TLR setup.
The mechanics of MTB tubeless (Mavic's UST notably) and road tubeless are quite different. MTB tubeless runs at stupidly low pressures, and relies on the bead locking into the rim to prevent burping. Road tubeless runs at typically 3-5 times the pressure on a much narrower and stiffer tyre - so the strength of the system comes from the bead itself being held against the rim wall and being a tight enough and inflexible enough fit to retain its radial hold even under high side loads when cornering. The intrinsic argument of whether the rim is strong enough to hold the bead in place is just as relevant to clinchers - if your tyre is so loose that cornering will expose the tube, rim wears through or a sidewall cut blows your tube out you're just as stuffed on a clincher as a tubeless where a rim fails. And (arguably, I haven't done the maths) the higher inherent pressures required for clinchers - even fat ones - will stress the rim more.
Let's turn this review competency thing on its head. I purport that fewer than 0.1% of UK cyclists own let alone know how to use a torque wrench (I own six, ranging from 2 to 80NM, BTW). And none of them would take it out on a ride with them. Therefore, is Road.CC irresponsible in publishing reviews of multitools, or home-use allen key sets? According to the manufacturer's instructions, ***every single bolt, lockring or fixture*** on your bike ***MUST*** be done up ***EXACTLY*** to the specified torque. Anything otherwise will invalidate any claim you may have in the event of failure/death.
Our industry is full of lightweight componentry, users of varying weights/strengths/competencies, riding over infinitely varied surfaces at all speeds and performing in-the-field repairs. The best we as reviewers can do is consider the proof points, consult manufacturers/experts, and present a balanced, caveated review. That is what I believe this review has done.
UPDATE: Yesterday's soaking-wet cold 4hr club run was interrupted for 15 minutes as a clubmate faffed about changing a flat tyre.
Near the end of the same ride I had the first puncture in about 2000km of riding. Noting the roads were filthy with mud and flint chippings. The first I knew were hoots of mockery from non-believers who saw the pale-green Slime sealant leaking from my spinning tyre and dripping off the back of my mudguard. A 5 second stop to make sure nothing was actually lodged in the tyre, then off again, some pressure lost but nothing really noticeable, and I was still happy to do 35MPH on the downhill run home.
This is why I'm tubeless - the idea of stopping at the end of a 4hr wet, cold ride to change a tube was not one I relished. My hands were on the borderline of 'not working' and I was welcoming every hill as a chance to warm up a bit.
Here at home in the warm and dry, I'll now spend a few minutes popping off one section of tyre, cleaning the spot, then applying a Rema Tip Top patch. Might pop a tablespoon of sealant in for good luck. As the cut measures exactly 3mm which is the limit of the sealant's ability, it's better to patch it.
File 27-07-2015 08 28 14.jpeg
Flamming hell. I could install two new Lithion 2s plus tubes for less than that and then go out for bloody good bike ride by the time you've read the instructions for this kit !
Stans sealant 473ml - £12.5 (twice as much and works much better both for initial setup and punctures)
Gorilla tape - £2.00
valves - free (the ones salvaged from damaged inner tubes will do the job just as well)
coke bottle compressor (5 min job) - from free to err... £1-2 ?
optionally cheap co2 inflator istead - £10
Total: around £15-25
P.S. For a tubeless virgin a ghetto compressor may be a better (cheaper) option than wasting co2 cartidges
http://singletrackworld.com/forum/topic/ghetto-tubeless-inflator-total-c...
Again, the Stan's sealant is latex. It will dry out. and make a huge mess needing cleaning off, probably with some sort of latex solvent, by all reports. When Dave A sent me the Schwalbe One's for this test, it took me an age to get them cleaned of latex-based sealant - and if you don't remove it, old sealant can compromise new sealant as the 'boogers' get betwixt rim & tyre.
We may have to agree to disagree re valves, if you think risking deflation to save £10 on a setup that has already cost you over £100 in tyres and sealant is A Good Idea then that's your value call.
A fair number of Road.CC readers will see value in using one kit, purchased once, to do the job properly. Not that there's anything wrong with taking the DIY approach, which is to be applauded. Rah.
I'm more interested in the beer. Not sure if that is good or bad.
£50 ??? Really? All you need is some Gorilla tape a couple of valve stems from old tubes and a proper sealant like Stans. All for 1/5 of the price.
If you don't have a compressor or a co2 thingy you can make one using a 2l. fizzy drink bottle in 5 minutes.
This ended up on the Road.CC cutting room floor, but should help clarify:
At £39.99 the kit brings together everything you need to go tubeless, if you have a tubeless tyre handy. Arguably you could source the valves, tape, sealant and inflators separately - but you won't save much if anything so it's a good deal that avoids camping by the front door to receive packages. The comparative breakdown based on a Google search for UK retailers is:
Gorilla Tape (1" wide, 9m roll): £2
40mm valves & valve tool: £12
8oz Slime Pro sealant: £10
CO2 inflator & 2 x 20g cartridges: £20
So at £44 for the component parts from different retailers, the GI kit at £39.99 makes sense - if you need the CO2, that is. And you may not know you need it until you do - as I did for the Hutch Sectors, but not the Schwalbe One's. If you suddenly find you DO need CO2, it could be an annoying wait with your rim out of action and the risk of spilling sealant until you can have a crack at CO2 inflation. The Microflate Nano is a very nice, small inflator in its own right, for which you twist the canister to turn the gas on/off. After half-using a canister 2 months ago, it's still charged.
Also Stan's isn't 'proper', it's simply latex-based - with the latex-specific hassle that brings.
And the idea of using old tube valves *might* work, depending on rim, valve and ability to clamp down the valve securely, long-term - you'll still be using it as a valve on a weekly basis, remember. There's a reason tubeless-specific valves are designed the way they are - and the chances of not wasting £10 worth of sealant and a lot of time/frustration would be greatly improved sticking to proven tech, IMHO. If you've forked out £100 for new tubeless rubber, why scrimp a tenner on valves that may cost you more than that in lost fluid?
"but on a road bike this is a total no-go that could get you killed or worse."
Wow, worse than death. That's pretty bad.