- News
- Reviews
- Bikes
- Components
- Bar tape & grips
- Bottom brackets
- Brake & gear cables
- Brake & STI levers
- Brake pads & spares
- Brakes
- Cassettes & freewheels
- Chains
- Chainsets & chainrings
- Derailleurs - front
- Derailleurs - rear
- Forks
- Gear levers & shifters
- Groupsets
- Handlebars & extensions
- Headsets
- Hubs
- Inner tubes
- Pedals
- Quick releases & skewers
- Saddles
- Seatposts
- Stems
- Wheels
- Tyres
- Tubeless valves
- Accessories
- Accessories - misc
- Computer mounts
- Bags
- Bar ends
- Bike bags & cases
- Bottle cages
- Bottles
- Cameras
- Car racks
- Child seats
- Computers
- Glasses
- GPS units
- Helmets
- Lights - front
- Lights - rear
- Lights - sets
- Locks
- Mirrors
- Mudguards
- Racks
- Pumps & CO2 inflators
- Puncture kits
- Reflectives
- Smart watches
- Stands and racks
- Trailers
- Clothing
- Health, fitness and nutrition
- Tools and workshop
- Miscellaneous
- Buyers Guides
- Features
- Forum
- Recommends
- Podcast
feature
 17 things they never tell you about fixing punctures May 2022
Psst… 23 puncture-fixing hacks to get you out of trouble – for tubeless too
Punctures are annoying but we have some tips and tricks to help you deal with them as painlessly as possible and to get you out of a scrape if you’re really desperate.
Puncture repair — learn how to fix a tube
We all know the basics of puncture repair, right? It’s a pretty straightforward process, but we were having a chat in the road.cc office recently about the various bits of advice we’ve received over the years and the tricks we’ve developed to get back on the road as smoothly as possible, and we also had a quick chat with Muc-Off's mechanic Rob Webb. This is the result.
You might have mended hundreds of punctures in your time but we hope there’s something useful in here for you.
Think twice before pulling out that thorn
You might occasionally spot something sticking out of your tyre tread – a thorn or a tack, say – before noticing any air escaping. Your instinctive reaction is to pull it out… but that sometimes results in a loud hiss because you’ve just removed the plug that was keeping the air in.
It’s a dilemma. If you don’t think the thorn (or whatever) has gone all the way through to the air chamber then, of course, get it out before it does any damage.
On the other hand, if you suspect it has gone all the way through yet your tyre is still pumped up hard, consider leaving it in place and sorting out the issue when you get home.
“Since pulling a thorn out and watching the tyre go down like the Hindenburg, I often just snap off any extra stick (so it doesn't get caught and pull out) and just leave it in,” says our man Steve Williams.
The complicating factor is that it’s hard to be sure whether a thorn has gone all the way through or not, and leaving it in place might just allow it to work deeper.
There’s no easy answer here – sorry – so our advice is simply to stop yourself immediately removing anything that’s stuck in your tyre and give it a thorough inspection before deciding what’s best.
If it looks like there’s gum on your tubeless tyre, leave it alone
If you have a tubeless system and you see a little white/grey/pink blob on your tyre that looks like a bit of gum, leave it alone. The chances are that this is just sealant that has done it’s job and mended a puncture before you even knew you had it.
Pull it off and you could be sprayed in sealant as it again tries to mend the puncture you’ve just caused.
Check your tubeless tyre sealant
“As a rule, we always recommend checking sealant levels every three to six months, depending on where you are in the world,” says Rob Webb from Muc-Off.
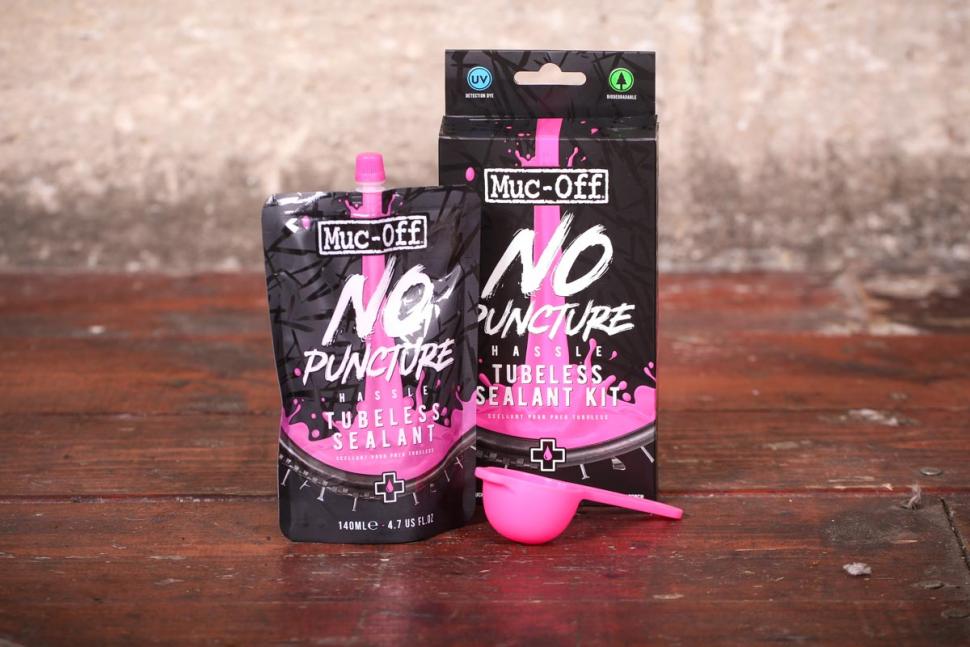 You’ll need to top up the sealant more frequently in hot conditions.
“If you are planning an epic weekend adventure, good practice is to make sure your sealant is topped up and the tyres are in good condition.”
Don't forget your tyre levers
“The tyre lever is your best friend, so grab a decent one (or more) that won’t let you down,” says Rob Webb.
Okay, we’re getting into dangerous territory here but you can sometimes innovate if you’ve left your tyre levers at home. This guy did…
Got caught out today. Puncture, for some reason no tyre levers in my bag and late for nursery pickup. Luckily I had my trusty Afro comb. I’m the Black bike MacGyver aka the Shimano Shaft! pic.twitter.com/zdDf8wDdVB
— Takudzwa (@WUTM) April 25, 2022
Plenty of people have used their quick release skewers to get out of a fix but, you know, why run the risk? Just take some good levers on every ride.
Tight tyres are usually manageable
road.cc newshound Simon MacMichael said, “My Vittoria Rubino pink Giro d'Italia limited edition tyres are gorgeous, but bloody hell, trying to get them on and off the rims… Any hacks beyond carrying a shedload of tyre levers?”
There’s no doubt that some wheel and tyre combinations are ridiculously tight and getting them to work together is a nightmare.
Although it might sound counterintuitive, our best advice is first to push the bead inwards if you’re having trouble getting a tyre off the rim. The centre of the rim – the well – is lower than the shoulders (as shown on the cross-section above), only by a few millimetres but that adds up around the full circumference of the rim.
You need to get all of the tyre bead sitting in the well before trying to lever one section off the rim. Sometimes this is enough to give you the slack to need.
It’s a similar deal when getting the tyre back on. Push as much of the bead as possible into the well before trying to lever the last section onto the rim.
We’re not saying this will make every wheel/tyre combo easy – some will still drive you nuts – but it’ll certainly help.
A tyre boot can get you out of trouble
You might go a whole cycling lifetime without slicing the sidewall of a tyre – especially if you ride exclusively on the road – but if it does happen you could be stranded because any tube you put inside will bulge out through the hole and eventually go bang.
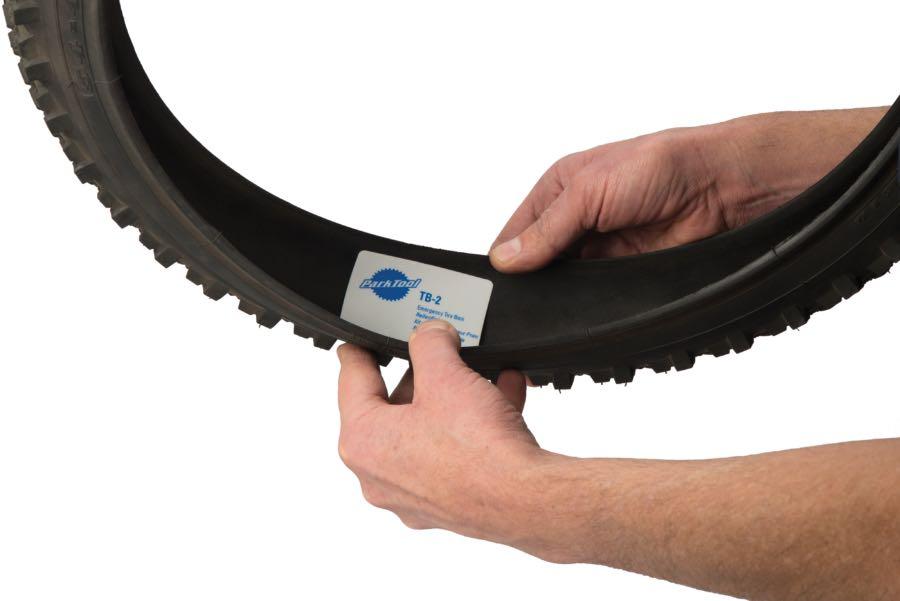
A boot is a reinforcing layer that you put on the inner wall of the tyre to stop this from happening.
Restrap offers a Tyre Boot Kit (£8.99) that we reviewed recently. It comes with tough patches and glue to hold them in place.
You can also use a section of an old tyre that you’ve tucked away, or even put something like a £5 note between the inner tube and the tyre’s sidewall.
Park Tool says that its Emergency Tyre Boot Patch Kit (£4.99) is suitable for any tubed tyre and also for tubeless tyre systems.
off.road.cc's Matt Page says, “If you don't want to buy a specific tubeless tyre patch, a cut section of toothpaste tube works a treat. It’s worth adding to any saddlebag.”
Search hard for whatever caused the puncture
Whatever caused your puncture will often stay in the tyre carcass just waiting to strike again.
"If you’re running tubes and you get a puncture, run your hand round the inside of the tyre to check for debris like thorns," says Muc-Off's Rob Webb. "Make sure you look first as there could be glass. From experience, it can make a mess of your fingers pretty quickly.”
Tiny objects stuck within the tyre can be hard to find.
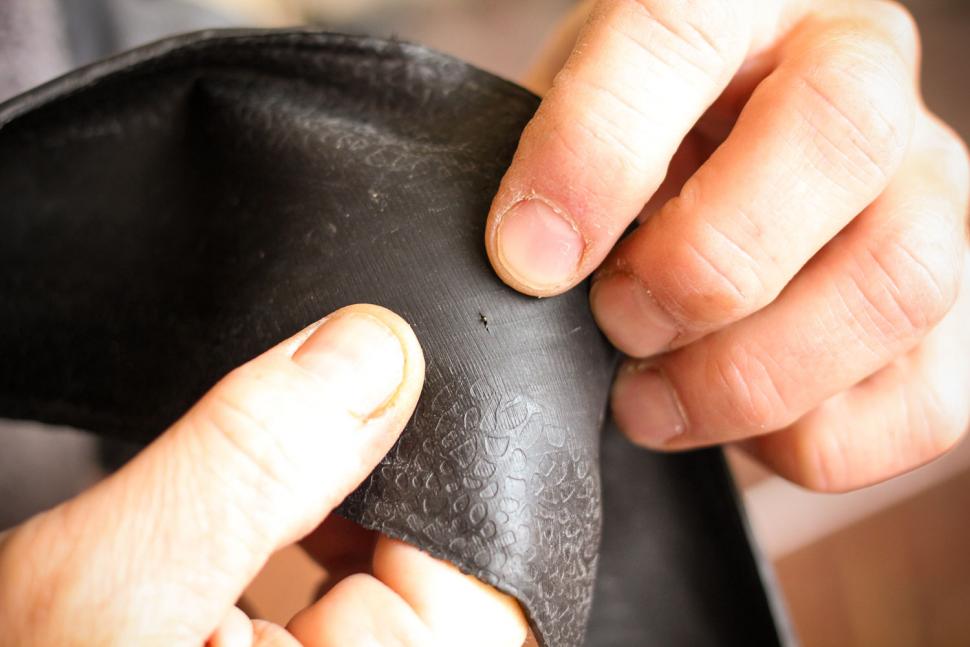
road.cc’s Tony Farrelly says, “If you can’t find the flint or bit of wire that's embedded in the carcass, it can pop out and puncture your new tube once the tyre is deformed by your weight pressing down on the road. I really flex the carcass to open up the rubber on the inside so that I can find whatever's buried in there.”
Always take a spare inner tube
This one is pretty basic but swapping a punctured inner tube for a fresh new one on the side of the road is easy while patching a tube when you’re away from home can be a pain in the butt.
Okay, it’s usually straightforward enough, but then you get those times when it’s raining, your hands are frozen, the light is fading, it’s a pinch flat with two holes…
Life’s just much easier if you carry a spare inner tube.
Check your spare tube from time to time
“Test your spare inner tube intermittently to make sure there are no issues,” says Muc-Off’s Rob Webb. “Faulty valves, small holes… You don’t want to find out it doesn’t work when you’re out on the road or trails.”
Don’t skip the sanding
Once you’ve found the hole in your inner tube you need to roughen the area with sandpaper to prepare the surface for the vulcanising solution. Rema TipTop suggests that you do this in a crisscross pattern. If the patch is going over a ridge in the inner tube surface, use the sandpaper to flatten it.
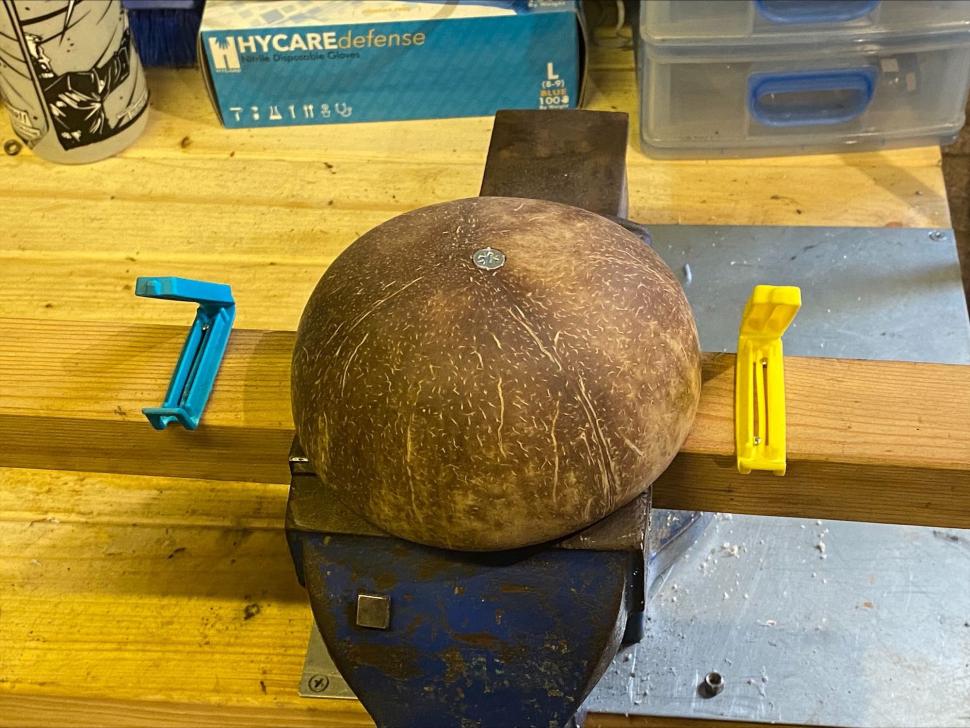
“I reckon the sanding is the crucial step people under-do so I made a contraption to hold an inner tube to make it easy,” says John Stevenson. “It’s made from two bag clips, a bit of scrap wood and a dirt-cheap wooden bowl off Amazon that started life as a coconut shell.”
You stretch the tube over the bowl and clamp it in place with the bag clips before going to work with the sandpaper. Inventive, huh?
This is something for the shed/garage. It’s far more awkward if you need to repair a tube at the side of the road, but don’t skip this step or you run the risk of your patch not sticking.
You don’t need much vulcanising cement
“People often use too much vulcanising cement,” says Dave Atkinson. “They tend to think of it like glue, but it's not really. The patch is designed to adhere to the rubber and the vulcanising cement is just to prepare the surface. The more you put on the less likely it is to dry, and that's why most patches come off.”
Put a thin layer of vulcanising cement on the tyre, let it dry, and only then put the patch in place.
Remove the patch’s plastic backing from the centre
If your patch has a plastic backing, leave it in place until the vulcanising cement has done its thing. Once the patch is firmly in place, roll it between your fingers and thumb to crack the backing and then peel it away from the centre outwards.
If you start from the side you risk lifting the edge of the patch and ruining your repair.
Don’t inflate your repaired inner tube too soon
Inflating a repaired tube too soon can make the patch come off. It needs to be firmly in place, especially if the tube is narrow for the tyre and will be stretched more than usual.
Inner tube repair brands might tell you that no waiting time is required once the patch is in place but we’d still prefer to put it on a flat surface and weigh it down with something heavy – like a pile of books or a chopping board – for a few minutes. Certain members of the road.cc team are known to clamp repaired tubes, just to be sure.
These aren’t options if you need to make a repair on the side of the road, so just be patient before sticking your tube back in the tyre.
You can stuff your tyre with grass if you’re desperate
You’ve probably heard about the old trick of filling your tyre with grass if you’re in real trouble. Have you ever tried it, though? It’s not easy.
You need alot of grass – or moss or leaves – and it gets compacted fast. Plus, if what you pack inside is too dry it will gradually turn to dust.
It’s an option if you’re in a real pickle but we’d try this next alternative first…
Tying a knot in your inner tube is a useful trick
If you’ve got a puncture in an inner tube and you have no patches – or the hole is too big to patch – this solution often works.
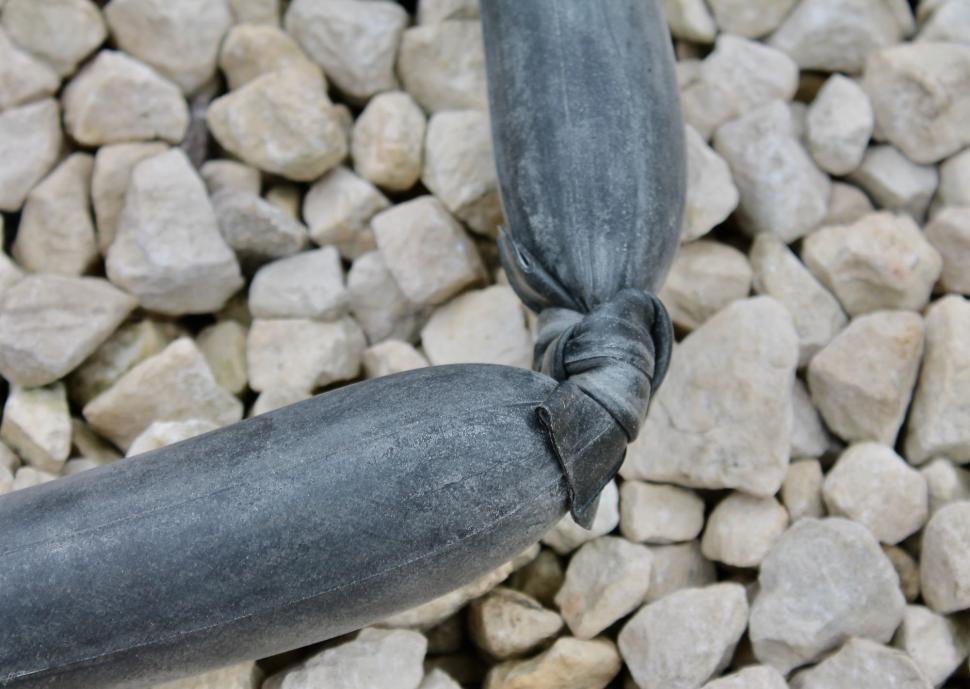
You can just make a loop in the tube and knot it tightly to isolate the punctured section.
We prefer to cut through the inner tube at the site of the puncture. In an ideal world, you’ll have a knife on your multitool. If not, you can use your chainring as a makeshift saw – although the results won't be pretty.
Then you tie the ends of your inner tube together tightly – a reef knot will do the job – and put it back on the rim. The inner tube’s circumference will now be much smaller than before, of course, but you’ll manage it.
Once re-inflated, your tyre isn’t going to feel great but you can pack grass, moss or leaves around the knot to make it run a bit more smoothly as you limp home.
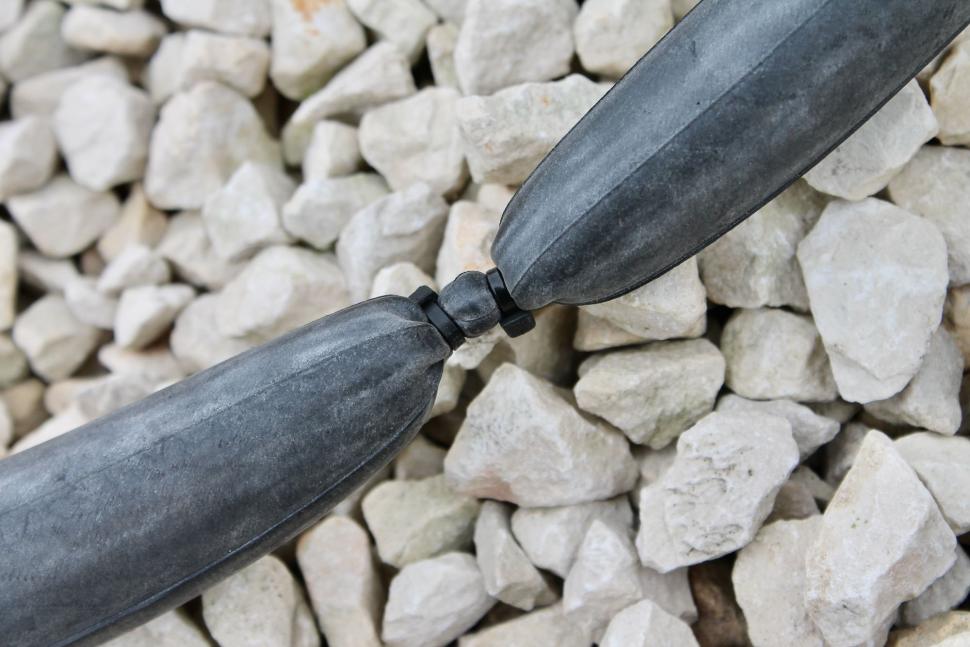
Zip ties can do the job too
A couple of zip ties squirrelled away in a saddle pack can come in handy if you have a punctured inner tube that you can’t fix.
Fasten one zip tie around the inner tube on one side of the hole and the second zip tie on the other side of the hole. You need to tighten them as much as possible so that no air can get into the punctured section of tube.
As with the knot trick (above), the ride home is going to be bumpy but stuffing anything soft around the non-inflated section of tube will help.
What to do if your tubeless tyre doesn’t seal
“If you’re running tubeless and you get a puncture that doesn’t seal first time, add a bit of pressure and float the hole to the bottom part of the wheel to make sure the sealant coats everywhere,” says Rob Webb. “If that fails, it’s time to grab a plug.
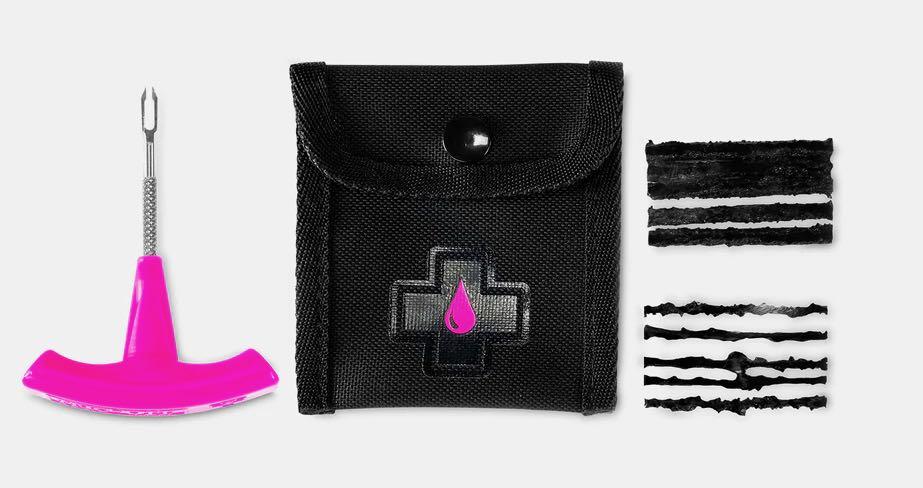
“Never understate the power of something like a Puncture Plug Repair Kit (£13.99). It can save your tubes and your tyres.”
Check out our tubeless tyres buyer's guide
Kits like this contain self-adhesive puncture plugs – otherwise known as tyre worms – that you can use to repair holes. If you get a huge hole, you can double these up to plug it.
Carry dental floss. No, really!
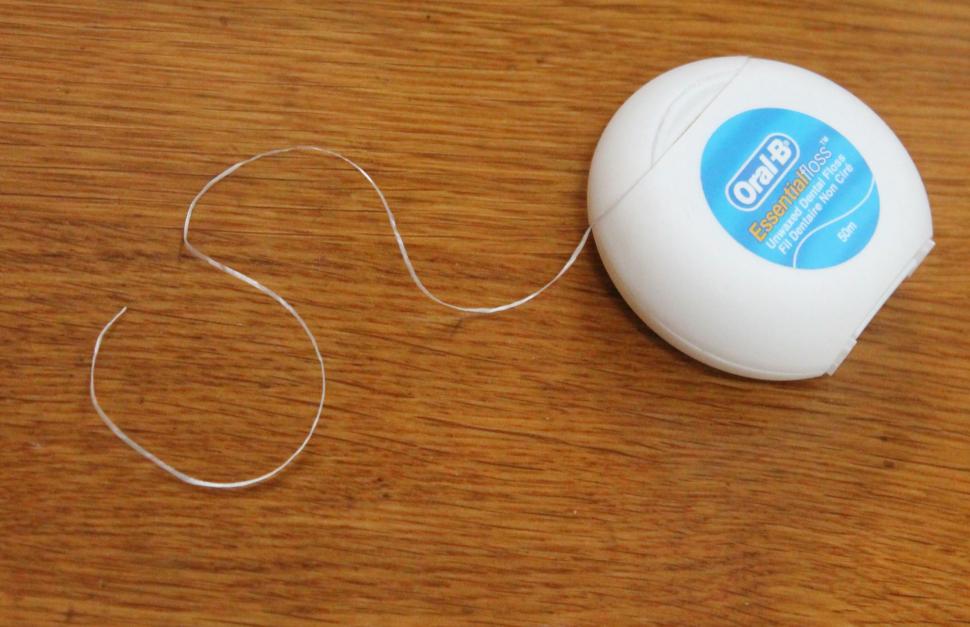
“I carry a needle and some dental floss in my kit,” says our Dave Atkinson.
Dental floss? Really?
“I’ve used it to fix a ripped sidewall more than once,” says Dave, who is prone to heading off on long rides to places where mobile phone coverage isn’t guaranteed.
“Dental floss is great because it’s super strong. If you get a waxed version it’s easier to pull through.”
Just take a short piece. You don't need the full 50m plus dispenser.
Valve extenders can save the day
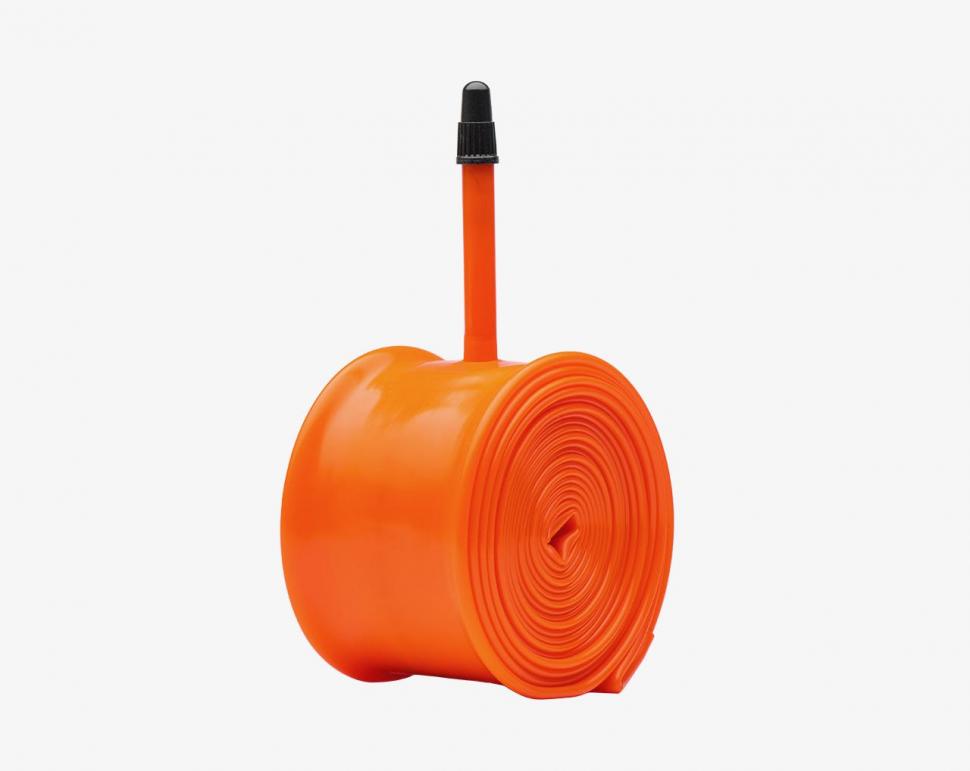
If you use inner tubes with long valves for deep-section rims, chances are that you’ll take a spare with a similarly long valve. That makes sense, right? But if you puncture that second tube, having valve extenders gives you other options.
“Keeping valve extenders in the saddlebag means you can either buy a tube with a short valve – which you’ll find more easily than a tube with a long valve – or borrow any tube from someone you’re riding with,” says off.road.cc's Matt Page.
You can use a tube with a tubeless wheel and tyre
Most people probably know this but just in case you don’t: if your tubeless tyre goes flat and sealant won’t plug the puncture, you can stick an inner tube in.
Beware, though, that if there’s a big hole in the tyre carcass, you might need to put a boot in (see above) in to stop the tube bulging through.
Don't use CO2 canisters with bare hands
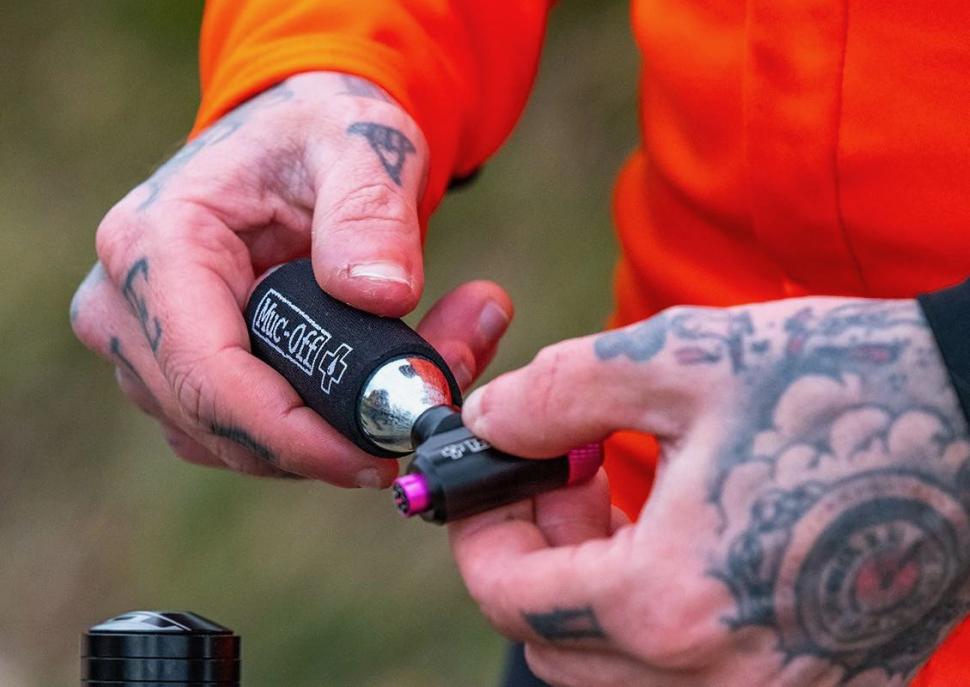
“Don’t use a CO2 canister with bare hands,” says Rob Webb from Muc-Off. “Avoid freeze burn by using a neoprene sleeve/case provided."
Muc-Off's Road Inflator Kit includes a neoprene sleeve, for example.
As the pressure inside the canister drops, so does the temperature, and if you have your fingers on it at the time you could end up in pain and maybe blisters.
If you have nothing else, covering the canister with a sleeve or an arm warmer will do the trick – or just wear gloves.
You need to double-check that the tyre is seated right
“I’ve at least three times thought I’d replaced a punctured inner tube, inflated it and was ready to set off again, only to find I’ve not seated the tyre properly so the tube is hanging outside the rim,” says our man Jack Sexty. “I’ve had to go back to square one and reseat the tyre to make sure no tube is popping out.”
If any part of the inner tube is poking out from inside the tyre you’re in danger of it exploding with a huge bang, and you’re never going to fix the tube.
If you’re lucky, it might just be that a section of the bead hasn’t been caught by the hook of the rim. In this case, you need to deflate the tyre and make sure all of the inner tube is pushed inside the bead before inflating it again.
Stop a couple of times to check that the tyre is seating correctly this time.
Inner tubes leak CO2 quicker than air
If you use a CO2 canister to inflate an inner tube out on the road you might notice that the tyre pressure drops significantly overnight. Inflate a tyre using a traditional pump and the pressure will stay high for longer. How come?
Carbon dioxide is much more soluble than air (which is mostly nitrogen and oxygen) in butyl, so it can move outwards through the tube walls much more quickly. Honestly.
The answer is to deflate your inner tube when you get home and re-inflate using a standard floor pump with standard air.
If you have any more tips for fixing punctures, let us know in the comments below.
Mat has been in cycling media since 1996, on titles including BikeRadar, Total Bike, Total Mountain Bike, What Mountain Bike and Mountain Biking UK, and he has been editor of 220 Triathlon and Cycling Plus. Mat has been road.cc technical editor for over a decade, testing bikes, fettling the latest kit, and trying out the most up-to-the-minute clothing. He has won his category in Ironman UK 70.3 and finished on the podium in both marathons he has run. Mat is a Cambridge graduate who did a post-grad in magazine journalism, and he is a winner of the Cycling Media Award for Specialist Online Writer. Now over 50, he's riding road and gravel bikes most days for fun and fitness rather than training for competitions.
Latest Comments
- lwrncc 3 hours 5 min ago
My 2 cents. My road bikes with 28mm tires at 55-60 psi and cane creek / redshift components are more comfortable than my rigid mtb with 60mm tires...
- David9694 6 hours 22 min ago
Active travel schemes are 'squeezing out motorists in favour of cyclists' Go Rochdale!
- mdavidford 6 hours 57 min ago
You don't like the Look of it then?
- chrisonabike 7 hours 8 min ago
TBF I think their complaint was with the design as proposed. There would be a cycle path with cyclists moving in two directions with little buffer...
- dh700 10 hours 29 min ago
I'd argue that nothing at all is wrong with the bans that you describe -- and they exist in some places....
- slc 10 hours 51 min ago
You seem to be forgetting the first article in our great constitution. A citizen has the right to store motor vehicles immediately outside their...
- Jakrayan 11 hours 59 min ago
Yeah, the number of times I've had oncoming drivers overtake a stationary vehicle - parked car on their side for example - forcing me to hit the...
- bobbinogs 12 hours 16 min ago
I always think that the Pearson font is such a dreadful choice, it's almost impossible to read.







Add new comment
11 comments
I think that coconut thing was going a bit far, I've patched tubes for over 58 years...yes, even as a kid of 8 years! I never had to resort to that stunt, nor ever had to clamp the patch to the tube, and rarely do I ever have a failed patch, and the patch on my tubes last the life of the tube, I've had as many as a 12 or 13 patches on a tube and ride with that tube in the tire and think nothing of it.
Now I do have a trick for getting on tough tires that are just frustrating the crap out of a person. Buy a package of releaseable, or reusable, Zipties about a 1/4 inch wide, once your at that point where is so tough but as you try to get on a small section the opposing side come off the rim, take 2 zip ties, and place them around the tire were the bead is still in the rim, cinch it down as tight as you can, you may have to use a pair of pliers to cinch it down a bit more, both of those Zip Ties should only be about an 1/8th of inch apart from each other. Then take some Dawn for Dishes, put a couple of drops into a squirt bottle, put about an 1/8th cup of water, then gently swish it around to mix the soap but not make it sudsy, squirt the bead that is not in the rim yet, now start working on the other side, that tire bead will not come out.
A great tool for tough tires when you're at that hardest part is the Kool Stop Tire Bead Jack, it's cheap to buy but it works far better then levers, instead of a lever lifting the bead outward taking up even more space to mount the tire thus making the job even harder, and then up and over the rim, it slides the bead along the face of the rim then into the rim. The Tire Bead Jack will not damage CF rims either.
PoTAYto, poTAHto
I was trying to cook up a process that would give me a high chance of success at repairing a tube in the least possible time. It definitely takes me less time to sand a tube that's held in the contraption than one that's, say, wrapped around my hand, and it holds the tube in place so I can't lose track of the location of the hole when I've sanded off the big X that marks the spot. (As a card-carrying idiot, I'm fond of making things as idiot-proof as possible.)
On the other hand, one experiment that failed was using a Dremel to sand the tube; it just melts the rubber and goes right through.
If you line up the maker's name on the tyre with the valve, you don't need to search the whole tyre for the offending thorn/flint/broken glass etc.
I'd still advise searching the whole tyre regardless as odds are where there's one bit of broken glass or thorns there will probably be others - nothing more frustrating (been there) than puncturing, finding and removing the offending object, repairing the tube then immediately getting a puncture in another part of the tube from a second shard from the same smashed bottle or whatever.
My 2 cents worth
1. I cut the beads off a knackered tyre and cut a 4" section to use as a tyre boot - can't get much tougher than that!
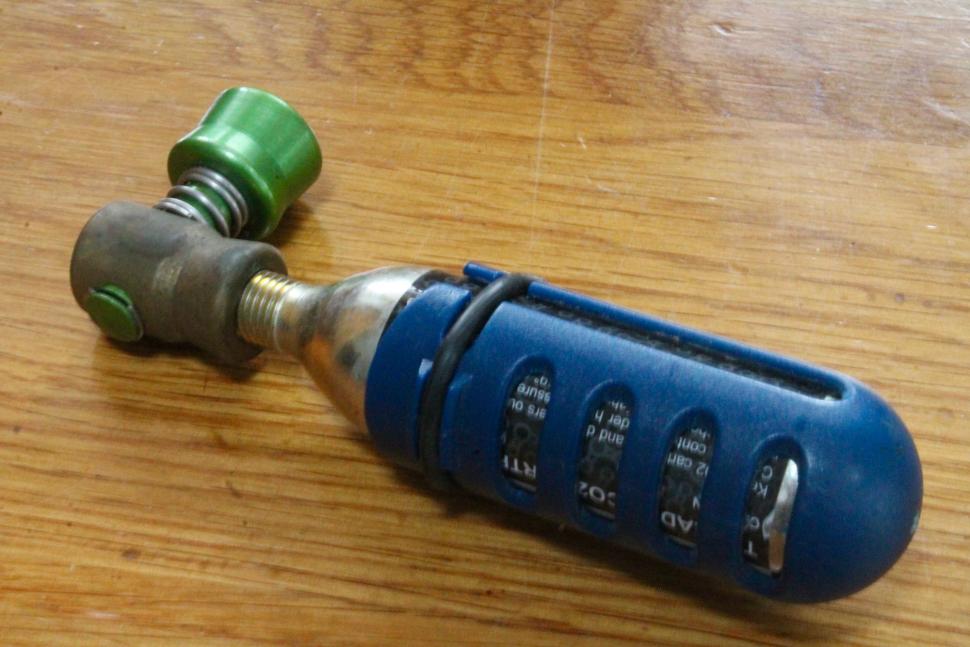
2. The picture in the article does show it, but it doesn't mention the different types of valve extenders - you need to carry those for removable core tubes, like Continental, and one for non-removable core tubes, like Specialized. Then you are covered for whatever tube you can get your hands on.
3. I also bought a couple of Presta to Schrader adapters, which means you can use Schrader pumps (like a car foot pump) or a garage airline to inflate your tyre in an emergency. Cheap as chips and tiny. https://www.wiggle.co.uk/lifeline-presta-to-schrader-valve-pump-head-ada...
4. If you have a CO2 inflator head with a valve to open/ close, two things are worth checking - 1. Ensure that the valve isn't stuck if you don't use it for extended periods (I had one that I could not open by hand when stuck by the side of the road - got it working again at home with a squirt of WD40 and a pair of pliers) and 2. Make sure it is closed if you are screwing the CO2 cartridge on otherwise you will lose loads of the charge as it pierces the cartridge! I have since purchased a Lezyne head which is far superior and doesn't seize.
5. Practice fitting and removing your combination of rim/ tyre at home in the warmth to perfect the technique. Ideally, if not tubeless you should be able to fit/ remove the tyre without using tyre levers unless you have a particularly tight combo. I've found Gp4000/5000 tyres (non-tubeless) start off being really tight but once they have been fitted for a while I can remove and fit them using the well of the rim without using tyre levers. That reduces the risk of nipping your tube, especially when re-fitting.
6. With that in mind, I have stopped carrying really lightweight tubes as spares, such as Conti Supersonics. At first it seemed a great idea as they roll up really small, are lighter etc etc. However they are very fragile, especially rubbing around in a saddle bag for months/ years.
7. Top tip regarding point 6 above, I use slightly tougher tubes as spares, then wrap them tightly in several wraps of cling film before packing them tightly in my saddle pack. Ideally you do not want them moving about at all, so pack them tightly - I have a Cyckit Clamshell hard shell storage pack under the saddle that everything crams really tightly into. This prevents movement and rubbing - a tube rubbing around can soon wear a hole right through it. I know, I've had it happen!
8. After wrapping in cling film I then use the little rubber bands that come around a new tube to hold my valve extenders and tyre patch tightly against the side of the tube. Again, stops rattling and chafing. You can do the same with quality, flat tyre levers on the opposite side which again protects the tube and stops them rattling.
9. And as an ad lib, once you have put your spare tube in (or ideally whilst you are doing it, get your mate to) roll your tube from opposite the valve towards the valve and remove the trapped air. Then lock the valve shut and roll the tube around the valve which will get it as tight and small (for putting back in a jersey pocket/ saddle bag) for carriage home, if you aren't going to put it in a nearby bin. Be sure to put the dust cap on to prevent the presta valve wearing a hole/ damaging the tube if you want to repair it and reuse when back home.
10. Last one - I don't use the knurled circular nut to hold the valve against the rim. If you have carbon rims it can damage the surface and if you have done it quite tight you might not be able to get it undone roadside just using (especially freezing cold) fingers. My tip is to I wipe the rim clean with isopropyl alcohol either side of the rim hole when fitting your tube (at home, not when fitting a replacement roadside!), fit the tube, leave the dust cap off, then get a 3-4" length of electrical tape, hold it crossways over the valve and push down at each end with it stretched tight to pierce it with the presta valve head. Slide it down the valve, then trim off the ends that you have touched and push down flush either side of the rim so you have about an inch either side of the valve. This will stop the valve rattling but ensure you can remove the tube roadside if you puncture.
If doing off-road tubeless; I can't recommend highly enough carrying a small pair of pliers (I use a Gerber Dime multitool) to remove thorns before tubing. If the tyre has been on for a while, then when the need to tube up strikes there could be a heck lot of thorns. All of those thorns will need sorting. Even if it's a best possible conditions day - many of those thorns will be greasy with sealant and next to impossible to remove with fingers alone [0].
[0 ] Can of course try to use your teeth to remove the thorns. But no matter the non-toxicity of the sealant. Or if haven't ridden through anything too revolting - recently. Using your teeth, is at best a deeply unpleasant, at worst a positively unhealthy experience that you will never, ever, ever want to repeat ...
Now that I've packed my Boot Strap Kit, dental floss, puncture repair kit, sandpaper, tyre sealant, and of course, my coconut, I guess there's no need for me to take this inconvenient spare inner tube on my rides.
For my long puncture repairs at home, or indeed at work, because I use latex tubes, I use a Sharpie, or other permanent marker to mark the hole, once found. I will then cut down the patch foil and plastic and scribble around it to mark out the specific area to be vulcanised.
Only ever use quick patches when out and then long repair them at home, as they don't last too long, a good repair should last longer than the rest of the tube.
I find it's good to have many spares so that the repair has a good loooong time to properly set.
Because of my liking for the effective marking on the tube, when I have fixed standard black butyl tubes, for others mainly, I have used tipex pens, more the newer horrible eco stuff, I'm not as liberal with it's use as the Sharpie, just a few dots. It doesn't seem to adversely affect the tube.
I use a small penknife blade to scrape the bit of chalk to go over the tiny bit of exposed vulcanising, though I am quite big on the use of talc on tubes and inner surfaces of tyres.
Nice roughing device by the way.
I am just starting to figure out where my obsessions go on tubeless at the moment.
Tyre boots should only be used for getting you home, had a bit of a cut on a nearly new tyre, only a few mm, but enough to see the tube, so I booted it, after some time the boot started to crack, actually causing a puncture.
Also care for your spare, talc, tissue paper and bagged. When it's needed, it's really needed!
I can vouch for toothpaste tube as a tyre boot. I had one in for the best part of a year - so long that I forgot it was there. It's useful for padding loose clamps too.
I did a hundred mile ride at Easter weekend with a bit of crisp packet as a tyre boot. I did change the tyre afterwards, though.